Sunday, December 12, 2021

Wishing You Warmth and Coziness All Winter Long-Coffee and Cards with Celeste and Deb


Hello and welcome to the December Coffee and Cards with Celeste and Deb! Deb and I decided to use this fun winter/Christmas mood board as the inspiration for this month's collaboration cards. I just love all of the images on this mood board! I have an awesome friend who used to get the KOTM's from Unity Stamp Company and she's been kind enough to let me play with her whole collection...thank you Becky! The October 2018 collection really caught my eye and I decided to use several images from that stamp set. I stamped the background stocking stamp onto some kraft cardstock using Memento tuxedo black ink and then cut the panel down using a Pink and Main rectangle stacking die. I mounted it directly to my white A2 card base. To add some interest to the background I added lots of white gel pen detail to the snowflakes and stockings. I then stamped the focal image onto some white Copic-friendly cardstock and die cut it with a pierced edge oval die from My Favorite Things. I stamped the same image again and fussy cut the scarf and adhered it to the focal panel. I colored the images using my alcohol markers and attached the whole thing to my card. I then stamped the sentiment onto more white card stock and mounted them onto some white cardstock I had colored with my Copic marker to match. To finish off this card off I simply added a few clear rhinestones from Recollections around the focal panel. Love this quick and simple card!
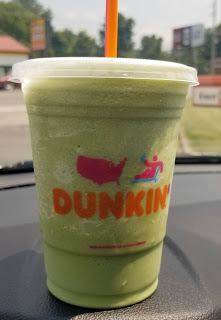
We got a new Scooter's Coffee here in our little town, so I popped in and tried their iced Peppermint Mocha latte! I ran a very cold and windy 5K this morning and this was the perfect way to refresh after my run! Be sure to pop on over to Deb's site and see how she was inspired by the mood board!


Saturday, December 4, 2021

Happy Winter-Send A Smile 4 Kids December


Hello! Can you believe that it's December already? This month at Send A Smile 4 Kids we are celebrating winter by creating winter cards for kids. And before anyone gets upset with me...yes, this is the same stamped image I used for last month's challenge but I shook it up with a winter sentiment and a new layout and winter themed patterned papers. To create my card I started by layering some early espresso cardstock by Stampin' Up onto my white A2 card base. I then cut and adhered a piece of dusty blue patterned paper from the My Mind's Eye Signature Christmas 6x6 paper pad on top. I die cut a large strip of pretty snowflake paper from the same paper pad and matted it with more early espresso cardstock. I adhered it to the card to the far left. I then stamped the adorable image from Margaret Sherry's Christmas Cuties stamp set onto some white Copic-friendly cardstock and colored it with my alcohol markers. I die cut the image using a pierced edge oval die from My Favorite Things and then another decorative pierced edge panel using a Gina Marie Designs die and more early espresso cardstock. I adhered the two panels together and popped it up off of the card using 3M foam tape. To finish off my card I added some fun details and highlights to the image using my white gel pen and added some dark brown sequins from The Ton around the focal panel. I'm kind of obsessed with this adorable image! I can't wait to see what everyone else creates for this challenge!

Monday, November 22, 2021

Have A Very Merry Christmas


Happy Monday! I cannot believe that Thanksgiving is this week. This year is slipping by so quickly. I'm in Christmas card mode for the rest of the month and still have quite a few I have to make before I get mine mailed out. I saw the current sketch challenge over at Sunday Stamps weekly challenge and was inspired! I had just picked up the October issue of Cardmaking & Papercraft and there was a darling little freebie that came with that month's edition...Margaret Sherry's Christmas Cuties stamps and snow globe die! Gotta love free stuff, right? I stamped up the darling little mouse pulling Rudolph on the sled onto some white Copic-friendly cardstock and colored the image to create a winter scene using my alcohol markers. Using the snow globe die cut I cut it once using the white cardstock and then a second time using black. I colored the hearts and the star with my alcohol markers and inserted them into the die cut panel along with the focal panel. Then following the sketch I adhered some Stampin' UP basic black cardstock to my white A2 card base, then a slightly smaller white panel. To that I added my sketch elements from the My Mind's Eye Christmas Wish 6x6 paper pad to the card, matting each piece with more black cardstock for some nice contrast. I stamped the sentiment from the same Margaret Sherry stamp set at the bottom right corner using Versafine onyx black ink and added a few black gems from my stash on either side of the sentiment and some white gel pen details to the critters to finish off this adorably cheery Christmas card!


Thursday, November 18, 2021

Life Happens, Coffee Helps


Hello and happy Thursday! Today's card was created for the 2021 Coffee Lovers Blog Hop. To create my card I inked up a rectangle panel using Stampin' UP Sahara sand and an A2 mask from Simon Says Stamp. With the mask stencil still on I added the coffee rings using a Tim Holtz stencil and distress ink in tea stain. I then stamped the sentiment from Honey Bee's Blah Blah Blah stamp set and Gina K Design black ink. I then stamped the coffee pot and mug from Altenew's Coffee Love onto white Copic-friendly cardstock, colored them using my alcohol markers, and fussy cut them out. I popped them up off of the card for a little interest and dimension. Love how clean and simple this card was. Thank you for visiting my blog today!


Sunday, November 14, 2021

Baby It's Cold Outside, Drink Coffee-Coffee And Cards With Celeste And Deb


Hello and welcome to the November Coffee and Cards with Celeste and Deb! This month we decided to use this fun Christmas photo as our inspiration. And, since the Coffee Lovers Blog Hop happens to be going on right now, we decided it would be fun to coordinate this month's collaboration around that! To create my card I started by stamping the beautiful Planner Gal Cold Outside by Unity Stamp Company onto some white Copic-friendly cardstock. I then stamped the coordinating sentiment to the top left of the image. Then, doing some very selective stamping, I stamped the drink coffee sentiment and one of the cups from L2E's Morning Cup stamp set to the right of my planner gal. I colored the image using my alcohol markers. Then using a strip of striped paper from the My Mind's Eye Yuletide 6x6 paper pad I added a little tablecloth beneath my image and die cut the whole thing into a rectangle panel using a stitched border die from Paper Rose. I added more of the pretty patterned papers from the same My Mind's Eye paper pad onto my white A2 card base using a fun sketch I found on Pinterest. To finish my card off I popped the focal panel up off of the card using some 3M foam tape. 

For my coffee this month I chose a warm, toasty Cinnamon Crunch Latte from my local Panera restaurant. I absolutely loved it! Now, be sure to head on over to Deb's blog and see how she was inspired by this month's challenge!


Sunday, November 7, 2021

Bride & Groom


I have a wedding to attend next weekend and thought it would be perfect to enter into this week's Watercooler Wednesday card challenge. To create my card I started by layering some teal blue cardstock from Hobby Lobby onto my white A2 card base. I then layered a pretty light blue panel of patterned paper from The We R Memory Keepers Anthologie Potpourri 12x12 paper pad on top. I then die cut a fish tail banner using a light blue cardstock from Hobby Lobby and a We R Memory Keepers die and layered it on top. I then stamped the floral framed image from Stampin' UP's Apothocary Art stamp set using Memento tuxedo black ink and colored it using my Copic markers. I fussy cut the image out and then die cut the same shape using the coordinating dies and more of the teal blue cardstock. I adhered them together and then popped the panel up off of the card using some 3M foam tape. For finishing touches I added some clear gems from The Paper Studies in various sizes throughout the blooms on the frame and around the fishtail banner. Love how pretty but simple this card is! 


Saturday, November 6, 2021

Merry Christmas-Send A Smile 4 Kids


Hello! Welcome to the November Send A Smile 4 Kids card challenge. This month we are creating happy holiday cards for kids. To create my card I started by stamping this adorable little gingerbread man from Purple Onion onto some white Copic-friendly cardstock, colored him using my alcohol markers, and fussy cut him out. I edged him with my Momento tuxedo black marker and popped him up using Stampin' UP foam dimensionals. I then cut a square out of more white cardstock and stamped the sentiment from the Avery Elle Joy To The World stamp set using Versafine onyx black ink. I die cut the square scalloped edge frame from cherry cobbler cardstock from Stampin' UP using a die from Spellbinders. To create the card I started by layering some cherry cobbler cardstock directly onto my white A2 cardbase and then started layering pretty Christmas patterned papers from Echo Park. The collection is so old I've honestly lost track of the name of it and when it was made. LOL. Yes, I'm a paper hoarder! Once I finished layering all of the panels onto the card I popped the focal panel up off of the card using 3M foam tape. To finish the card off I added some black gems from Ki to the corners and a little glitter pen to the details on the gingerbread man. So cute and so very fun!

Friday, November 5, 2021

Gnome For The Holidays


Whew, it's Friday! It's been a long week and work has been crazy and I've been struggling with my sleep. What better way to relax and get over it all? Craft! I am in the process of making my Christmas cards for next month. This card was created for the latest Addicted to Stamps And More, The Male Room, and the Freshly Made Sketches card challenges. To create my card I started by die cutting the adorable Li'l Gnome from Simon Says Stamp using some white cardstock for the base and patterned papers from the My Mind's Eye Oh What Fun 6x6 paper pad. I colored the beard and nose using my Copic markers. I then die cut a gorgeous Nordic pierced edge circle from The Greetery using white cardstock. I stamped the sentiment from Simon Says Stamp's Gnome For The Holidays stamp set using Gina K Designs black ink. I stamped the pine trees from Inkadinkado's Trees stamp set using Stampin' UP's Old Olive ink. Using some green cardstock from Hobby Lobby I cut an A2 panel to completely cover my white card base. I then layered some papers from the same My Mind's Eye Oh What Fun paper pad onto the card and then added the focal panel directly on top. I added some foam tape to the back of my gnome and popped him up off of the card for a final touch. Thank you for stopping by my blog today! 


Wednesday, October 27, 2021

It's Pumpkin Spice Season


Hello and welcome to my blog! Today's card was created for the latest Global Design Project card challenge. I recently won the Close To My Heart Pumpkin Treats stamp and thin cuts combo during a recent coffee blog hop and I just couldn't wait to use this fun set! So, it seemed fitting to use it for this current challenge. I started by stamping the mug and pumpkin pie onto some Copic-friendly white card stock using Memento tuxedo black ink and used the coordinating dies to cut them out. I then layered some gorgeous coffee themed patterned paper from the Echo Park Coffee 6x6 paper pad onto some navy cardstock. I adhered that panel directly onto my white A2 card base. I cut another strip of patterned paper from the same paper pad, matted it onto more navy cardstock and adhered that to the left of the card panel. I die cut an oval from the navy cardstock using a pierced edge oval die from My Favorite Things and then cut a smaller oval from white cardstock using a Spellbinders oval die. I cut another half oval using more of the patterned paper from the paper pad and the Spellbinders die and adhered it to the smaller white oval to create a faux tablecloth for my images. Using a foam blending brush and some distress ink I added a little color to the focal panel. I then stamped the sentiment from the Simon Says Stamp Pumpkin Spice Sentiments stamp set onto the focal panel using Gina K Designs black ink. I added the oval focal panel directly onto the card. I adhered the mug directly to the panel and popped the pumpkin pie image up off of the card using Stampin' UP foam dimensionals. For a finishing touch I added some white jelly roll highlights to the mug and the pie. You just can't go wrong with this cute stamp set!   


Sunday, October 24, 2021

Boo!-Coffee And Cards With Celeste And Deb


Hello, and welcome to the October Coffee and Cards with Celeste and Deb! With Halloween right around the corner Deb and I thought it would be fun to create a Halloween card. I love making Halloween cards and always send out at least a half dozen every year. I created this fun card for my bestie who absolutely loves Halloween. To create my card I started by die cutting the Lil' Inkers ghost die from white cardstock and then cut it out with a stitched edge circle die from My Favorite Things using white cardstock. I then cut the circle again using black cardstock and mounted the two together. I then stamped the sentiment from My Sentiments Exactly's Halloween Innies & Outies stamp set using Versafine onyx black ink. I poured some Zing clear embossing powder over it and heat set it. Then using Pink and Main's stacking rectangle dies I layered some patterned paper from American Crafts Halloween 6x6 paper pad onto some black cardstock and adhered it directly onto my white A2 card base. I then cut a smaller strip of spider patterned paper from the same American Crafts paper pad and mounted that onto more black cardstock. I adhered that to the top of the card and then glued the focal circle panel lower onto the card. To finish this fun card off I added some 6mm black matte sequins from Pretty Pink Posh to the top right and bottom left. I love how this turned out!

For my coffee this month I decided to try something new that my running buddy suggested to me...Protein coffee! I am drinking Bang's chocolate peanut butter blast and, I have to say, it's pretty good! I drank it cold and it's very creamy and tasty! Now, be sure to pop on over to Deb's blog and see what sort of Halloween fun she created this month! And thank you for visiting my blog today. I appreciate all of your support!


Saturday, October 9, 2021

I'm Nuts About You


My card today was created for the Freshly Made Sketches card challenge. To create my card I started with a base of Stampin' UP's crumb cake cut to an A2 size. I layered on strips of Stampin' UP's early espresso and Paper Rose's Autumn plaid patterned paper for the diagonal stripes at the bottom. I then die cut a circle using a die from the My Favorite Things stitched circles stax. I stamped the leaves from the Avocado Arts Nuts About You stamp set at the bottom of the circle using Stampin' UP inks in autumn colors. I then stenciled the clouds onto the panel using My Favorite Things mini cloud stencil and Tim Holtz distress ink in faded jeans. I stamped the rake, the squirrel, the acorn, and the stump onto some white Copic-friendly card stock, colored them using my alcohol markers, and fussy cut them. I adhered them directly onto the focal panel using liquid glue and then popped the acorn up using a foam dimensional. For a final touch I added googly eyes to the squirrel and white gel pen for added detail. Thank you for stopping by my blog today!


Your Wishes Will Come True


Today's card was created for the latest Cards 4 Galz card challenge. The challenge was to create an Oriential themed card. To create my card I started by layering some pretty green polka patterned paper from the Studio Calico Sundrifter 6x6 paper pad onto my A2 white card base. Using some Pink & Main A2 stackable rectangle dies I die cut a white panel using Copic friendly cardstock and then a slightly larger black one using Stampin' Up's basic black cardstock. I stamped the lanterns from the Lawn Fawn Lunar Lights stamp set using Memento tuxedo black ink. I colored them using my alcohol markers, added some white gel pen for highlights, and went over all of them with clear Wink of Stella for a pretty shine. I then stamped the take out box, fortune, and chopsticks from Lawn Fawn's Good Fortune stamp set. I colored them, fussy cut them out, and popped them up off of the card using some Stampin' UP foam dimensionals. For a final touch I added some small black sparkling gems by Ki in each corner. 


Autumn Leaves Thank You


Hello and happy Saturday! I wish I could say that I've been outside enjoying cooler temps and pretty fall foliage but we have warmed back up again here in Southeast Missouri. So, I'm indoors in the AC and making cards. Today's card was created for both The Card Concept and If You Give A Crafter A Cookie card challenges. I don't do clean and simple cards very often but I wanted the leaves on this card to be the center of attention. To create my CAS card I started by embossing my white A2 card panel using a pretty plaid embossing folder from Spellbinders. I adhered it directly to my white card base. I then die cut a dark brown wreath using a Memory Box die and some early espresso card stock from Stampin' UP and adhered it directly onto the focal panel. I die cut the leaves using Jillian Vance stitched leaves dies and some Royal Langnickel watercolor paper. Using some autumn inspired colors of distress ink I inked the leaves using a foam blending tool. I popped each of the leaves up using some Stampin' UP foam dimensionals and adhered them around the wreath. Using the Paper Rose Thank you die and frame set I die cut the sentiment using vellum and more early espresso cardstock. I adhered them together using some liquid adhesive and attached it to the center of the wreath using some Darice foam strips. I love the clean simplicity of this card. Thank you for stopping by my blog today and, I hope where ever you are in the United States, that you are getting the opportunity to enjoy some beautiful fall weather. 


Wednesday, October 6, 2021

Have A Frightfully Spooky Halloween!


Today's fun Halloween card was created for both The Paper Players and Just Us Girls card challenges. To create my card I started by die cutting a panel of plain white cardstock using a Paper Rose stitched rectangle die. Using some Inkadinkado masking paper I masked off a large circle in the upper right hand corner and inked the panel using Tim Holtz distress inks and a blending tool. I Then removed the mask and added some color to the moon using my Copic markers. I then stamped the witch from the Pebbles/American Crafts Midnight Haunting stamp set using Versafine onyx black ink and heat embossed it using my heat tool and some clear embossing powder from Zing. I then stamped the sentiment from the My Sentiments Exactly Halloween Innies & Outies stamp set and heat embossed it. Finally, I stamped the trees on the bottom of the panel using Close To My Heart's Always Grateful Seasons & Nature stamp set and heat embossed them. To finish my card off I popped the panel up off of the card using some fun foam, added a few 6mm clear sequins from Pretty Pink Posh, and a few twinkly stars in the sky using my white gel pen. Thank you for stopping by my blog!


Saturday, October 2, 2021

Have A Boo-Tiful Halloween-Send A Smile 4 Kids


Hello, happy October! We have finally arrived at my favorite time of the year...Fall!! This month at Send A Smile 4 Kids we are creating holiday/celebration cards. Since Halloween falls in this month I thought it would be fun to create a sweet little Halloween card to send to one my grandmunchkins. To create my card I started by layering some fun Halloween patterned paper from American Crafts Haunted 6x6 paper pad onto some basic black cardstock from Stampin' UP. I used a fun sketch I found on Pinterest. I then stamped the ghost from Darcie's Heart & Home's Bootiful Halloween stamp set onto some white Copic-friendly cardstock. I then stamped the small pumpkin from Lawn Fawn's So Thankful stamp set and colored both images using my alcohol markers. I fussy cut them both out leaving a small white border around the image. I then cut down a small rectangle panel using a Gina Marie stitched rectangle die. I then cut down a grass border using a Lawn Fawn border die and some olive green cardstock from my stash. I die cut the tree using a Paper Smooches die and adhered them both to the focal panel. Using a small circle mask I created with a Stampin' UP circle punch and Inkadinkado masking paper I blocked off an area for the moon and then stenciled the clouds in using the MFT mini cloud stencil and Shaded Lilac distress ink from Tim Holtz. I removed the mask and colored the moon in using an alcohol marker. I adhered the ghost and pumpkin down to the focal panel using some Stampin' UP foam dimensionals. Love how adorably cute this card turned out. Thank you for stopping by my blog today. If you like my card be sure to leave a comment. I read and appreciate them all. Now, pop on over to the Send a Smile blog and see what the rest of the team created this month!

Sunday, September 19, 2021

It's Pumpkin Spice Season-Coffee And Cards With Celeste And Deb


Hello and welcome to the September Coffee and Cards with Celeste and Deb collaboration. This month Deb and I are celebrating all things pumpkin spice! I recently picked up the Simon Says Stamp Pumpkin Spice Season stamp set and I couldn't think of anything more perfect for this collaboration than that, right? I started by stamping the focal image and sentiment onto some white Copic-friendly cardstock and colored it using my alcohol markers. I die cut it down to a small panel using a Paper Rose stitched rectangle die. Using papers from Echo Park Reflections Fall 12x12 paper pack and some early espresso cardstock from Stampin' UP I created some stacked rectangle panels and mounted them to my card. I popped my focal panel up off of the card using 3M foam tape and finished it off by added some details with my white Gelly Roll pen and some 4mm espresso sequins from Pretty Pink Posh. I love this card so very much and will probably create a few more in different color combos. 
For my coffee I opted for a nice iced pumpkin spice Frappuccino from Starbucks. I can't wait to see what fun Deb created for this month's challenge!


Saturday, September 4, 2021

I Love You A Bushel And A Peck-Send A Smile 4 Kids


Wow, I cannot believe it's September already! Is is just me or does it seem like this year is just flying by? For our challenge this month over at the Send A Smile 4 Kids blog we are creating cute fall/Halloween cards for kids. I have two precious granddaughters that I love to send Halloween cards to. This adorable creation will be going to one of those little dolls. To create my card I started by layering some gorgeous fall plaid patterned paper from the Paper Rose Autumn Plaid 6x6 paper pad onto an A2 crumb cake cardstock card base. I then die cut a stitched edge panel using Paper Rose's stitched rectangle dies and some white cardstock. Using a My Favorite Things cloud stencil and Tim Holtz distress ink in faded jeans I created a fall sky background on the focal panel. Using dies and stamps from My Favorite Things Harvest Mouse I created my mice, pumpkins, and leaves and colored them using my Copic markers. I adhered them directly onto the panel using some precious glue from Jackie's Craft Table. I stamped the sentiment from the same stamp set directly onto the panel using my mini Misti and Versafine onyx black ink for a nice crisp look over the distress ink. To finish off my card I popped the focal panel up off of the card using 3M foam tape and added some fun highlights on the images using my Gelly Roll white gel pen. I can't wait to see how everyone else was inspired by this challenge. Thank you for stopping by my blog today!

Sunday, August 22, 2021

Happy Birthday-Coffee And Cards With Celeste And Deb


Hello and happy Sunday! Welcome to the August collaboration of Coffee and Cards with Celeste and Deb. This month Deb thought it would be fun to create a birthday card. I was pretty happy about that since these are the cards I send the most. This month's card was a Pinterest inspired card. I have seen numerous washi tape candle cards on the site, but have never made one. I have a large collection of washi tapes but admit to rarely using them for anything other than sealing my envelopes. So, I cut a panel down to 4 x 5.25 and adhered several pretty washi tapes to it cutting them at various angles at the top. I trimmed the bottoms off and then added a hand-drawn wick to each candle using my dual tip Memento tuxedo black marker. Using my Copic markers I added flames to each one. I die cut a sentiment using black cardstock and adhered it directly the panel over the candles. I added a black A2 panel to my white card base and then popped the panel up using 3M foam tape for some dimension. To finish my card off I added clear Wink of Stella to the flames and then topped them off with Glossy Accents for some pretty shine and dimension. I love how this turned out. Will have to try this with more masculine washi tapes. 
For my coffee this month I opted for a nice chilled Matcha. Our little cool streak we had last week is gone and we are back to steamy hot, humid days here in Southeast Missouri. This beverage hit the spot while I was out doing my obligatory errands! Now, be sure to pop over to Deb's site and see what fun she created this month for our birthday collaboration. 


Monday, August 16, 2021

Thankful


Hello and  happy Monday! We are experiencing some cooler temps and lower humidity here in the Midwest and it reminds me of fall. So, it seemed fitting when I saw the latest challenge over at The Sisterhood of Crafters. Why not create a fall leaf card, right? To create my card I started by layering a piece of crumbcake cardstock onto my A2 white card base and then adding a white cardstock panel that I had dry embossed with a woodgrain embossing folder by Darice to the bottom of the card. I then die cut some fall leaves using stitched leaves dies from Jillian Vance and solid cardstock and patterned papers from Paper Rose's Autumn Plaid 6x6 paper pad. I adhered the leaves directly to the card at the cardstock break staggering the solids with plaids. I then stamped the sentiment using Memento cocoa ink and a stamp I had picked up last season at the Target dollar spot. To finish off my card I added some brown and white bakers twine from Stampin' UP above the leaves and a few cocoa colored 6mm sequins from The Ton. I love this card and may have to mass produce it for Thanksgiving. Thank you for stopping  by my blog and, if you like my card be sure to leave a comment. I read and appreciate them all. 


Thursday, August 12, 2021

'Twas The Night Before Christmas


Hello, happy Thursday! I don't know what the weather is like where you live but here in SE Missouri Mother Nature is being quite rude! It's just too hot to do anything comfortably outside. So, after getting off work early today I opted for air conditioning and crafting. I created this fun and pretty Christmas card for the latest Watercooler Wednesday card challenge. To create my card I started by die cutting an A2 using patterned paper from Fancy Pants MeOlogy Painterly 12x12 paper and a die from Pink & Main. I adhered it directly to my white A2 card base. I then stamped the mantle, wreath, candles, vase, and stockings onto some white Copic-friendly cardstock using the Concord & 9th Merry Mantle stamp set and Memento tuxedo black ink. I colored the images and fussy cut them out. I popped all of the elements up off of the card using 3M foam tape and adhered them onto my card creating a nice mantle scene. I stamped the sentiment from the same stamp set onto some Stampin' UP basic black cardstock using Versamark ink and heat embossed it using Ranger's detail gold embossing powder. I cut the sentiment down into a thin strip and adhered it to the wreath using snail glue and foam tape. To finish my card off I added some 6mm clear sparkling sequins from Pretty Pink Posh. Thank you for stopping by today and, if you like my card, be sure to leave a comment. 


Saturday, August 7, 2021

Lucky Stars-Send A Smile 4 Kids

Hello and happy August! This year is really flying by. This month's challenge over at Send A Smile 4 Kids is to create a card for a child to give to a staff member/special person. To create my card I started by die cutting some stars using dies from My Favorite Things and patterned papers from the Simple Stories 6x8 Sunkissed paper pad. I then stamped the sentiment from the Hero Arts OWH Year Round Sentiments stamp set onto some heavy weight cardstock using Gina K Designs navy ink. I cut the sentiment down to a strip and mounted it onto some navy blue cardstock from Hobby Lobby. I punched a few tiny stars using a mini punch from Studio G and glued them on either side of the sentiment. I then adhered another piece of navy cardstock directly onto my white A2 card base and then adhered a smaller white panel that I had embossed using a Spellbinders plaid embossing folder. I adhered it to the card, popped the stars up using foam tape, adhered the sentiment strip below it, and embellished the card with enamel dots from the My Mind's Eye Now & Then collection and some clear Rhinestones from Recollections. I love that this card can be either masculine or feminine. Thank you for stopping by today and be sure to check out what the rest of the Send A Smile design team created for this month's challenge!


Sunday, August 1, 2021

The Early Bird


My second card today was created for the latest Freshly Made Sketches card challenge. Following the sketch I cut down some panels of patterned paper from the Heartland Farm 6x6 patterned paper from American Crafts and popped them up off of the card using 3M foam tape for some added interest. I then stamped the sentiment and the focal character onto some white Copic-friendly cardstock using Memento tuxedo black ink and the Art Impressions Spring Chicken stamp set. I colored the focal image using my alcohol markers and fussy cut her out. I then free handed a speech bubble for the sentiment and mounted them both onto the card using Stampin' UP foam dimensionals. Love how cute this turned out! 


Birthday Greetings


Hello and happy Sunday! Today's card was created for the latest The Paper Players card challenge. To create my card I started by cutting down a panel of cold press water color paper. Using my Tim Holtz distress inks I water colored a beach scene. Using Gina K Designs black ink and the Stampin' UP Wetlands stamp set I stamped the birds and the sentiment. I wrapped some ivory twine from American Crafts at the bottom of the panel and popped it up using some 3M foam tape. I mounted it onto a slightly larger piece of white cardstock for an additional border and then adhered the whole panel onto an A2 cardbase made out of Stampin' UP crumb cake cardstock. Love this clean and simple masculine card. Thank you for stopping by my blog today!