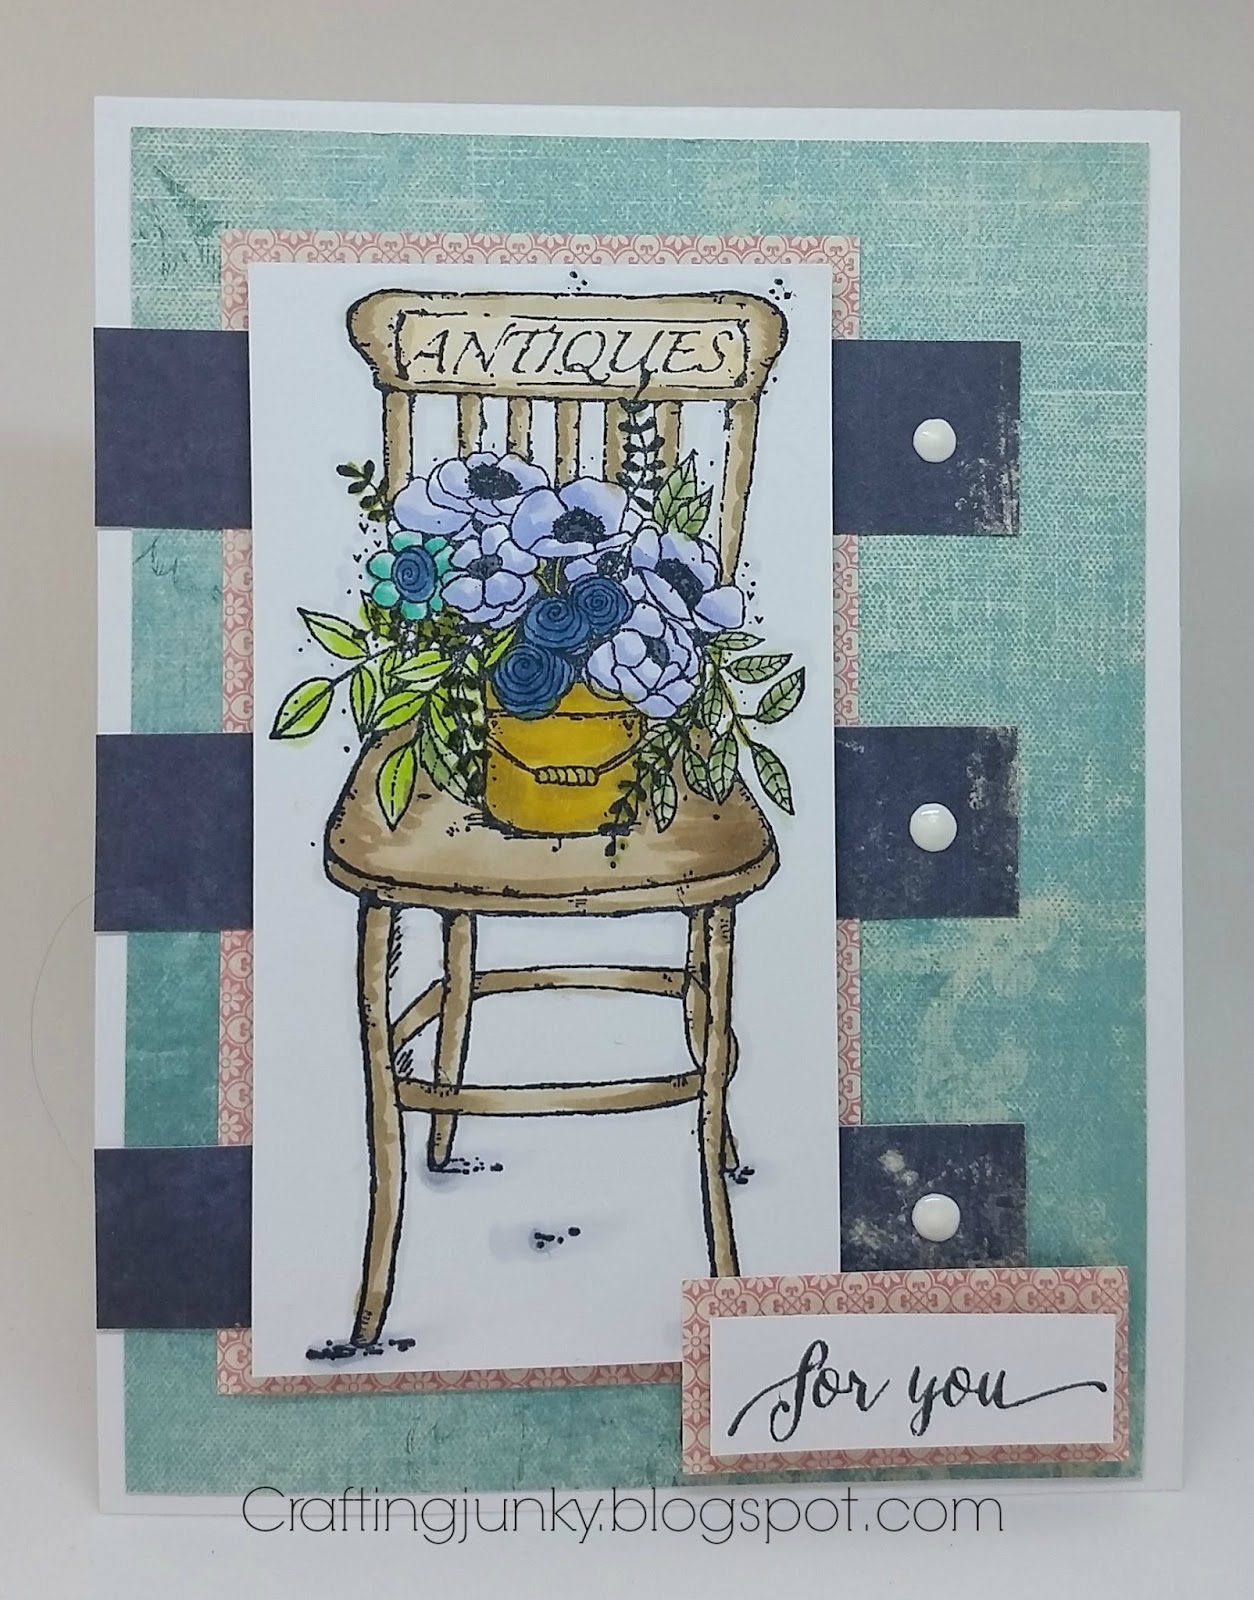
My card today was created for the latest Unity {show & tell} Facebook group sketch challenge. I love this sketch and have used one similar to it months back during a collaboration with my friend Debra Davison. To create my card I started by stamping the image from the March Unity Stamp Company kit of the month Stay Classy that I borrowed from my buddy Becky onto some Copic-friendly cardstock. I colored the image using some muted spring tones for a nice vintage look and cut the image down into a rectangle panel. I then mounted some patterned paper from Glitz Love You Madly 6x6 paper pad onto my white card base. I cut the focal image down into a rectangle panel and then cut more of the patterned paper to match the sketch. I assembled the card in the manner of the sketch and then stamped the sentiment from the WPlus9 Strictly Sentiments stamp set onto more white cardstock and mounted it onto the card using foam dimensionals from Scrapbook Adhesives. I popped the focal image up off of the card using some fun foam from Hobby Lobby. To finish my card and complete the sketch I added some Ranger Enamel Accents in glacier white to the ends of the accent strips. I love how beautifully this turned out. Thank you for visiting my blog and if you like my card be sure to leave a comment.
Welcome to my blog and thank you for visiting! I'm a medical assistant who loves exercise, coffee (sometimes too much coffee), and creating fun things in my spare time. I'm a single mom to two wonderful grown children and grandma to two beautiful granddaughters! I love sharing my card creations with my friends and the crafting world. To subscribe to my blog please click the "follow" button below or enter your email address in the "follow by email" box to the right.
Showing posts with label Unity Sketch Challenge. Show all posts
Saturday, April 14, 2018
Sunday, October 16, 2016
Merry & Bright

Okay, this is my final card for the day. I've been on something of a tear. I honestly had every intention of getting outside to do some yard work but I went and had a big lunch with my bestie and her daughter who was home from college and my full belly pretty much shot my desire to get out in the yard and pull weeds and dig up old flowers. So, I sat inside and made pretty things instead! This card was created for the latest Unity Show & Tell Facebook challenge. I love this pretty sketch and wanted to use a new stamp set that I'd picked up on the last Unity Stamp Company sale. I started by layering some pretty patterned papers from the Heidi Swapp Noel 6x6 paper pad onto my white card base. I then stamped the beautiful Angie girl from the Joy Girl stamp set onto some Copic friendly white carstock. I stamped the image several times onto various pieces of the same patterned paper so I could fussy cut the images out and paper piece the sweater, ornament, and hat onto the image. I colored and shaded all of the images, glued them all together, and then die cut the entire panel using a pretty stitched edge rectangle die from Gina Marie Designs. I added some two glue to a few of the details on the image and sprinkled some micro glitter in both sparkling clear and black. I just love how sparkly and pretty it turned out. I stamped the sentiment from the same stamp set onto white cardstock and cut it down by hand to create a small fishtail banner. I popped it and the focal panel up off of the card using some foam squares from Scrapbook Adhesives. I hope you like it!
Saturday, September 17, 2016
It's Your Special Day
Today's card was created for the latest Unity Show & Tell Facebook sketch challenge. I started by layering some pretty patterned paper from Studio Calico's Take Note 6x6 paper pad onto my card, following the sketch. I then die cut a piece of white Copic-friendly cardstock using a Gina Marie Designs wonky stitch rectangle border die. I stamped the image from Unity Stamp Company's Grace of Letting Go stamp set using Memento tuxedo black ink and colored her in with Copic markers to coordinate with the patterned paper and then popped the panel up off of the card using 3M foam tape. I used a 1/2" circle punch from EK Success to punch the three smokey grey dots that I used as a coordinating element and adhered them directly onto the card using my Zig two-way glue pen. To finish my card I stamped the sentiment from Tim Holtz Stampers Anonymous Crazy Talk stamp set. I hope you like it!
Note: I found out yesterday that I won the challenge with this entry!
Saturday, April 2, 2016
Keep Calm And Have A Beer
This is my second card created for the Unity Stamps sketch challenge over on their Facebook page. I started with the Unity Stamp itty bitty Keep Calm, Have Beer stamp set (which is on sale right now, FYI) and colored it in with my Copic markers. I fussy cut it out and edged it with my Memento tuxedo black dual tip marker to make it look like a die cut image. I stamped the sentiment out onto white cardstock and colored the words to create something of an ombre effect. I cut the words out into smaller panels. I adhered a piece of chocolate chip cardstock onto my card base and then layered on some patterned paper from the Basic Grey Carte Postale 6x6 paper pad. I added a few stitched lines around the outer edges and mounted the beer mug and the sentiment up off of the card using some Stampin' UP foam dimensionals. I think this would be a fun birthday card for a man. I hope you like it!
It's A Boy
My second card today was created for this week's Unity sketch challenge over on their Facebook page. I have to admit that I struggled with this one a bit, but I guess that's why it's called a challenge, right? I started with an oldie but a goodie. I stamped Unity Stamp itty bitty It's A Boy onto some American Crafts My Baby blue swiss dot patterned paper. I fussy cut the image out and edged it using a Memento tuxedo black dual tip marker for a nice, clean look on the edges. I stamped the image again onto some white cardstock and then cut the circle out and edged it with black marker as well and popped it up using Stampin' UP foam dimensionals. I embossed a piece of white cardstock using a Lifestyle Crafts large dot embossing folder and adhered the panel down onto my card base. I cut a small piece of patterned paper from the above mentioned paper pad and adhered that to the side and mounted my onesie straight onto it. I die cut a few "buttons" using the smallest of the MFT button die set using some more of the same patterned swiss dot paper. I tied some bows to the buttons using some blue and white baker's twine from American Crafts and popped each of the buttons up off of the card using some more foam dimensionals. So simple and so cute!
Subscribe to:
Posts (Atom)