Showing posts with label American Crafts. Show all posts

Saturday, October 3, 2026

Golden Days And Grateful Hearts


Today's card was created for the latest The Color Hues Challenge. I just won a huge haul of Unity Stamp Company products and could not resist using this beauty for this challenge. I can't be alone in my relief that Autumn is finally upon us. I live in the Midwest, and it's been brutally hot and dry this summer. So, fall is quite the blessing for many of us. As for the card, I stamped Unity Stamp Company's Acorn Almanac onto some Canson watercolor paper with Versafine onyx black ink and heat embossed it using Zing clear embossing powder. Using various inks from Gina K Designs and Stampin' UP, I loosely watercolored the image. I die the image down using Unity Stamp Company's postage edge nesting dies and wrapped some American Crafts hemp twine in a deep red around the panel and tied a bow. I added a brown button from my stash on top using a glue dot. I stamped the sentiment from the same Unity Stamp set onto more watercolor paper, heat embossed it, and fussy cut it out. I stamped Unity Stamp Company's Small Details background stamp onto an A2 kraft card base and popped the focal panel up onto the card using thin foam tape. Thank you for checking out my blog today!


Sunday, September 22, 2024

Hello Gorgeous-Coffee And Cards With Celeste And Deb


Hello! This month Deb and I have chosen this beautiful color palette as our inspiration. My granddaughter is obsessed with sunflowers, so I have several sunflower stamp sets and thought I would use one as my starting point. I stamped the sunflowers and leaves from the Recollections Sunflowers stamp set onto white Copic-friendly cardstock and colored them using my markers. I fussy cut them out and arranged them in a line using adhesive. I stamped the Sketchy Line background stamp by Simon Says Stamp using light blue ink onto a white panel. I adhered a paint chip I had picked up at my local hardware store to the bottom of that panel at an angle. I then adhered some gold glitter washi by American Crafts and my sunflowers above it to create a border. I die cut the entire panel using a stitched rectangle die by Paper Rose. I backed the panel with some early dark brown cardstock from my stash and adhered the panel to my white A2 card base. I stamped the sentiment from Honey Bee's Sweet Sunflower stamp set at the bottom using Versamark ink and embossed it using Ranger's detail white embossing powder. I finished by card off my adding some gorgeous coppery sequins from Pawsome Stamps. For my coffee, I chose a delicious pumpkin cold brew from our local Ziggi's coffee shop. Be sure to stop by Deb's blog and see how she was inspired by this month's color challenge. Thank you for stopping by my blog today!


Friday, March 29, 2024

Birthday Wishes


Hello, and happy Friday! Today's card was created for the latest Color Throwdown card challenge. I started by layering some light pink and medium brown cardstock from Hobby Lobby onto my white A2 card base. Using a shaped nesting die from Spellbinders, I cut down some pink striped patterned paper from Echo Park's Flower Market 6x6 paper pad and attached it to a white panel I created using the same shaped die. I added some brown grosgrain ribbon from American Crafts to bridge the gap between the papers. I stamped the sentiment in charcoal brown ink from Gina K Designs using a wooden block stamp from a Momenta birthday set. I die cut the flower and leaves using more patterned paper from the Echo Park paper pad, brown cardstock, and Little B's Bouquet floral die set. I popped the focal panel up off of the card using foam tape and added some white gel pen details to the florals and the stripes. I added some brown dashed lines around the top of the focal panel to add a bit more visual interest. This card is a throwback to my earlier cardmaking style. Very simple, but I love it. Thank you for visiting my blog today. I hope you have a lovely Easter weekend!


Sunday, April 30, 2023

Celebrate-Coffee And Cards With Celeste And Deb


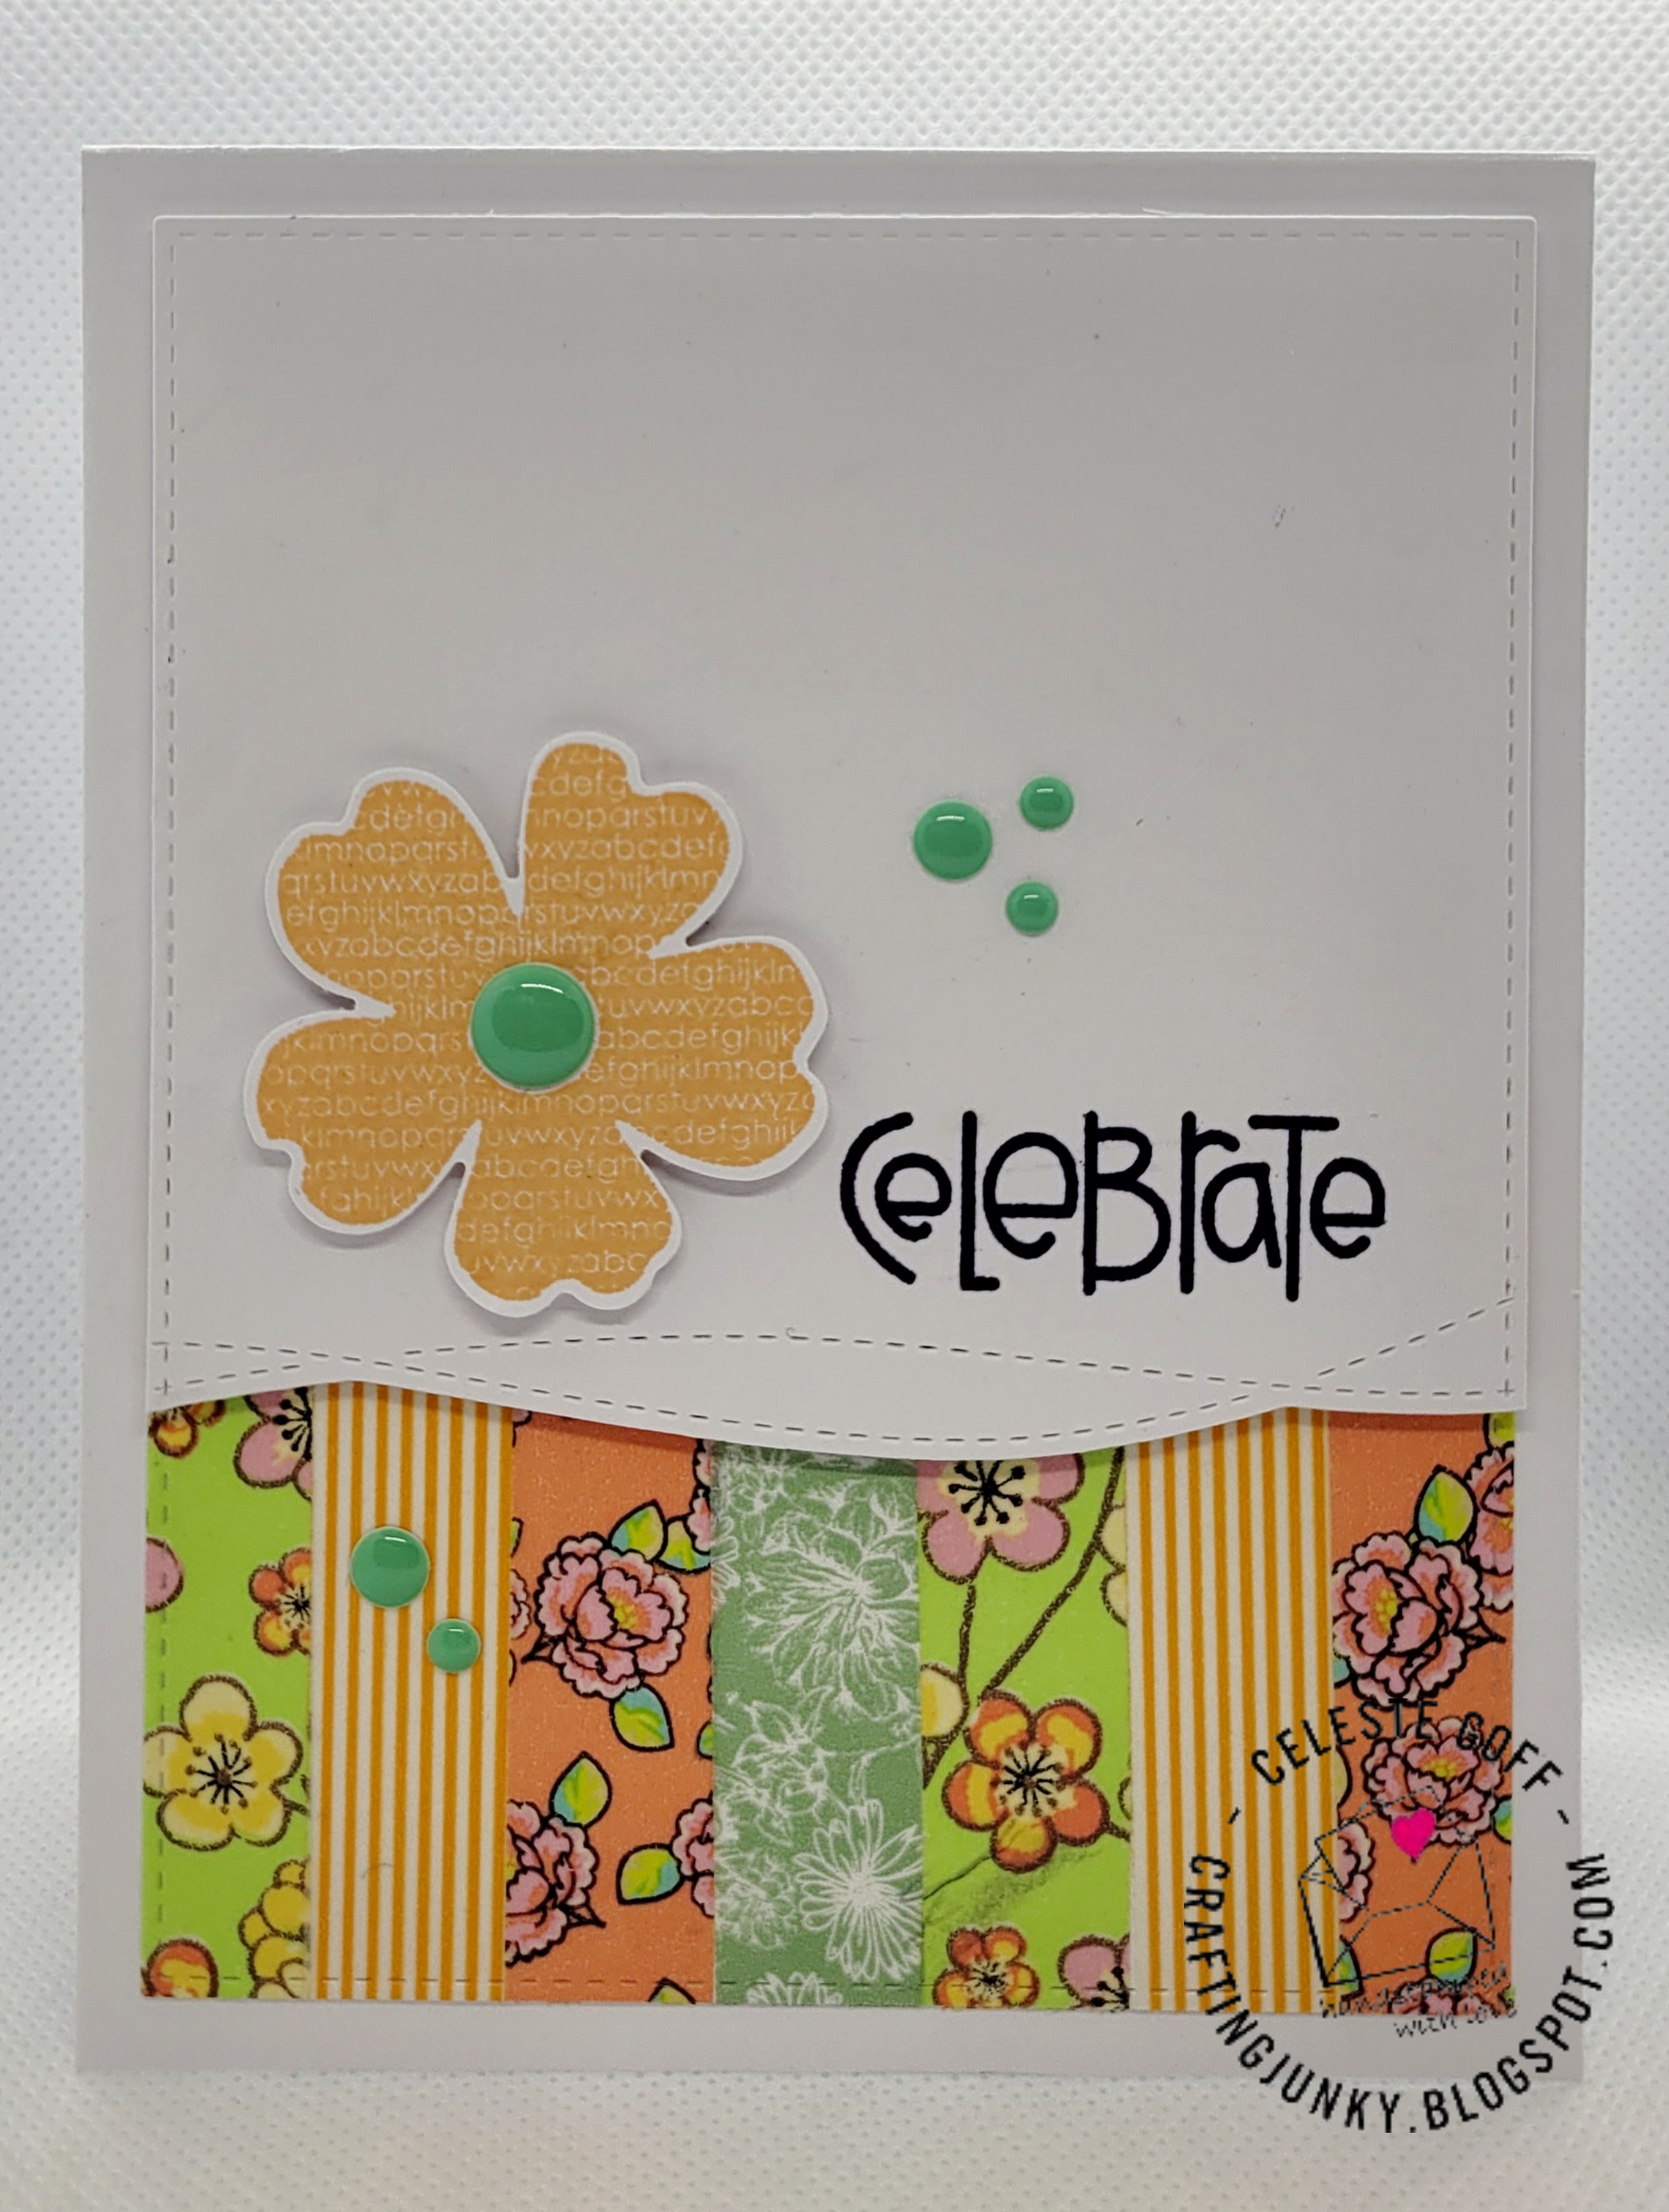
Hello, and welcome to the April Cards and Coffee collaboration between Deb and myself. This month we are using washi tape as our inspiration. I'm sure I'm not alone in the crafting community when I say that I have way more of this stuff than I could ever possibly use. So, given that we thought it would be fun and a clever way to use up some of the stuff we have in our stash. To create my card I started with a small 2"x4" cardstock panel. Using a vertical orientation, I laid my collection of American Crafts washi tapes right up next to each other in a pleasing color arrangement. I then used a stitched rectangle die from Paper Rose Studios to give it some additional detail. I then cut down a white cardstock panel using Simon Says Stamp's Drifting Stitches Border die and the same rectangle border die. I then stamped the sentiment from Paper Smooches Sentiment Sampler stamp set and Versafine onyx black ink. I then stamped the flower from Stampin' UP's Flower Shop stamp set using Gina K Designs Sweet Mango ink and punch the image out using the coordinating punch. I adhered the washi tape panel directly to my white A2 card base. Then I popped up the main focal panel with the sentiment using 3M foam tape. I popped the flower up off of the card using Stampin' Up's foam dimensionals. I adhered it to the left of the sentiment and finished it off with some fun enamel dots from Simple Stories. 
I attended a fun caffeinated event in my town this weekend that consists of a walking tour of our downtown, visiting vendors who serve all things chocolate or caffeinated. On one of my stops, I tried a Vietnamese salted cheese coffee. Now, I know what you're thinking...salted cheese in a coffee? But trust me when I say, this coffee was rich and delicious! I only wish I'd gotten the larger size. I recommend it if you have the opportunity to try it. Thank you for stopping by my blog. Now, be sure to head over to Deb's blog and see how she was inspired by our washi tape challenge this month. 


Friday, October 28, 2022

Boo!


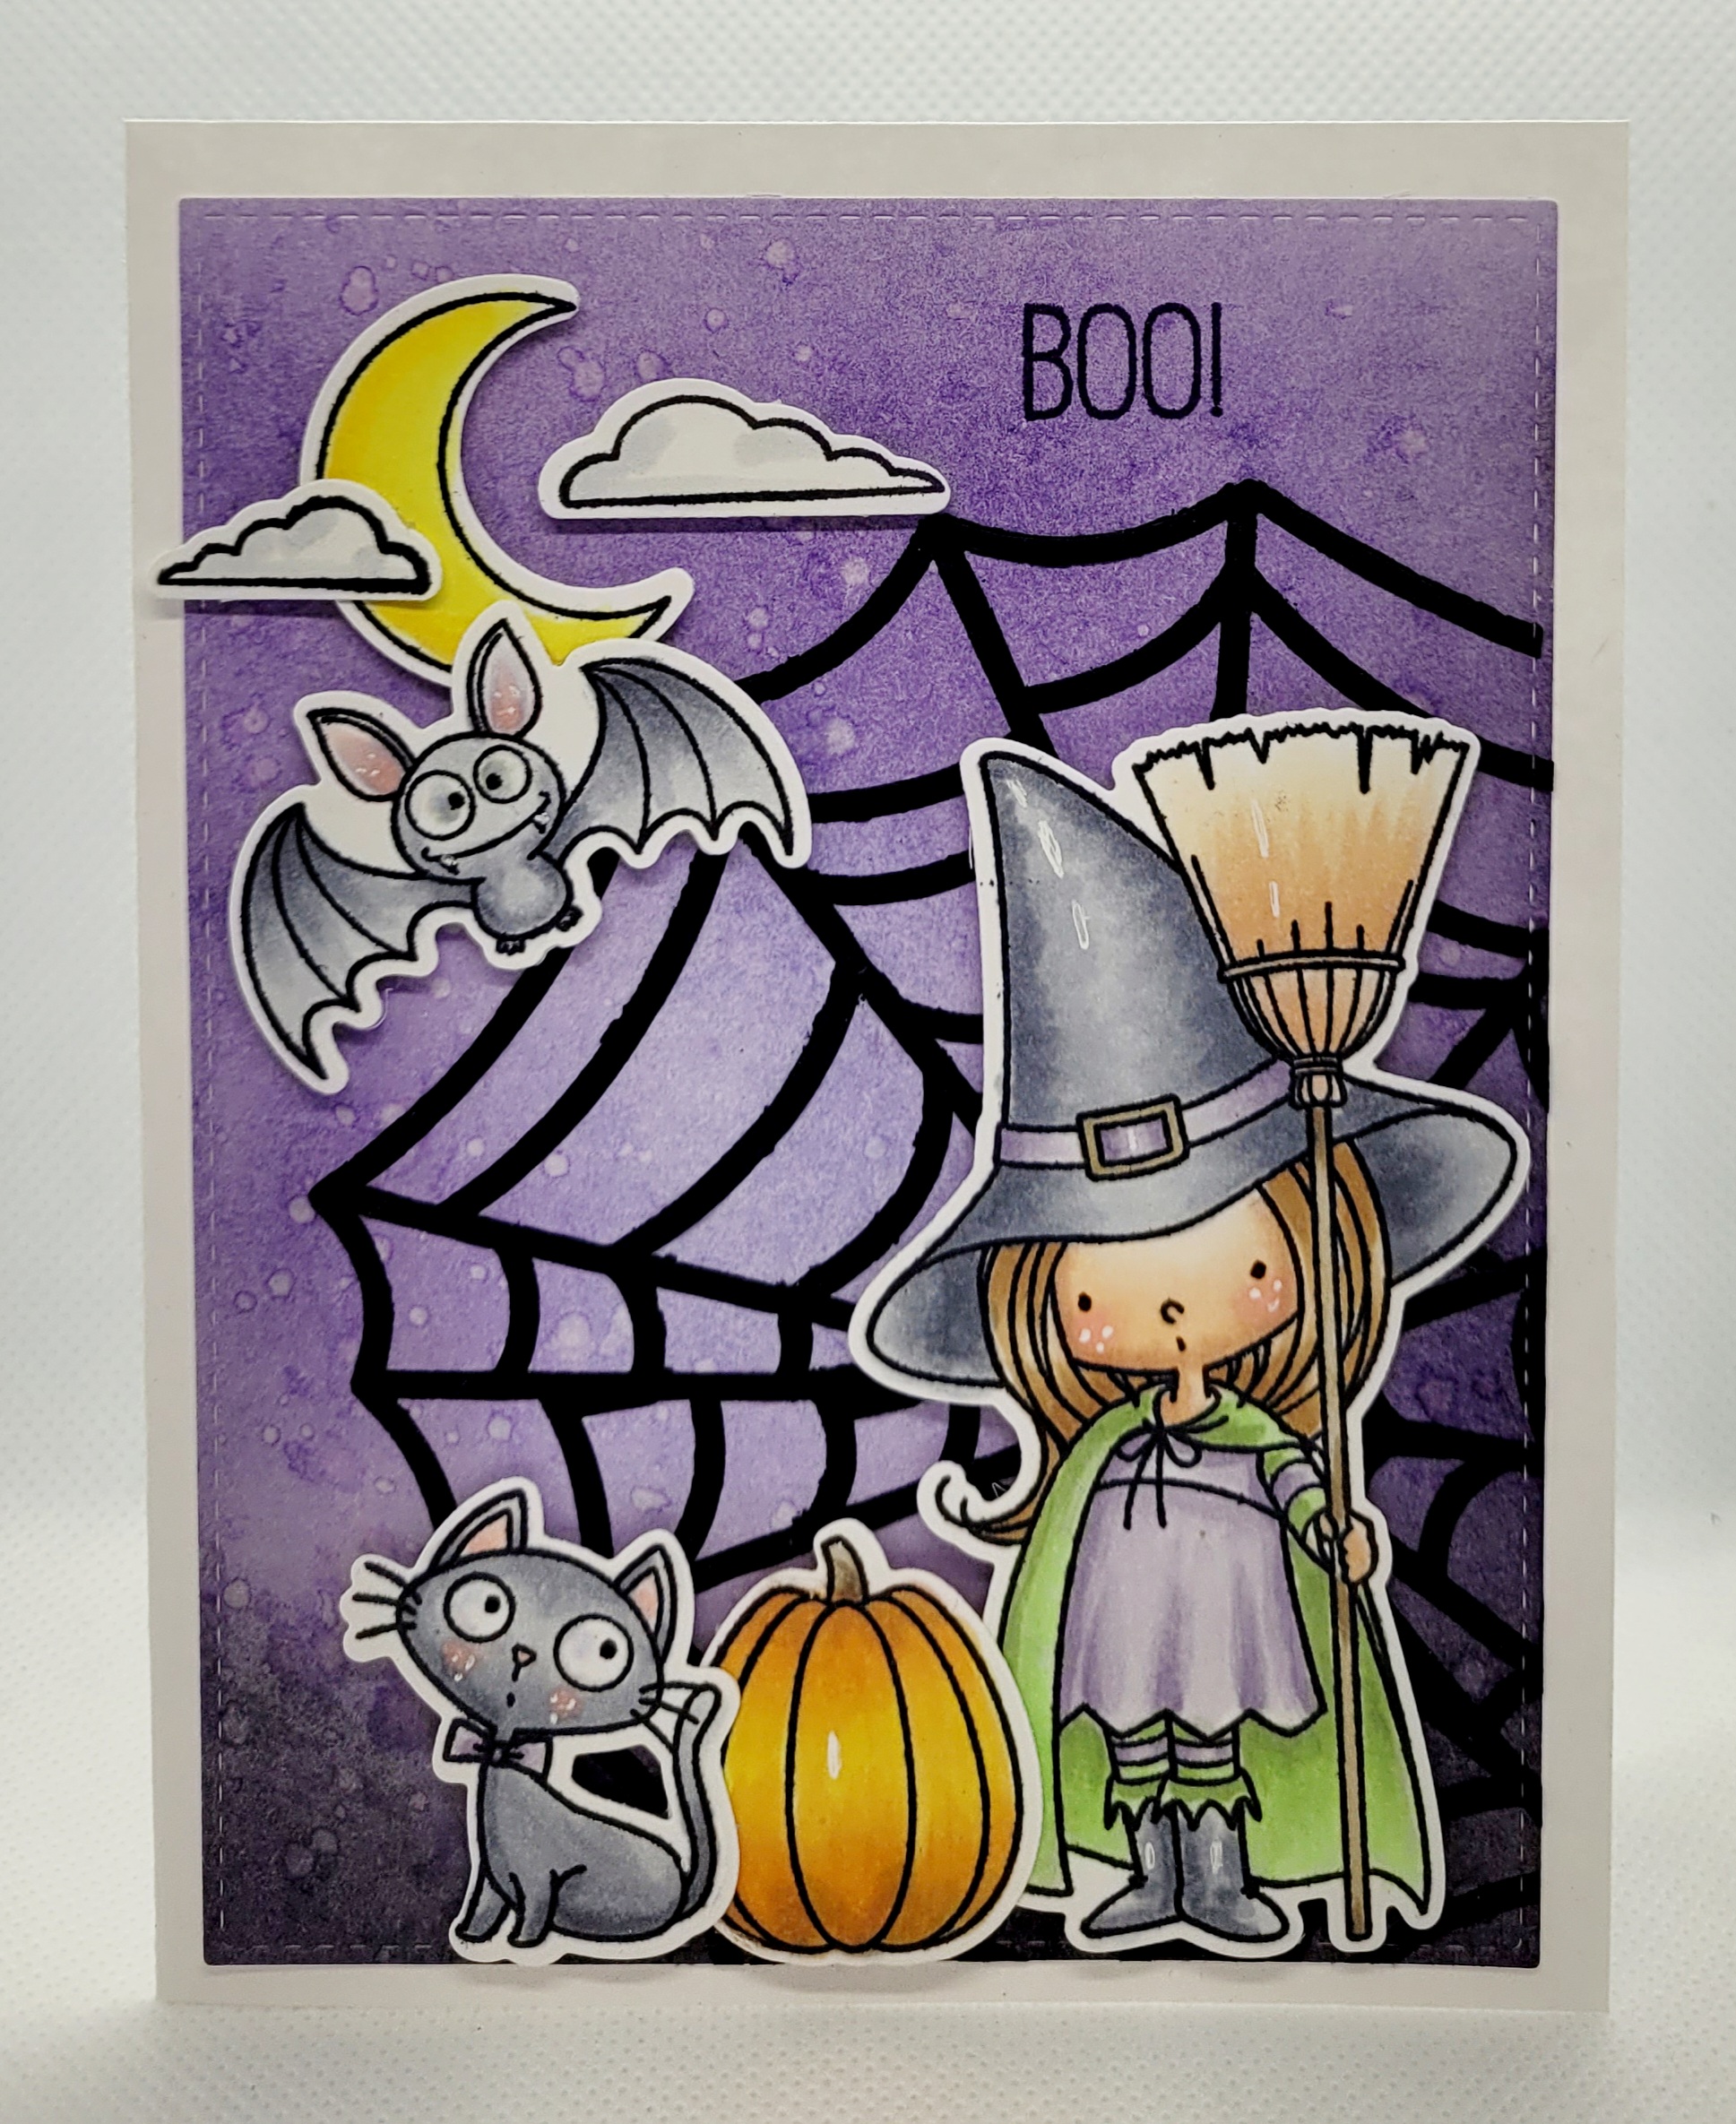
This fun little Halloween card was created for the There's A Stamp For That Challenge. To create this card I started with a panel of white cardstock that I blended on Tim Holtz distress inks in shaded lilac, villainous potion, and black soot. I took a distress sprayer and spritzed it with water and blotted off the excess for a nice, distressed look. I adhered an American Crafts Halloween spider web doily straight onto the panel using some liquid glue. I die cut the panel down using a stitched stacking rectangle die from MFT and popped the panel up off of my white A2 card base using 3M foam tape. I then stamped, colored, and die cut all of the images from MFT's Witch Way To The Candy stamp and die set. I adhered all of the images to the card using Stampin' UP foam dimensionals. For a finishing touch I added highlights to the individual images using a white gel pen. Thank you for stopping by my blog today. I hope you all have a safe and fun Halloween!!


Saturday, May 7, 2022

Loads Of Love For Dad-Send A Smile 4 Kids

Hello! Welcome to the May Send A Smile 4 Kids card challenge. This month we are creating cards for Dads. To create my card I started by stamping the adorable little dump trucks from the Hero Arts Happy Dad's Day stamp set onto white Copic-friendly cardstock. I colored them in primary colors using my alcohol markers and then punched them out using a Stampin' UP 1 1/4" square punch. I matted them onto basic black cardstock and cut them out leaving a small 1/8" frame around them. I stamped the sentiment from the same Hero Arts stamp set onto some kraft cardstock using Gina K Designs basic black ink. I added some American Crafts white twine around the bottom of the card and adhered it to the card by adding a basic black button I had in my stash. I popped each of the dump truck tiles up off of the card using 3M foam tape and adhered them to the card around the sentiment. I added some black dashed lines around the outer edge of the card for some visual interest and contrast and then popped the whole panel up off of my white A2 card base using more 3M foam tape. Thank you for stopping by my blog today and be sure to check out what the rest of the design team created for this fun challenge!


Sunday, August 1, 2021

Birthday Greetings


Hello and happy Sunday! Today's card was created for the latest The Paper Players card challenge. To create my card I started by cutting down a panel of cold press water color paper. Using my Tim Holtz distress inks I water colored a beach scene. Using Gina K Designs black ink and the Stampin' UP Wetlands stamp set I stamped the birds and the sentiment. I wrapped some ivory twine from American Crafts at the bottom of the panel and popped it up using some 3M foam tape. I mounted it onto a slightly larger piece of white cardstock for an additional border and then adhered the whole panel onto an A2 cardbase made out of Stampin' UP crumb cake cardstock. Love this clean and simple masculine card. Thank you for stopping by my blog today!


Saturday, January 2, 2021

I Think You're Pretty Grate-Send A Smile 4 Kids


Hello and happy new year! I'm sure I'm not alone in breathing a sigh of relief that 2020 is past us. I'm very excited about what the new year will bring for us all. I am especially excited about being asked to join the very talented design team at Send A Smile 4 Kids! Our theme this month is Love/Valentine cards. To create my card I started by printing the digital stamp You're Pretty Grate by Power Poppy onto some white Copic-friendly cardstock. I colored the image using my alcohol markers and did some highlights on the image using my white jelly roll pen. I then die cut the image using a pierced edge tag die from My Favorite Things. I added to the bottom of the tag some pretty patterned paper from the Crate Paper Main Squeeze 6x6 paper pad and a strip of Real Red cardstock from Stampin' UP to break up the papers. I added some inexpensive red and white ribbon I picked up at the dollar spot last year at Target to the top of the tag and tied it off with some pink and white baker's twine from American Crafts. I layered some more of the Crate Paper patterned paper onto some red cardstock and adhered them to my white A2 card base. I popped the tag up off of the card using some 3M foam tape and finished the card off with some cute little die cut hearts using more of the Real Red cardstock. Love how adorably cute this turned out! I can't wait to see what fun and creative creations everyone is going to post!


Sunday, November 22, 2020

Thankful-Coffee And Cards With Celeste And Deb

Welcome to the November coffee and cards with Celeste and Deb collaboration! This month we decided we'd do something Thanksgiving related since Thanksgiving is this coming week. I know 2020 has been a tough year for all of us, and I know that the holidays are going to be vastly different for many of this year. But we all still have much to be grateful and thankful for. I know I certainly do and I wanted my card to reflect that. To create my card I started by layering some 1" circles I cut using a Stampin' UP circle punch and some pretty patterned paper from the Authentique 6x6 Essentials Collection paper pad directly onto my card panel. I then wrapped some natural twine from American Crafts around the panel, securing it in the back using some scotch tape. I then adhered the panel directly to the front of my A2 card base. I stamped the sentiment using a fun wood block stamp I found at the dollar spot at my local Target using Gina K Designs charcoal brown ink. I die cut the beautiful leaves using Jillian Designs Leaves and Petals dies and some Stampin' UP kraft cardstock. I adhered them to the card using foam squares from Scrapbook Adhesives and then attached a bow using more of the same natural twine from American Crafts using a glue dot. To finish the card off I adhered a small yellow button I had in my stash directly to the leaves. Love how clean and simple this card. 
For my coffee this month I bought a bottle of cinnamon and vanilla cold brew from my local Aldi's and came home and put it on ice. And yes, it's as tasty as it sounds! Anyway, I hope everyone is staying safe out there and we all have a beautiful Thanksgiving. Now be sure to pop over to Deb's blog and see what fun she created for us this month. 


Tuesday, May 5, 2020

Hello Spring Chicken


Today's card was created for the latest The Paper Players card challenge. To create my card I started by layering the pretty blue bandana patterned paper from the American Crafts Heartland Farm 6x6 paper pad onto my white A2 card base. I then die cut an oval focal panel using some white cardstock that I inked with some Tim Holtz faded jeans distress ink to create a sky and a pierced edge oval die from My Favorite Things. I then stamped the fence from the Kaisercraft Cock A Doodle Do stamp set, colored it using my alcohol markers, and fussy cut it out. I adhered it to the panel and then layered a grassy piece on top using some green cardstock from Hobby Lobby that I die cut with a Lawn Fawn die. I stamped the clouds from the Kaisercraft stamp set and fussy cut those out too. I stamped the sentiment from the Art Impressions Spring Chicken stamp set and then adhered the clouds onto the panel, one directly to the panel and the other with foam squares from Scrapbook Adhesives. To finish off my card I stamped the chicken from the same Art Impressions stamp set, colored her in using my alcohol markers, fussy cut her, and popped her up off of the card. A few dark blue gems from Hobby Lobby in each corner finished this card off nicely! Hope you like it and thank you for visiting my blog today!

Tuesday, April 16, 2019

Celebrate

Today's card was created for my good friend Freda's upcoming birthday. I will be entering this card into the Cards 4 Galz card challenge. To create my card I started with some gorgeous patterned papers from the American Crafts Stay Colorful 6x6 paper pad, and layered them onto my A2 white card base by cutting them down using a stitched curved edge die from Paper Smooches and added a lacy border using a Simon Says Stamp eyelet border die. I then stamped the beautiful girl image from the Stamping Bella Uptown Girl Posh Has A Present stamp set onto some white Copic-friendly cardstock and colored her in using my alcohol markers in colors that coordinated with the papers. I fussy cut the image out using my detail scissors and popped her up onto my card using some Scrapbook Adhesives foam dimensionals. To finish my card off I rounded the bottom corners using my We R Memory Keepers Corner Chomper, stamped the sentiment from the Stampers Anonymous Crazy Talk stamp set using Versafine onyx black ink, and added a few turquoise sequins from The Ton around the card. Love how beautifully this card turned out. I know my friend will like it.  


Saturday, March 9, 2019

Have A Magical Day-Maddie's Birthday

Hello and happy Saturday! Tomorrow is my youngest granddaughter Maddie's first birthday and I created this adorable little card for her special day. I started by layering some pretty buttery yellow cardstock from Hobby Lobby onto my white A2 card base. I then layered some fun springtime patterned papers from the American Crafts Heartland Farm 6x6 paper pad on top. I added a cute little white doily from Sunny Side Up Bakery for some additional interest. I stamped the sweet little fairy image from the My Favorite Things Pure Innocence Fairy Girl stamp set onto some Copic-friendly cardstock and colored her using my alcohol markers. I fussy cut her out and added her to a distress inked die cut panel I cut using a Spellbinders circle die. I die cut a coordinating scalloped edge circle using more of the same yellow cardstock from Hobby Lobby and adhered the focal panel to it. To complete my card I popped the image up off of the card using foam squares from Scrapbook Adhesives, added some shimmer using my Spectrum Noir clear glitter pen on the fairy's wings and dress, and some Stickles on the wand and wings for some extra shine. Thank you for visiting my blog. Hope everyone has a great weekend!

Sunday, January 27, 2019

Merry-Coffee And Cards With Celeste And Deb

Hello and welcome to the January Coffee and Cards with Celeste and Deb! Hope everyone had a wonderful holiday season and aren't covered up with too much snow. We got our first heavy snow of the season this past week. This month Deb and I chose to use a mood board as our starting point for our cards. I found this fun image on Pinterest and fell in love with the earthy colors and the snow! To create my card I started by layering a strip of mint and gold foil hearts patterned paper from the Crate Paper Main Squeeze 6x6 paper pad onto a piece of Simple Stories woodgrain paper. I then added a strip of gold glitter washi tape from American Crafts Make It Happen collection to the side for some added shine and interest. I mounted that panel to my A2 white card base. I then stamped the beautiful image from the Unity Stamp Company's February KOTM stamp set Being Who You are onto some white copic-friendly cardstock and colored it using coordinating colors to the mood board. I die cut the image using a pierced edge oval die from My Favorite Things and adhered it directly onto the card panel. To finish off this simple card I stamped the sentiment from the Unity Stamp Company's October KOTM stamp set All Winter Long using Versafine onyx black ink onto a white strip of paper and adhered it directly below the focal image. 
For my coffee selection this month I opted for a Starbuck's Cinnamon Shortbread latte.  And yes, it's as tasty as it sounds!
Thank you for stopping by my blog today and checking out this month's collaboration project. Now, be sure to pop on over to Deb's site and show her some blog love with a nice comment!


Sunday, December 16, 2018

Merry & Bright-Coffee And Cards With Celeste And Deb

Hello and welcome to our final Coffee and Cards with Celeste and Deb for the year! This month we have Shanna of Caffeinated Craftiness joining us as a guest designer. She makes the loveliest coffee cards! Debra chose our inspiration photo this month and I think it's absolutely perfect for a December/holiday card! To create my card I started by layering some red cardstock from Stampin' UP onto my white A2 card base. I then layered on some fun coffee, Christmasy patterned papers from the American Crafts Hot Cocoa 6x6 paper pad. I then stamped the coffee cup image from the Unity Stamp Company's KOTM We Can Rise stamp set onto some Copic-friendly white cardstock using Memento tuxedo black ink and colored it to match the inspiration photo. I masked the image and then stamped some small snowflakes around it using a stamp from the Inkadinkado Christmas Characters stamp set. I die cut the image into a circular focal panel using a pierced edge circle die from My Favorite Things and then matted it onto more red cardstock using a Spellbinders die. I stamped the sentiment and the hearts from the Simon Says Stamp Christmas mini stamp set using both Versafine onyx black ink and Memento lady bug red ink. I cut it down into a think sentiment strip, matted it onto some more red cardstock and adhered it directly to the card. To finish this card off I added some clear shimmer to the colored image using my Spectrum Noir clear glitter pen and scattered a few red sequins from Craft Medley for some additional pops of color and interest. 
For my coffee choice this month I opted for a Starbucks white mocha latte to help warm me up on this rainy, cold day. Now pop on over to Deb and Shanna's blogs and see what fun they created! 


Thursday, December 13, 2018

Freezin' My Snowballs Off-W2CB Dec/Jan

Hello and welcome to the December/January Words 2 Craft By word challenge. This month's quote is "I'm an angel at Christmas time, but the rest of the year I'm the real me. Benjamin, age 11" My card kind of flips that a bit and I decided to create something fun and mischievous! To create my card I started by stamping the bunny from The Cat's Pajamas Snow Days stamp set onto some Copic-friendly white cardstock and colored him in using my alcohol markers. I die cut the image using a pierced edge circle die from My Favorite Things and then framed it out using some dark olive cardstock from Hobby Lobby and a Spellbinders circle die. I layered more of the olive cardstock onto my white A2 cardbase and then layered some pretty patterned papers from the American Crafts Very Merry paper pad onto the card. I stamped the sentiment from Unity Stamp Company onto more white cardstock, cut it down into strip and layered it onto more olive cardstock and mounted it onto the card below the focal panel. To finish this fun card off I added some red 6mm sequins from Craft Medley around the card. I hope can't wait to see how our quote inspires everyone else!


Wednesday, November 14, 2018

Blessed-Words 2 Craft By

Hello and happy November to you all! I cannot believe we are one week away from Thanksgiving and a month away from Christmas. Honestly, where has this year gone? Our latest Words 2 Craft By quote is "When I count my blessings, I count you twice.-Irish Proverb." To create my card I started layering some pretty fall plaid patterned paper from the American Crafts Autumn Crisp 6x6 paper pad onto my A2 white card base. I then stamped the sentiment and the pumpkin from the Unity Stamp Company's September KOTM Blessed Fall stamp set onto some white Copic-friendly cardstock. I die cut the image using a postage stamp edge rectangle die from Gina Marie Designs and then colored the pumpkin using my alcohol markers. I matted the panel onto some pumpkin colored cardstock from Hobby Lobby and popped it up off of the card using some inexpensive fun foam from Hobby Lobby. To finish my card off I added some orange 6mm sequins from Pretty Pink Posh and some gorgeous shimmer to the pumpkin and the sentiment using my Spectrum Noir clear glitter pen. I can't wait to see how this month's quote inspires everyone! 


Sunday, October 28, 2018

Spooky-Coffee And Cards With Celeste And Deb

Hello and welcome to the October Coffee and Cards with Celeste and Deb collaboration. We are so tickled to have our crafty friend Michael Trent joining us again this month! Since it's late October we thought it might be fun to create a Halloween card. I opted to keep my card fairly clean and simple. There is no stamping on this card...only die cuts and paper with a touch of twine. To create my card I started by layering some orange textured cardstock from the American Crafts Halloween 6x6 paper pad onto my white A2 card base. I then die cut the ghost using the Lil' Inkers Ghost dies and some white cardstock. I then cut the sentiment using another Lil' Inkers die. I cut down a piece of batty patterned paper from the American Crafts Haunted 6x6 paper pad and adhered it to my card base. I adhered some black American Crafts jute twine to the ghost panel and adhered it directly to the card base and finished it off with a bow. Love how clean and simple it is! 
For my coffee choice this month it's turned a little cool here in Southeast Missouri so I opted for a large Dunkin Donuts toasted coconut coffee to warm me up after my run this morning. 
Thank you for visiting my blog today. If you like my card be sure and leave a kind word. I appreciate them all! Now be sure to pop on over to Deb and Michael's blogs and check out what fun and spooky creations they came up with! 

Wednesday, August 15, 2018

Merry Christmas

Today's card was created for the latest Jingle Belles card challenge. To create my card I started by layering some basic black cardstock from Stampin' UP onto my standard white card base. I then layered a piece of red patterned paper from the American Crafts Very Merry 6x6 paper pad on top and added some white dashed lines around the outer edge for some fun contrast. I then die cut the snow globe images from the Papertrey Ink Winter Snow Globe stamp and die collection. I prepped the die cut images with my EK Success powder tool and stamped the base of the snow globe onto the cardstock using Versamark ink and heat set it using Recollections detail embossing powder in silver. I then stamped the snowflakes using more Versamark ink and heat set them twice, once using Ranger's holographic embossing powder for a fun sparkle and again with Recollections detail embossing powder in snow. I love the little extra glimmer and shine stamping it twice gave the images. I then die cut and stamped the Santa, snowman, and tree images onto some white Copic-friendly cardstock and colored them using my alcohol markers. I then stamped the sentiment onto more of the same black cardstock using the Amy R Stamps Big Christmas Wishes stamp set and heat embossed it using more of the Recollections detail embossing powder in snow. I trimmed the sentiment down to create a fishtail banner. I then mounted the snow globes directly to the card base using the sketch as my guide and popped the focal images up off of them using Stampin' UP's foam dimensionals and the fishtail banner using some 3M foam tape. I love how adorably this card turned out. I hope you like it too!


Thursday, August 9, 2018

Art Impressions Birthday

My card today was created for the latest The Paper Players theme challenge. To create my card I started by stamping the fun chicken image from the Art Impressions Bird Brains stamp set onto some white Copic-friendly cardstock and colored it using my alcohol markers. I added some sparkle to the image using my Spectrum Noir clear glitter pen on her beak, legs, and the straw. I then cut the image out using a My Favorite Things pierced edge circle die and matted into onto a scalloped edge circle panel in Stampin' UP's real red cardstock that I cut using a Spellbinders die. I stamped the sentiment from the same stamp set onto more white cardstock and cut it down into a strip that I mounted on more red cardstock. I then layered a fun plaid patterned paper from the American Crafts Heartland Farm 6x6 paper pad onto a panel of the red cardstock and then adhered it to my white card base. I die cut a large fishtail banner using more of the same papers from the paper pad a die from Jillian Vance. The inside of the card reads, " They're both a pain in the rear! Happy Birthday anyway!" This stamp set cracks me up! If you like my card be sure to leave a comment. I appreciate them all. 


Never Stop Looking Up

My card today was created for the latest Tuesday Throwdown challenge. This week's challenge is "anything goes." I have a dear friend who lets me come raid her craft room and borrow stamps every month and this month I borrowed her Unity Stamp Company KOTM Open Sky, Big Ocean. I stamped that gorgeous moon and the coordinating sentiment onto some Canson cold pressed watercolor paper using Versamark ink and Recollections detail embossing powder in snow white. I heat embossed the image using my heat tool and then colored the image using my Tim Holtz distress inks and a watercolor brush. Once the image was dry I cut it down into a panel using a wonky stitched edge rectangle die from Gina Marie Designs. I popped the panel up off of my white card base using fun foam from Hobby Lobby and then added a sweet little wooden embellishment star from American Crafts and a smattering of silver star sequins from Pretty Pink Posh. I love how this card turned out! Thank you for visiting my blog and if you like my card be sure to leave a kind word. I appreciate them all!