Showing posts with label Memento. Show all posts

Saturday, December 2, 2023

Peace*Love*Joy-Send A Smile 4 Kids


Hello, and happy December! I cannot believe we are just a few short weeks away from Christmas. This year has just zipped on past. This month we are creating Winter cards for kids at Send A Smile 4 Kids. This adorable card was so easy to create and think it would be fun to mass produce. I started by wrapping some pretty red tinsel ribbon that I picked up last year in the dollar bin at Target around a panel of crumbcake cardstock from Stampin' UP. I popped the panel up off of my white A2 card base using 3M foam tape. I stamped the adorable reindeer image from Sweet 'N Sassy Stamps Christmas Blocks stamp set onto some white alcohol-friendly cardstock. I colored the images with my Copic markers and cut the image out right on the stamped border. I edged it with my dual tip Memento black marker and adhered it directly to the focal panel. To finish off my card I added some white gel pen detail to the deer image, added faux stitching lines around the focal panel, and some red gems from Recollections. Such an easy and simple card to create! Now, be sure to pop by the Send A Smile 4 Kids blog and see how the rest of the design team was inspired this month. 

Saturday, February 4, 2023

Happy Easter-Send A Smile 4 Kids


Hello, and happy February! This month at Send A Smile 4 Kids we are creating Spring/Easter cards. To create my card I started by stamping the adorable bunny from The Alley Way stamps Spring Has Sprung stamp set onto white Copic-friendly cardstock. I colored the image using my alcohol markers, and fussy cut the image out. I chose fun patterned papers from the American Crafts Sunny Side 6x6 paper pad and chose a fun layout to utilize as much of the patterns as I could. I stamped the sentiment from the same stamp set onto more of the patterned paper using Memento tuxedo black ink and punched the image out using a 1.5" Stampin' UP punch. I popped the bunny and the sentiment up off of the card using Stampin' UP foam dimensionals for a little more interest. 

Sunday, January 15, 2023

Between The Pages Of A Book-Coffee And Cards With Celeste And Deb


Happy Sunday! This month Debra and I decided to use this lovely photo as our inspiration celebrating books and warm beverages. To create my card I started by layering some pretty patterned paper from the My Mind's Eye Lost & Found Market Street 6x6 paper pad onto some royal blue cardstock from Hobby Lobby. I rounded the outer corners on both the patterned paper and the cardstock before adhering them together and mounting directly to my ivory A2 card base. Using more of the patterned papers from the same paper pad I printed images from the Gracielle Designs Vintage Tea Cup-Stacked Books digital stamp set and paper pieced the images together. I fussy cut the entire peice out, edged it with my Memento tuxedo black dual tip marker and adhered the image directly onto the focal panel. I printed the sentiment from the same digital stamp set onto more patterned paper from the same paper pad, cut it down into a strip, bordered it with more royal blue cardstock, and adhered it below the focal image. To finish the card off I added some royal blue 4mm sequins from Pretty Pink Posh around the card. Love how big and beautiful these images are and think it would be fun to create a whole card set to give as a gift! 
I got a beautiful new stoneware set from my boyfriend this Christmas and thought I'd drink my coffee from one of the mugs this morning. Isn't the finish on this set just so pretty? 
Now be sure to head over to Deb's blog and see how she was inspired by this month's photo. 


Saturday, November 5, 2022

Friendship Warms The Heart-Send A Smile 4 Kids


Hello, and a very happy November to you! This month at Send A Smile 4 Kids we are creating Holiday cards for kids. I recently picked up this adorable stamp set on a de-stash from a fellow crafter and couldn't wait to use it. I layered some cherry cobbler cardstock from Stampin' UP onto my white A2 card base. I then added a piece of plain white cardstock as a frame and then added a pretty piece of snowflake patterned paper from the Simple Stories Cozy Christmas 6x6 paper pad. Using a scalloped edge die from Papertrey Ink I created a large scalloped border using more paper from the same paper pad. I stamped the sentiment from My Favorite Things PI Merry Kissmas stamp set using Versafine onyx black ink and trimmed it down into a narrow border. I mounted it on more of the cherry cobbler cardstock and adhered it to the scalloped border. I stamped the adorable image from the same My Favorite Things stamp set with Memento tuxedo black ink directly onto a round circle panel I created using a Spellbinders circle stacking die. I also paper pieced the girl's sweater and hat and the snowman's scarf and hat using more patterned paper from the same paper pad. I adhered them directly onto the images on the focal panel and colored everything using my Copic markers. I adhered the entire panel to another piece of cherry cobbler cardstock using a Spellbinders scalloped edge circle stacking die. I adhered the panel to the card using some 3M foam tape. For a nice finishing touch, I covered the pom poms on the girl's hat and the snowbank with liquid glue and poured over some Wow! glitter in white for some sparkle and shine and added some white gel pen to the characters. Be sure to stop over at the SendASmile4Kids blog and see what the rest of the design team created this month. 

Thursday, April 28, 2022

Latte


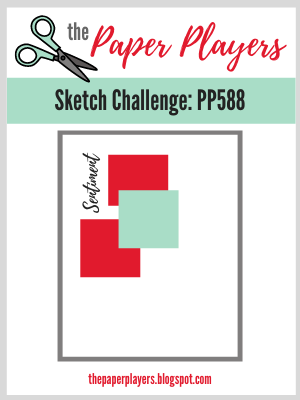
Today's card was created for newest The Paper Players card challenge. To create my card I started by layering a piece of dark blue patterned paper from the Echo Park Coffee 6x6 paper pad onto my white A2 card base. I then cut a smaller panel using plain white cardstock and layered it on top. I cut a few squares of patterned paper from the same Echo Park paper pad and layered them directly onto the card following the sketch. I then stamped, colored, and fussy cut the latte image using Honey Bee Stamps Coffee Break stamp set, Memento tuxedo black ink, and my Copic markers. I popped the image up using Stampin' UP foam dimensionals. I die cut the sentiment using Honey Bee Stamps Perfect Blend Honey Cut dies using more of the same dark blue and white cardstock. I popped the sentiment up too and finished the card off with some white gel details. Thank you for stopping by my blog today. I hope you have a wonderful rest of your day!


Thursday, April 21, 2022

April Showers


I could not think of a more appropriate theme for a card challenge than the April Showers theme at The Paper Players. I'm not sure what the weather is like anywhere else in the world, but here in Southeast Missouri we have had more than our fair share of rain. It's actually raining right now as I am crafting. So, in honor of all of that rain I created this card. I stamped this beautiful image from the Unity Stamp Company Harmony girl in Memento tuxedo black ink onto Copic-friendly cardstock. I colored it with my alcohol markers and then die cut the panel using a Gina Marie Design stitched edge rectangle die. Using some cellophane from a recent stamp purchase I added some Tim Holtz distress ink in broken china and spritzed it with a mini mister. I then selectively added the ink around the colored image to create a misty, rainy sky. I stamped the sentiment from the same stamp set and die cut it using a fishtail banner die from Jillian Vance Designs. I attached it to the card and then popped the panel up off of the card using 3M foam tape for a little dimension. Love how beautifully simple this card is! Thank you for stopping by my blog. I hope you're dry wherever you are. 


Saturday, April 16, 2022

Let It Snow


Hello, happy Saturday! Today's card was created for the latest Fusion Card Challenge and Addicted To Stamps And More challenge. To create my card I started by layering a piece of white cardstock that I had embossed using a Paper Studio snowflake embossing folder onto my A2 card base. I then cut strips of patterned paper from the American Crafts North Pole 6x6 paper pad and adhered them onto the card following the sketch. I die cut a circle using a stitched edge circle die from My Favorite Things and stamped the adorable image from My Favorite Things Merry Kissmas mini stamp set using Memento tuxedo black ink. I colored the image using my Copic markers and added some fun details with my Sakura jelly roll white gel pen. To finish my card I popped the die cut focal panel up off of the card using 3M foam tape. 


Saturday, March 12, 2022

Just Bee-cause


Hello and happy Saturday! We got a snow last night and it's around 21 degrees here today in Southeast Missouri. It's a bit cold to play outside, so I opted to do some light house cleaning and card making today. This card was created for the latest Freshly Made Sketches card challenge. I created my card by embossing black cardstock from Stampin' UP using a Momenta honeycomb embossing folder. I adhered the panel to my white A2 card base. I then added a strip of patterned paper from Pink & Main's Spring Color Pop's 6x6 paper pad to the botton. To help distinguish from the embossed panel and the patterned paper I punched an edge of bright yellow cardstock from Hobby Lobby using a EK Success decorative punch. I adhered that strip at the seam between both panels. I then stamped the bee, the sentiment, and the decorative leaves from the Hampton Art's Hello Honey stamp set using Memento tuxedo black ink. I added a bit of color to the bee and the sentiment using my alcohol markers. I then die cut the panel using a decorative die from Spellbinders. I popped the panel up off of the card using 3M foam tape and added a few black gems from Ki. Thank you for stopping by my blog today!


Sunday, December 12, 2021

Wishing You Warmth and Coziness All Winter Long-Coffee and Cards with Celeste and Deb


Hello and welcome to the December Coffee and Cards with Celeste and Deb! Deb and I decided to use this fun winter/Christmas mood board as the inspiration for this month's collaboration cards. I just love all of the images on this mood board! I have an awesome friend who used to get the KOTM's from Unity Stamp Company and she's been kind enough to let me play with her whole collection...thank you Becky! The October 2018 collection really caught my eye and I decided to use several images from that stamp set. I stamped the background stocking stamp onto some kraft cardstock using Memento tuxedo black ink and then cut the panel down using a Pink and Main rectangle stacking die. I mounted it directly to my white A2 card base. To add some interest to the background I added lots of white gel pen detail to the snowflakes and stockings. I then stamped the focal image onto some white Copic-friendly cardstock and die cut it with a pierced edge oval die from My Favorite Things. I stamped the same image again and fussy cut the scarf and adhered it to the focal panel. I colored the images using my alcohol markers and attached the whole thing to my card. I then stamped the sentiment onto more white card stock and mounted them onto some white cardstock I had colored with my Copic marker to match. To finish off this card off I simply added a few clear rhinestones from Recollections around the focal panel. Love this quick and simple card!
We got a new Scooter's Coffee here in our little town, so I popped in and tried their iced Peppermint Mocha latte! I ran a very cold and windy 5K this morning and this was the perfect way to refresh after my run! Be sure to pop on over to Deb's site and see how she was inspired by the mood board!


Saturday, November 6, 2021

Merry Christmas-Send A Smile 4 Kids


Hello! Welcome to the November Send A Smile 4 Kids card challenge. This month we are creating happy holiday cards for kids. To create my card I started by stamping this adorable little gingerbread man from Purple Onion onto some white Copic-friendly cardstock, colored him using my alcohol markers, and fussy cut him out. I edged him with my Momento tuxedo black marker and popped him up using Stampin' UP foam dimensionals. I then cut a square out of more white cardstock and stamped the sentiment from the Avery Elle Joy To The World stamp set using Versafine onyx black ink. I die cut the square scalloped edge frame from cherry cobbler cardstock from Stampin' UP using a die from Spellbinders. To create the card I started by layering some cherry cobbler cardstock directly onto my white A2 cardbase and then started layering pretty Christmas patterned papers from Echo Park. The collection is so old I've honestly lost track of the name of it and when it was made. LOL. Yes, I'm a paper hoarder! Once I finished layering all of the panels onto the card I popped the focal panel up off of the card using 3M foam tape. To finish the card off I added some black gems from Ki to the corners and a little glitter pen to the details on the gingerbread man. So cute and so very fun!

Saturday, October 9, 2021

Your Wishes Will Come True


Today's card was created for the latest Cards 4 Galz card challenge. The challenge was to create an Oriential themed card. To create my card I started by layering some pretty green polka patterned paper from the Studio Calico Sundrifter 6x6 paper pad onto my A2 white card base. Using some Pink & Main A2 stackable rectangle dies I die cut a white panel using Copic friendly cardstock and then a slightly larger black one using Stampin' Up's basic black cardstock. I stamped the lanterns from the Lawn Fawn Lunar Lights stamp set using Memento tuxedo black ink. I colored them using my alcohol markers, added some white gel pen for highlights, and went over all of them with clear Wink of Stella for a pretty shine. I then stamped the take out box, fortune, and chopsticks from Lawn Fawn's Good Fortune stamp set. I colored them, fussy cut them out, and popped them up off of the card using some Stampin' UP foam dimensionals. For a final touch I added some small black sparkling gems by Ki in each corner. 


Sunday, August 22, 2021

Happy Birthday-Coffee And Cards With Celeste And Deb


Hello and happy Sunday! Welcome to the August collaboration of Coffee and Cards with Celeste and Deb. This month Deb thought it would be fun to create a birthday card. I was pretty happy about that since these are the cards I send the most. This month's card was a Pinterest inspired card. I have seen numerous washi tape candle cards on the site, but have never made one. I have a large collection of washi tapes but admit to rarely using them for anything other than sealing my envelopes. So, I cut a panel down to 4 x 5.25 and adhered several pretty washi tapes to it cutting them at various angles at the top. I trimmed the bottoms off and then added a hand-drawn wick to each candle using my dual tip Memento tuxedo black marker. Using my Copic markers I added flames to each one. I die cut a sentiment using black cardstock and adhered it directly the panel over the candles. I added a black A2 panel to my white card base and then popped the panel up using 3M foam tape for some dimension. To finish my card off I added clear Wink of Stella to the flames and then topped them off with Glossy Accents for some pretty shine and dimension. I love how this turned out. Will have to try this with more masculine washi tapes. 
For my coffee this month I opted for a nice chilled Matcha. Our little cool streak we had last week is gone and we are back to steamy hot, humid days here in Southeast Missouri. This beverage hit the spot while I was out doing my obligatory errands! Now, be sure to pop over to Deb's site and see what fun she created this month for our birthday collaboration. 


Sunday, August 1, 2021

The Early Bird


My second card today was created for the latest Freshly Made Sketches card challenge. Following the sketch I cut down some panels of patterned paper from the Heartland Farm 6x6 patterned paper from American Crafts and popped them up off of the card using 3M foam tape for some added interest. I then stamped the sentiment and the focal character onto some white Copic-friendly cardstock using Memento tuxedo black ink and the Art Impressions Spring Chicken stamp set. I colored the focal image using my alcohol markers and fussy cut her out. I then free handed a speech bubble for the sentiment and mounted them both onto the card using Stampin' UP foam dimensionals. Love how cute this turned out! 


Thursday, July 15, 2021

Season's Greetings


Today's card was created for the latest AAA Cards clean and simple challenge. I will be the first to admit that I struggle with clean and simple cards. I love layers and lots of elements on a card, but I wanted to challenge myself and do something outside of my comfort zone. I just picked up the Concord & 9th Merry Mantle stamp set during a 4th of July sale and thought the wreath in that set would be perfect for this challenge. I stamped it onto some white Copic-friendly cardstock, colored it using my alcohol markers, fussy cut the image, and then edged it with my Memento dual tip marker for nice clean lines. I then die cut a stitched rectangle using Paper Rose stackable dies. I stamped the sentiment from the same Concord & 9th stamp set onto the panel and then popped it up off of my card using 3M foam tape. I then added more foam tape behind my wreath and popped it up over the sentiment. To finish my card off I added some red Stickles around the wreath to mimic berries. Thank you for stopping by my blog today!


Saturday, July 3, 2021

A Very Merry Christmas-SAS4Kids


Hello, and welcome to the July Send A Smile 4 Kids card challenge! This month we are celebrating Christmas in July. The challenge is to create a Christmas card to give to a child. To create my card I started by stamping the adorable Santa image from Inkadinkado's Christmas Characters stamp set onto some 110lb white cardstock using Memento tuxedo black ink. I did some simple coloring on the image using my alcohol markers and then die cut the image into a circle focal panel using a Gina Marie Designs double pierced edge circle die. I die cut a larger circle out of real red cardstock from Stampin' UP using a Spellbinders circle die and then layered the two panels together. I then embossed the background panel using a Provocraft 25 Days Of Christmas embossing folder and adhered it directly to my white A2 card. I cut down some panels from the My Mind's Eye Oh What Fun 6x6 paper pad, framed them out using more real red cardstock and adhered them directly to the card panel. I stamped the sentiment from the same Inkadinkado stamp set using Memento tuxedo black ink, cut it down into a small sentiment panel, and backed it against more real red cardstock. To finish the card off I popped both the sentiment and the focal panel up off the card using some 3M foam tape. I can't wait to see what everyone else on the design team came up with this month! Thank you for stopping by and have a safe and happy 4th of July weekend!

Sunday, May 23, 2021

If Friends Were Flowers-Coffee And Cards By Celeste And Deb


Hello and welcome to the May Coffee and Cards with Celeste and Deb collaboration! This month Deb and I thought it would be fun to play with stencils. To create my card I started by inking a background using some basic 110lb white cardstock, the Sunrise Radiating Rays stencil by My Favorite Things, and Tim Holtz squeezed lemonade distress oxide ink. Using my mini Misti I stamped the sentiment from the Stampendous Hand Of Friendship stamp set directly onto the panel using Memento tuxedo black ink. I stamped the hand and the flower from the same stamp set onto some separate white Copic-friendly cardstock, colored it using my alcohol markers, and then fussy cut the entire image out. I mounted it onto the panel using some 3M foam tape. To finish off the card I added some yellow Stickles to the center of the flower and the bracelets and some pretty yellow 6mm sequins from Pretty Pink Posh. Love how this card turned out! 

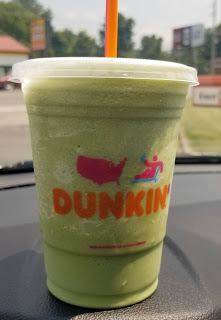
For my coffee this month I popped by my local Dunkin Donuts for a nice iced matcha latte! Now be sure to pop over to Deb's blog and see what she created using stencils!


Saturday, February 6, 2021

Have A Happy Sunny Bunny Day-SAS4Kids


Hello, happy February! This month at Send A Smile 4 Kids we are creating spring/Easter cards for kids. I wanted to create a fun card that would work for either a boy or a girl. I cracked out my Darcie's Heart & Home Feathers and Fur stamp set and stamped the adorable bear, bunny, and chick images onto some white Copic-friendly cardstock. I colored them using my alcohol markers and then stamped their "hands" separately, colored them, and fussy cut them out. Using patterned paper from the Doodlebug Springtime 6x6 paper pad I layered a green base onto my A2 white card base and then created a panel using the colored images and more of the patterned paper and die cut it using a stitched edge rectangle die from Gina Marie Designs. I popped it up off of the card using some 3M foam tape for some fun dimension. I added a small fishtailed banner at the lower left side of the card. I stamped the sentiment from the stamp set using Memento tuxedo black ink and then die cut it using a pierced edge circle die from My Favorite Things and then added it some of the same patterned paper I used in the background using a slightly larger Spellbinders circled die. The sentiment also got popped up for a bit more dimension. To finish this fun card off I added some white gel pen details to the critters and then added some light green enamel dots from Snap at the corners. I love this adorable card and can't wait to see what the rest of the team created for this month's challenge!  


Sunday, January 10, 2021

You're fabulous Dahling!


Hello and happy Sunday! It's cold and dreary here in Southeast Missouri, so the perfect day to stay inside and get crafty. My card today was created for the latest Less Is More card challenge. To create my card I started by layering some beautiful pink patterned paper that I've had in my stash for years onto my white A2 card base. I cannot even recall who made the paper but I know the name of the collection is Amore.  Next I stamped one of the purses from Skipping Stones Design Birthday Purses stamp set onto some white Copic-friendly cardstock. I colored the image using my alcohol markers, fussy cut it, and went around the edges with my dual tip Memento tuxedo black marker for a nice crisp look. I die cut a focal panel using a stitched edge rectangle die from Gina Marie Designs and stamped the sentiment from the same Skipping Stones Design stamp set using Versafine onyx black ink. I popped the purse image up using some 3M foam tape and adhered it to the focal panel above the sentiment. I kept this card pretty simple so I finished it off my added some clear rhinestones from Paper Recollections in the four corners and on the clasp of the purse. Thank you for stopping by my blog today, and if you like my card be sure to leave a comment. I read and enjoy them all!

Sunday, August 30, 2020

Seize The Cupcake


My card today was created for the latest Watercooler Wednesday card challenge. To create my card I started by die cutting a focal panel of kraft cardstock using a stitched scalloped edge rectangle die from Gina Marie Designs. I added white gel pen around the stitching lines for some added interest to make the panel pop against the white A2 card panel. I stamped the cupcake images from the Hero Arts Cupcakes stamp set onto some white Copic-friendly cardstock and colored them using my alcohol markers. I fussy cut the images out and edged them all using my Memento tuxedo black dual tip marker to make them look clean and crisp. I popped them all up off of the focal panel using some foam squares and then added some Clear Wink of Stella to the frosting on all three cupcakes. To finish my card off I stamped the sentiment from the same stamp set and added some pretty sequins I picked up at my local Tuesday Morning. Love how fun and whimsical this card is!


Friday, August 28, 2020

Happy Birthday


Hello and happy Friday! I hope everyone is staying safe out there. My card today was created for the latest Inspired By card challenge.
To create my card I started by layering some patterned paper from the Pebbles Garden Party 6x6 paper pad onto my white A2 card base. I then stamped the adorable pups and heart from the Paper Smooches Paws For A Cause stamp set onto my white cardstock using Memento inks. I then stamped the sentiment from the Paper Smooches Sentiment Sampler stamp set using more Memento ink. I added more patterned paper from the same Pebbles paper pad at the top of the panel. For some added interest and to break up the cardstock and patterned paper I wrapped some dark brown twine from We R Memory Keepers around it and tied a bow. I added some 3M foam tape behind the panel and popped it up off of the card for some fun dimension. I appreciate you taking the time to stop off at my blog today and, if you like my card, be sure to leave a comment. I read and appreciate them all!