Showing posts with label
Pink & Main nesting A2 rectangle dies.
Show all posts
Showing posts with label
Pink & Main nesting A2 rectangle dies.
Show all posts
Happy Sunday! Today's card was created for the latest Just Add Ink card challenge. I layered some dark brown cardstock onto my A2 card base, then some light pink cardstock on top. I then die cut a cut out panel using white cardstock and nesting rectangle dies from Pink & Main to create the lid of my donut box. I wrapped some white twine from my stash around it and added a bow and some thin foam tape to elevate the panel. I stamped and colored the donuts from Close To My Heart Treats Of Friendship Occasions stamp set six times, colored them, and fussy cut them. I arranged them in the donut box using foam tape for dimension. I finished this card off by add Star Dust Stickles to all of the donut sprinkles and popped the sentiment from the same stamp set up under the package bow. Thank you for stopping by my blog today. I hope you have a lovely weekend!
This month at Send A Smile 4 Kids we are celebrating Christmas in July. I created this fun card using Sunny Studio's Christmas Cookies mini stamp set and some white heat embossing. I stamped the images onto some sand cardstock from Hobby Lobby using Versamark ink and Ranger's detail white embossing powder. I used my Copic markers to color the images in shades of brown and pink. I cut the panel down using a Pink & Main nesting rectangle die. I layered it onto a scalloped edge stitched panel by Gina Marie Designs that I cut down using plain white cardstock. I adhered both panels to my card base created out of more sand cardstock. I stamped the sentiment from the same stamp set onto a small strip I had colored with my pink Copic marker, cut it down into strips, and popped it up off of the card using foam tape. This card was so simple to create and really packs a punch! Be sure to stop by the Send A Smile 4 Kids blog and check out this month's challenge!
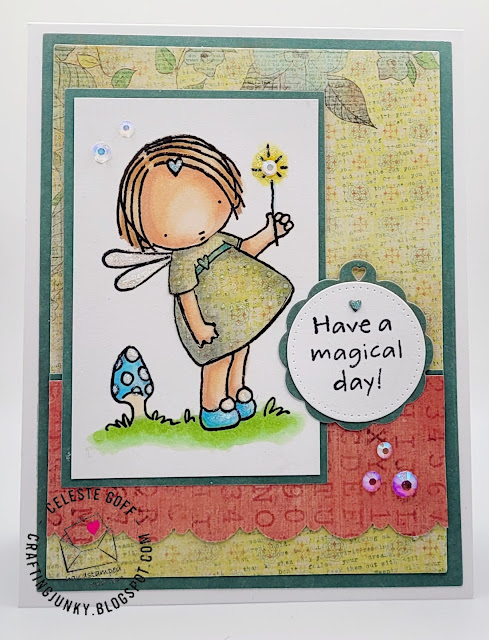

My adorable little fairy card was created for the latest AAA Birthday card challenge. I started by layering some pretty patterned papers from We R Memory Keepers Anthologie 6x6 paper pad onto my card. I stamped the fairy from MFT's Pure Innocence Fairy Girl stamp set onto white alcohol marker-friendly cardstock and colored it with my Copics. Using a Pink & Main's nesting rectangle die, I die cut the focal panel and the layering piece. I adhered them to the card. I paper pieced the dress from the same patterned paper I used for my background panel, fussy cut it, and adhered it directly onto the focal image. I stamped the image from the same stamp set and die cut it using a pierced edge nesting circle die from MFT and a decorative edge scalloped circle die from Papertrey Ink. I adhered them together and adhered it to the card next to the focal panel. To finish off my card, I added some clear crystal drops from Simon Says Stamp, and some pretty Nuvo Crystal Drops in white blizzard to the mushroom, the fairy wings, the wand, and her dress. Love the fun sparkle and shine it adds. Thank you for stopping by my blog today. Hope you have a wonderful day!


.jpg)


