This month at Send A Smile 4 Kids we are celebrating all things Halloween/Fall. Several years ago, I picked up a cute paper pack from Design, Inc that I picked up in the dollar bin at Target. Not only did it have fabulous fall themed papers but a super cute stencil with leaves, acorns, pumpkins, a turkey, and a pumpkin pie. I opted to use both today. I cut the patterned paper down to 4x5.25 inches and matted it onto some darker craft cardstock I had in my stash. I stenciled the pumpkin, acorn, and two leaves in fall-colored inks. I added white gel pen details to them all, and fussy cut the images out. I adhered them together and mounted foam tape on the back of the image. The image also came from the dollar bin at Target and was inked in warm cocoa ink from Gina K Designs. I cut the sentiment down into a strip, mounted it on more of the dark craft cardstock, and adhered it to the card. My finishing touch was adding a fishtail banner made from the same cardstock using a banner die from Unity Stamp Company. Now, be sure to head over to the Send A Smile 4 Kids blog and see how the other design team members were inspired this month. We would also love it if you played along!
Welcome to my blog and thank you for visiting! I'm a Surgical Scheduler who loves exercise, coffee (sometimes too much coffee), and creating fun things in my spare time. I'm a single mom to two wonderful grown children and grandma to two beautiful granddaughters! I love sharing my card creations with my friends and the crafting world. To subscribe to my blog please click the "follow" button below or enter your email address in the "follow by email" box to the right.
Saturday, September 6, 2025
Sunday, August 24, 2025
Come Sail Away With Me-Coffee And Cards With Celeste And Deb
Saturday, August 2, 2025
Happy Birthday Princess-Send A Smile 4 Kids
This month at Send A Smile 4 Kids, we are celebrating all things birthday! I have a good friend who has 3 kiddos, and between her kiddos and my grandkids, I feel like I'm always making kid birthday cards. This one is for my buddy's youngest little girl. To make this card I layered red cardstock onto my white A2 card base. I then matted a piece of green patterned grid paper from the American Crafts Neapolitan 12x12 paper pad onto plain white cardstock. I then matted a piece of floral paper from the same paper pad onto more red cardstock. I layered them together. I then stamped the adorable little girl from My Favorite Things Pure Innocence Birthday Princess stamp set onto alcohol marker-friendly cardstock. I colored in the skin, hair, and cake. I stamped the crown and dress onto patterned paper from the paper pad, fussy cut them out, colored them with alcohol markers for depth and dimension, and paper pieced them onto the focal image. I fussy cut her out and mounted her with foam tape for dimension. I adhered her to the left of the card on a strip of red cardstock that I white heat embossed the sentiment from the same stamp set. I finished the card off with some red sequins and white gel pen detail. Now, be sure to head over the Send A Smile 4 Kids blog to see how the rest of the design team was inspired by this month's challenge. We would also love it if you played along!
Sunday, July 20, 2025
Relax And Enjoy Your Day-Coffee And Cards With Celeste And Deb
Hello! We are well into July now, and man is it hot! Debra and I decided to go with a summer theme this month for our coffee and cards collaboration. I wanted my card to look very similar to our inspiration photo. I started with some crumb cardstock and added sandy texture to it by stamping the dotted detail from the Stampendous Sunny Flowers stamp set onto the paper using Sahara Sand ink from Stampin' UP. Then I took a piece of textured white cardstock from my stash and inked it up with Tim Holtz Salvaged Patina distress ink. I then tore the edges and created 4 panels. I adhered them to my panel at an angle to look similar to the inspiration photo. I stamped the seashells, and flip flops from Honey Bee's Flippin' Fabulous stamp set, colored them with alcohol markers, die cut them, and adhered them to my beachy scene using liquid glue. I stamped the sentiment from the same set, die cut it, and popped it up using foam tape. I added stardust Stickles to the foam on the waves, the shells, and my flipflops. I added some clear rhinestones from Recollections to the flip flops for a finishing touch.
Sunday, July 6, 2025
Hi
Hello, happy Sunday! I hope everyone had a safe and fun 4th of July weekend. I absolutely had to join the latest card challenge at Just Us Girls this week, because my lovely friend Lisa Elton of Paper Tales mailed me a card this week with this amazing die. It was like a sign from the Universe. LOL. The Hi die from The Stamp Market is huge and takes up a large portion of an A2 sized card, so I decided to keep it simple and let the sentiment be the star. And since it creates both a positive and negative when you die cut it, I created two cards with one swipe! Using patterned paper from Fancy Pants Meology Painterly 12x12 collection, I created both focal panels by die cutting them with a stitched rectangle die from Paper Rose. I die cut the Hi using plain white cardstock and more patterned paper from the same Fancy Pants collection. On the chartreuse card, I used the white outline and filled in the letters with the patterned paper. On the blue card, I did the opposite. I embellished both with more patterned paper from the same collection by using a flower puch from Stampin' UP and finished them off with large clear rhinestones from Recollections! Thank you, Lisa, for the lovely gift, and thank you to all who have popped by my blog today! Be sure to tell me which card you liked best.
You Look Better Without Him
Today's card was created for the latest Paper Players card challenge. No one likes to think about a long-term relationship ending, but we all know it happens. I have a friend whose daughter just ended her marriage, and she asked me to create a card for her. I used Kelly Purkey's F Bomb stamp set and heat embossed it onto some pink cardstock using Ranger's white detail embossing powder. Using various punches from Stampin' UP and dies from Spellbinders, I created lots of circles, hearts, and flowers using beautiful, patterned paper from Echo Park's Hello Valentine 6x6 paper pad. I created a panel by die cutting a rectangle using a Paper Rose stitched rectangle die, embossed it using a Spellbinders plaid embossing folder, and adhered the whole panel down onto my white A2 card base using thin foam tape for a little added dimension. I adhered the circles I created onto the focal panel using Bearly Art liquid glue. I embellished the card using some Recollections clear rhinestones in various sizes. I love how this card turned out! Thank you for visiting my blog today. I hope you have a wonderful rest of your weekend.
Saturday, July 5, 2025
Sweet Holiday Wishes-Send A Smile 4 Kids
This month at Send A Smile 4 Kids we are celebrating Christmas in July. I created this fun card using Sunny Studio's Christmas Cookies mini stamp set and some white heat embossing. I stamped the images onto some sand cardstock from Hobby Lobby using Versamark ink and Ranger's detail white embossing powder. I used my Copic markers to color the images in shades of brown and pink. I cut the panel down using a Pink & Main nesting rectangle die. I layered it onto a scalloped edge stitched panel by Gina Marie Designs that I cut down using plain white cardstock. I adhered both panels to my card base created out of more sand cardstock. I stamped the sentiment from the same stamp set onto a small strip I had colored with my pink Copic marker, cut it down into strips, and popped it up off of the card using foam tape. This card was so simple to create and really packs a punch! Be sure to stop by the Send A Smile 4 Kids blog and check out this month's challenge!
Sunday, June 29, 2025
Happy Birthday
Today's card was created for the latest Freshly Made Sketches card challenge. I recently picked up the Penny Black Nature's Jewels stamp set from an online purging sale, and immediately had to use it when it came in. Using a 1.25-inch punch from Paper Shapers, I punched three squares. I stamped the floral images on the squares and colored them using my alcohol markers. I matted them onto black cardstock from Hobby Lobby. I die cut a smaller piece of white cardstock using a Paper Rose nesting stitched rectangle die. I embossed the panel using a Lifestyle Crafts geometric embossing folder. I matted that panel onto black cardstock and adhered it onto the card panel. Using a piece of blue patterned paper from my stash that is so old I no longer know who makes it, I created the side border. I popped the stamped squares up using foam tape and adhered them to the card. Using a sentiment stamp from Stampers Anonymous Crazy Talk, I created the sentiment strip and adhered that to the card according to the sketch. I finished the card off with some black gems from Simon Says Stamp. Thank you for visiting my blog today!
Sunday, June 22, 2025
Enjoy Life's Simple Pleasures-Coffee And Cards With Celeste And Deb
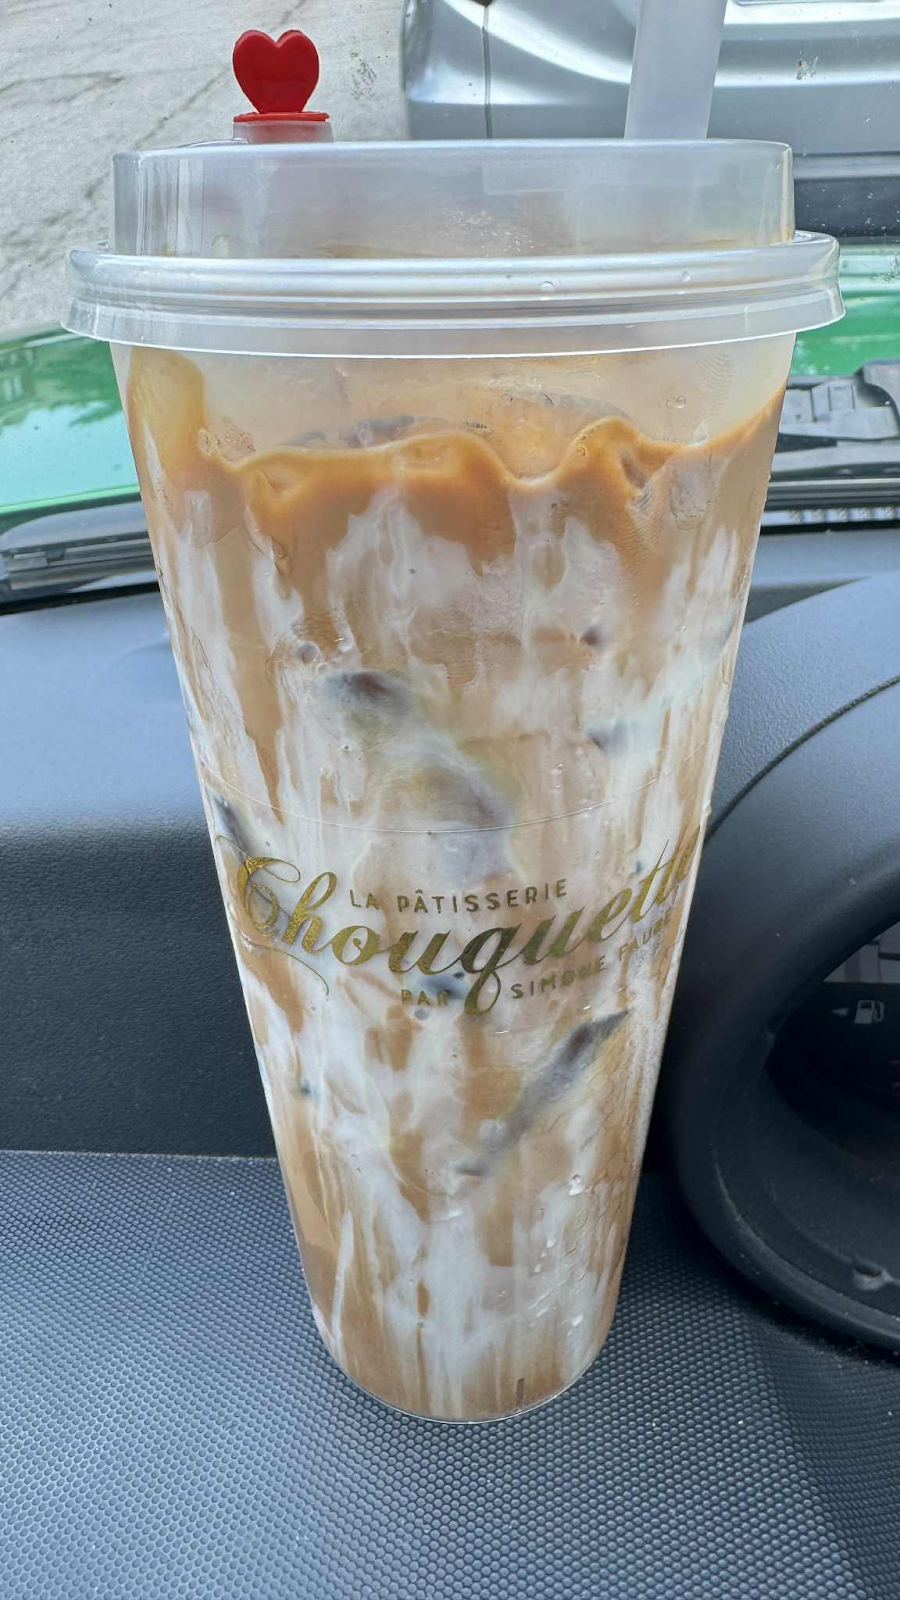
It's been getting brutally hot and humid here in Southeast Missouri, so I opted for a nice, ice-cold S'mores blended latte from Scooters. It definitely helped cool things down and was delicious! Now, be sure to stop by Deb's blog and see how she was inspired. She creates the best cards, and her creations are always so fun!
Saturday, June 7, 2025
Scooting By To Say Hi-Send A Smile 4 Kids
This month at Send A Smile 4 Kids we're creating cards that celebrate summer fun. I had to crack out an oldie but goodie for this card. I stamped by stamping the scooter from Paper Smooches Spiffy Scooters stamp set onto white card stock. I colored the lights and wheels using my alcohol markers. Using patterned papers from Simple Stories Sunkissed 6x8 paper pad, I stamped the scooter again onto various patterned papers, fussy cut them out, and adhered them to the original image. Using real red cardstock from Stampin' UP and a pretty orange polka paper from the same Simple Stories paper pad I created my card base. I then created a contrasting strip for the bottom half of the card using a pretty floral paper from the same paper pad and red cardstock. I created the frilly border using a border punch from EK Success. Using Spellbinders nesting circle and scalloped circle dies I created the focal panel using red cardstock and a nice blue grid patterned paper. I popped up the circle panel using thin foam tape. I adhered the scooter onto the circle with a few clouds I had punched using a mini cloud punch by Fiskars. I finished the card off by stamping the sentiment from the same stamp set at the bottom of the card. I love how cute this sweet, summer card is! Be sure to stop by the Send A Smile 4 Kids blog and see how the rest of the design team was inspired by this month's challenge. We would love if you were to join us with a fun summer creation!


.jpg)