Showing posts with label Just Us Girls Challenge. Show all posts

Tuesday, September 23, 2025

Many Thanks


Today's card was created for the latest Just Us Girls card challenge. I heat embossed a sentiment from Hero Arts Grateful Pumpkin die and stamp bundle onto my kraft cardstock panel using Ranger gold detail embossing powder. I then layered the panel onto my A2 white card base. Using plain white cardstock, I stamped and heat embossed the pumpkins and leaves from the same stamp and die bundle. Using my Ranger distress inks, I colored them all using a blending brush, die cut them out using their coordinating dies, and layered them onto my card panel. I finished them off with some gold sequins from The Ton. Thank you for visiting my blog today!


Sunday, July 6, 2025

Hi


Hello, happy Sunday! I hope everyone had a safe and fun 4th of July weekend. I absolutely had to join the latest card challenge at Just Us Girls this week, because my lovely friend Lisa Elton of Paper Tales mailed me a card this week with this amazing die. It was like a sign from the Universe. LOL. The Hi die from The Stamp Market is huge and takes up a large portion of an A2 sized card, so I decided to keep it simple and let the sentiment be the star. And since it creates both a positive and negative when you die cut it, I created two cards with one swipe! Using patterned paper from Fancy Pants Meology Painterly 12x12 collection, I created both focal panels by die cutting them with a stitched rectangle die from Paper Rose. I die cut the Hi using plain white cardstock and more patterned paper from the same Fancy Pants collection. On the chartreuse card, I used the white outline and filled in the letters with the patterned paper. On the blue card, I did the opposite. I embellished both with more patterned paper from the same collection by using a flower puch from Stampin' UP and finished them off with large clear rhinestones from Recollections! Thank you, Lisa, for the lovely gift, and thank you to all who have popped by my blog today! Be sure to tell me which card you liked best.  


Sunday, March 23, 2025

Jump For Joy


Today's card was created for the latest Just Us Girls card challenge. I saw Lisa Elton's card posted on her Facebook page, and it really inspired me to crack out an old stamp set I've not used in years. I stamped the sheep, the flowers and grass, and the sentiment using Elzybells Jump For Joy stamp set and Memento tuxedo black ink. I created masks for the sheep and stenciled the background using My Favorite Things Mini Cloud Edges stencil and bashful blue ink from Stampin' UP. I die cut the panel using a stitched edge rectangle die from Paper Rose. I colored the images using my Copic markers and finished the card off by adding some mini clear rhinestones from Recollections to the centers of each of the flowers. Thank you for stopping by my blog today. 

Tuesday, February 25, 2025

Thinking Of You On Your Birthday


My card today was created for the latest Just Us Girls card challenge. I tried to use some of the fun colors in the mood board on my card. I started by die cutting a piece of bright pink cardstock from Colorbok's Cardstock Carton paper pad using CTMH Stitched Lattice background plate. The "thinking of you on your" sentiment came from The Greetery's PreText Sentiments stamp set. And the remainer of the images were from the SSS Birthday Mail freebie I received from my last order with them. The images were all stamped onto white Copic-friendly cardstock, colored with my Copic markers, and fussy cut out. I popped them all up using foam tape and arranged them on the card. I finished off the card using 6mm and 3mm clear sequins from Pretty Pink Posh. Thank you for stopping by my blog today! 

Sunday, November 17, 2024

Joy


Hello, happy Sunday! I hope everyone had a wonderful weekend. Today's card was created for the latest Just Us Girls card challenge. I created this card by layering some basic black cardstock onto my white A2 card base. Then, using piece of patterned paper from The Paper Studio's Vintage Christmas 6x6 paper pack, I created a frame that I popped up off of the card base using thin foam tape. I then die cut the word Joy using Echo Park's Santa Claus Lane Wreath Of Joy die and red and green cardstocks. I adhered all of the elements to the card, and finished it all off with red gem stickers from Honey Bee Stamps Harvest Festival sticker pack and white gel pen details. Thank you for stopping today, and if you like my card, be sure to leave a comment. I appreciate and read them all!

Saturday, May 18, 2024

Take Me To The Beach


My card today was created for the latest Just Us Girls card challenge. I love this beautiful mood board, and just had to play along! I created my card by stenciling the Newton's Nook Retro Sun & Palms stencil (a freebie that I won recently) onto some white cardstock using Tim Holtz distress inks. I die cut the panel using a wonky stitch stacking rectangle die from Gina Marie Designs. I stamped the images and sentiment from Honey Bee's Flippin' Fabulous stamp set and used the coordinating die cuts to cut them out. I colored them and adhered them to my focal panel. I popped the focal panel up off of the card using foam tape and added a few clear rhinestones from Recollections for a pretty finishing touch. Thank you for stopping by my blog today. I hope you have a fabulous day!


Tuesday, May 14, 2024

Friends Are Like Flowers


My card today was created for the latest Just Us Girls card challenge. I started by stamping my gnome garden scene from Inkadinkado's Garden Gnome stamp set onto some white Copic-friendly cardstock and colored them using my alcohol markers. I trimmed the panel down and mounted it onto some green cardstock. I stamped the sentiment from Stampendous True Friends stamp set and created a circle panel using a circle punch. Using patterned paper from Echo Park's Flower Market 6x6 paper pad I created a fun layout. I finished off my card by adding a stitched banner I created using a Unity die and green cardstock. I adhered that to the top left of my card for a bit of balance and visual interest. I finished off the card by adding a bit of white gel detail to the gnomes. Thank you for stopping by my blog today. I hope you have a wonderful day!


Sunday, March 27, 2022

Friends Are The Gardeners Of Our Souls


Hello and happy Sunday! I created my card today for the latest Just Us Girl's card challenge. I was browsing through my local Hobby Lobby yesterday and happened upon the cutest little gnome stamp set and couldn't resist buying it. As soon as I saw this challenge today I knew I had to use it. I started by stamping the gnome images from Inkadinkado's Garden Gnome stamp set onto Copic-friendly cardstock and colored them using my alcohol markers and the colors in the photo as my guide. I then die cut the images down to a focal panel using a Paper Rose stitched rectangle die. Using patterned papers from the Little Yellow Bicycle Fern & Forest 6x6 paper pad I created a fun backdrop for my focal panel. I then stamped the sentiment from the Stampendous True Friends stamp set and die cut it out using a pierced edge oval die from My Favorite Things. I finished my card off by scattering a few clear rhinestones from Recollections around the sentiment and main images. Thank you for stopping by my blog today!


Sunday, March 6, 2022

I'm A Lucky Girl


Hello and happy Sunday! Today's card was created for the latest Just Us Girls card challenge. I saw a great plaque the other day that had a four-leaf clover on it and the saying "Friends are like four-leaf clovers. Hard to find and lucky to have." I absolutely love that and wanted to create a card with that on the inside for my bestie, who has had a pretty rough year. For the outside of the card I started by die cutting the Close To My Heart background stitched lattice plate and cutting it at a diagonal. I then cut down some four-leaf patterned paper that I've literally had in my stash for so many years I can no longer recall who makes it. I edged it with some Kelly green cardstock from Hobby Lobby. I adhered all of it to my A2 card panel. I die cut an oval using a MFT pierced oval die using the same green cardstock, adhered it to the card, and added dashed lines around the outer edge using my white gel pen. I then die cut the t-shirt from the MFT Girly Graphic die and stamp set and then stamped the four-leaf clover in Memento ivy green ink. I stamped the sentiment right over it using Gina K Designs basic black ink. I popped the t-shirt up off of the focal panel using Stampin' UP foam dimensionals. I finished my card off by added some clear rhinestones in various sizes from Recollections. Thanks for stopping by my blog!


Wednesday, October 6, 2021

Have A Frightfully Spooky Halloween!


Today's fun Halloween card was created for both The Paper Players and Just Us Girls card challenges. To create my card I started by die cutting a panel of plain white cardstock using a Paper Rose stitched rectangle die. Using some Inkadinkado masking paper I masked off a large circle in the upper right hand corner and inked the panel using Tim Holtz distress inks and a blending tool. I Then removed the mask and added some color to the moon using my Copic markers. I then stamped the witch from the Pebbles/American Crafts Midnight Haunting stamp set using Versafine onyx black ink and heat embossed it using my heat tool and some clear embossing powder from Zing. I then stamped the sentiment from the My Sentiments Exactly Halloween Innies & Outies stamp set and heat embossed it. Finally, I stamped the trees on the bottom of the panel using Close To My Heart's Always Grateful Seasons & Nature stamp set and heat embossed them. To finish my card off I popped the panel up off of the card using some fun foam, added a few 6mm clear sequins from Pretty Pink Posh, and a few twinkly stars in the sky using my white gel pen. Thank you for stopping by my blog!


Sunday, February 28, 2021

Thinking Of You


Hello and happy Sunday! It's the last day of February and it's pouring here in Southeast Missouri. While it makes getting outside to play difficult it does allow me some time to stay in and get inky. Today's card was created for the latest Just Us Girls card challenge.
To create my card I started by smooshing some Tim Holtz distress inks onto one of my square acrylic blocks. I spritzed it with some water using my Mini Mister and then pressed the block directly onto my focal panel. I let the ink air dry and then stamped the trees from the Inkadinkado Trees stamp set onto the panel using Versafine onyx black ink. I stamped the sentiment from the My Favorite Things Inspired By Flowers #4 stamp set using the same ink. I mounted the panel onto some basic black cardstock from Stampin' UP and adhered the whole thing to my A2 white card base. To finish it off I added some black self adhesive gems from Ki to the corners. I love cards that I can give to either a male or female recipient! Thank you for stopping by my blog. If you enjoyed my card be sure to leave a comment. I read and appreciate them all! 

Sunday, August 30, 2020

Especially For You


Today's card was created for the latest Just Us Girls card challenge. To create my card I started by layering some fun text patterned paper from the Pebbles Garden Party 6x6 paper pad onto my white A2 card base. I then die cut some kraft cardstock down into a focal panel using a stitched scalloped edge die from Gina Marie Designs and added some white gel pen around the stitched detail to really make it pop. I cut the butterflies out using a punch from Martha Stewart and more patterned paper from the same Pebbles paper pad. I attached them all with a glue dot and popped the wings up with foam squares for added dimension. I stamped the sentiment in Versafine smokey grey ink and attached the focal panel to the card. For a nice finishing touch I added some seed pearls from Paper Studios to the centers of the butterflies. Thank you so much for visiting my blog today! 

Sunday, May 19, 2019

Happy Birthday

Hello and happy Sunday! I've been so busy with work and running/weight lifting that I've literally not had time to sit down and get crafty all week. I forced myself to get inky this morning though. Today's card was created for this week's Just Us Girls photo inspiration challenge. To create my card I started by layering an embossed panel onto my white A2 card base that I had embossed using a Lifestyle Crafts decorative embossing folder. I then layered a thin decorate strip of patterned paper from the Bazzill Basics Antique Aged Papers 6x6 paper pack at the center of the card to help break up the white a bit. I then die cut and stamped the roses using the My Favorite Things MPD Rose Bouquet stamp set and coordinating dies and some beautiful inks from Altenew to coordinate with the inspiration photo. I die cut a circle using a My Favorite Things pierced edge circle die and some basic black cardstock from Stampin' UP and adhered it directly to the center of my card. I then layered the roses and leaves around the center to create a nice balanced cluster. I stamped the sentiment from the Sweet Stamp Shop's Just The Basics stamp set using Versamark ink and some Recollections white detailed embossing powder in snow. I popped the sentiment up off of the card using some Scrapbook Adhesives foam squares and that completed my card. I hope you like it!

Sunday, April 28, 2019

You're So Special


Hello and happy Sunday! Not sure what's going on with Mother Nature lately but it's late April and my region is still getting chilly, winter weather but I need to mow my lawn. Go figure! Anyway, on to crafty things. My card today was created for the latest Just Us Girls card challenge. To create my card I started by stamping the Hero Arts Leaf & Floral Background stamp onto some white cardstock with Versamagic and heat embossed with clear embossing powder by Zing. I heat set the panel and then inked it using my Tim Holtz round blending tool and ocean mist and edible eggplant inks from Gina K Designs. I wiped the panel down with a clean tissue to ensure that none of the ink was left standing on the embossed areas and then mounted up off of my white A2 card base using some fun foam from Hobby Lobby. I stamped the sentiment and the peacock from the Hero Arts Beautiful Peacocks stamp set onto some white Copic-friendly cardstock and then colored the peacock using my alcohol markers and the inspiration colors. I die cut the image using a pierced edge oval die from My Favorite Things and adhered it directly onto the background panel. For a little sparkle and shine I added some shimmer to the peacock using my Spectrum Noir clear shimmer pen and added a few Recollections clear rhinestones around the sentiment. Thank you for popping by my blog today.  

Saturday, March 30, 2019

Congratulations On Your Wedding!

My second card today was created for the latest Just Us Girls card challenge. To create my card I started by stamping the images onto some white cardstock using the Stampin' UP Love & Laughter stamp set and Versafine onyx black ink. I stamped the flowers from the same stamp set on top of the cake using Stampin' UP's bashful blue ink. I then used the Stampin' UP Framed Tulips embossing folder to frame out the image and trimmed along the edges. I added some blue textured cardstock from The Paper Studio onto my white A2 cardbase and then popped the embossed focal panel up off of the card using 3M foam tape. For some added sparkle and interest I added some clear rhinestones from Recollections to the flowers and the corners of the card panel. If you like my card be sure to leave a kind word. I appreciate them all!

Sunday, July 29, 2018

Happy Birthday-Just Us Girls Challenge


My second card today was created for the latest Just Us Girls card challenge. I have been stuck in a coloring rut lately. It seems that anytime I stamp an image I automatically reach for my Copic markers. I have been trying to get myself to branch out and try to watercolor more. So, when I saw the inspiration photo I thought it would be a good time for me to actually challenge my watercoloring skills. To create my card I started with some kraft cardstock from Hobby Lobby. I inked up the Stampin' UP French Script background stamp using Tim Holtz black soot ink and spritzed it with my mini mister to give it a nice loose look on the text since I was going to be stamping it sideways onto my A2 card base. Using some Canson coldpress watercolor paper I stamped the pretty poppies and leaves from the Stampers Anonymous Flower Garden stamp set and the sentiment from the Papertrey Ink Botanical Silhouettes stamp set using Versafine onyx black ink. I covered all of the stamped images with Zing clear embossing powder and heat set them. Using an inexpensive watercolor set I picked up at Hobby Lobby I watercolored the images and set it aside to dry. Once dry I die cut it down into a panel using a Gina Marie Designs stitched rectangle die. I added popped the panel up off of the card using some fun foam from Hobby Lobby and added some clear rhinestones by Recollections to the center of the poppies and a few Nuvo crystal drops in ebony black around the panel to finish this card off. I hope you like it. 

Wednesday, May 23, 2018

Wishing You A Very Happy Birthday

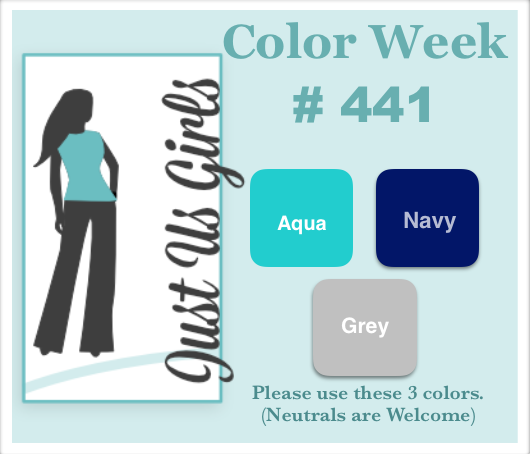
Hello...happy hump day! Today's card was created for the latest Just Us Girls challenge. I don't know why I struggle with color challenges but they are always so hard for me. There is only one more day left to enter this challenge so you know I had to ponder this one all week. LOL. To create my card I started by layering on some inexpensive grey cardstock from Hobby Lobby onto my white card base. I then cut a smaller white cardstock panel and stamped the elements from Stampin' UP's Kinda Ecclectic using Gina K Designs inks in navy and ocean mist and Memento ink in London fog. I then stamped the floral images from the Stampin' UP's Floral Shop and Petite Petals stamp sets using more of the same blue inks and used the coordinating punches to punch the shapes out. I added a small fishtail banner using the same grey cardstock and a Jillian Vance Design die and adhered that down to the card base. I popped the floral images up off of the card using Stampin' UP foam dimensionals. I stamped the sentiment from the Verve Stamps Wishing You stamp set using more of the navy ink and added some pretty little clear rhinestones from Recollections as a finishing touch. Thank you for visiting my blog today and if you like my card be sure to leave a comment and hit the subscription button! 


Sunday, November 26, 2017

Merry Little Christmas

I just picked up the fabulous Essentials By Ellen Christmas Scribbles stamp set on a Facebook destash and knew as soon as I saw the newest Just Us Girls photo challenge that I would have to use it! I wanted to keep the card pretty clean and simple, which is a difficult task for me. I like layers and lots of embellishments, but this stamp set made it easy. I started by layering some cherry cobbler cardstock from Stampin' UP onto my white card base. Using my mini-Misti stamping tool I stamped the branches, pinecone, snowflakes, and two ornaments from the stamp set onto some Copic-friendly white cardstock. Using the inspiration photo I colored the images trying to stay close to the color palette. I then die cut the colored piece of cardstock down using a Gina Marie Designs stitched rectangle die and mounted it onto the card using some 3M foam tape. I took another strip of the same red cardstock and heat embossed the sentiment from the same stamp set using Recollections snow white detail embossing powder. I ran that strip of paper through my Cuttlebug using the same rectangle die so the edges would match the panel and mounted it directly onto the panel. To finish the card I added some clear Wink of Stella to all of the stamped elements. I only wish I could have captured all of the wonderful shine it added! I think this would be a fun card to mass produce. I hope you like it.


Sunday, November 12, 2017

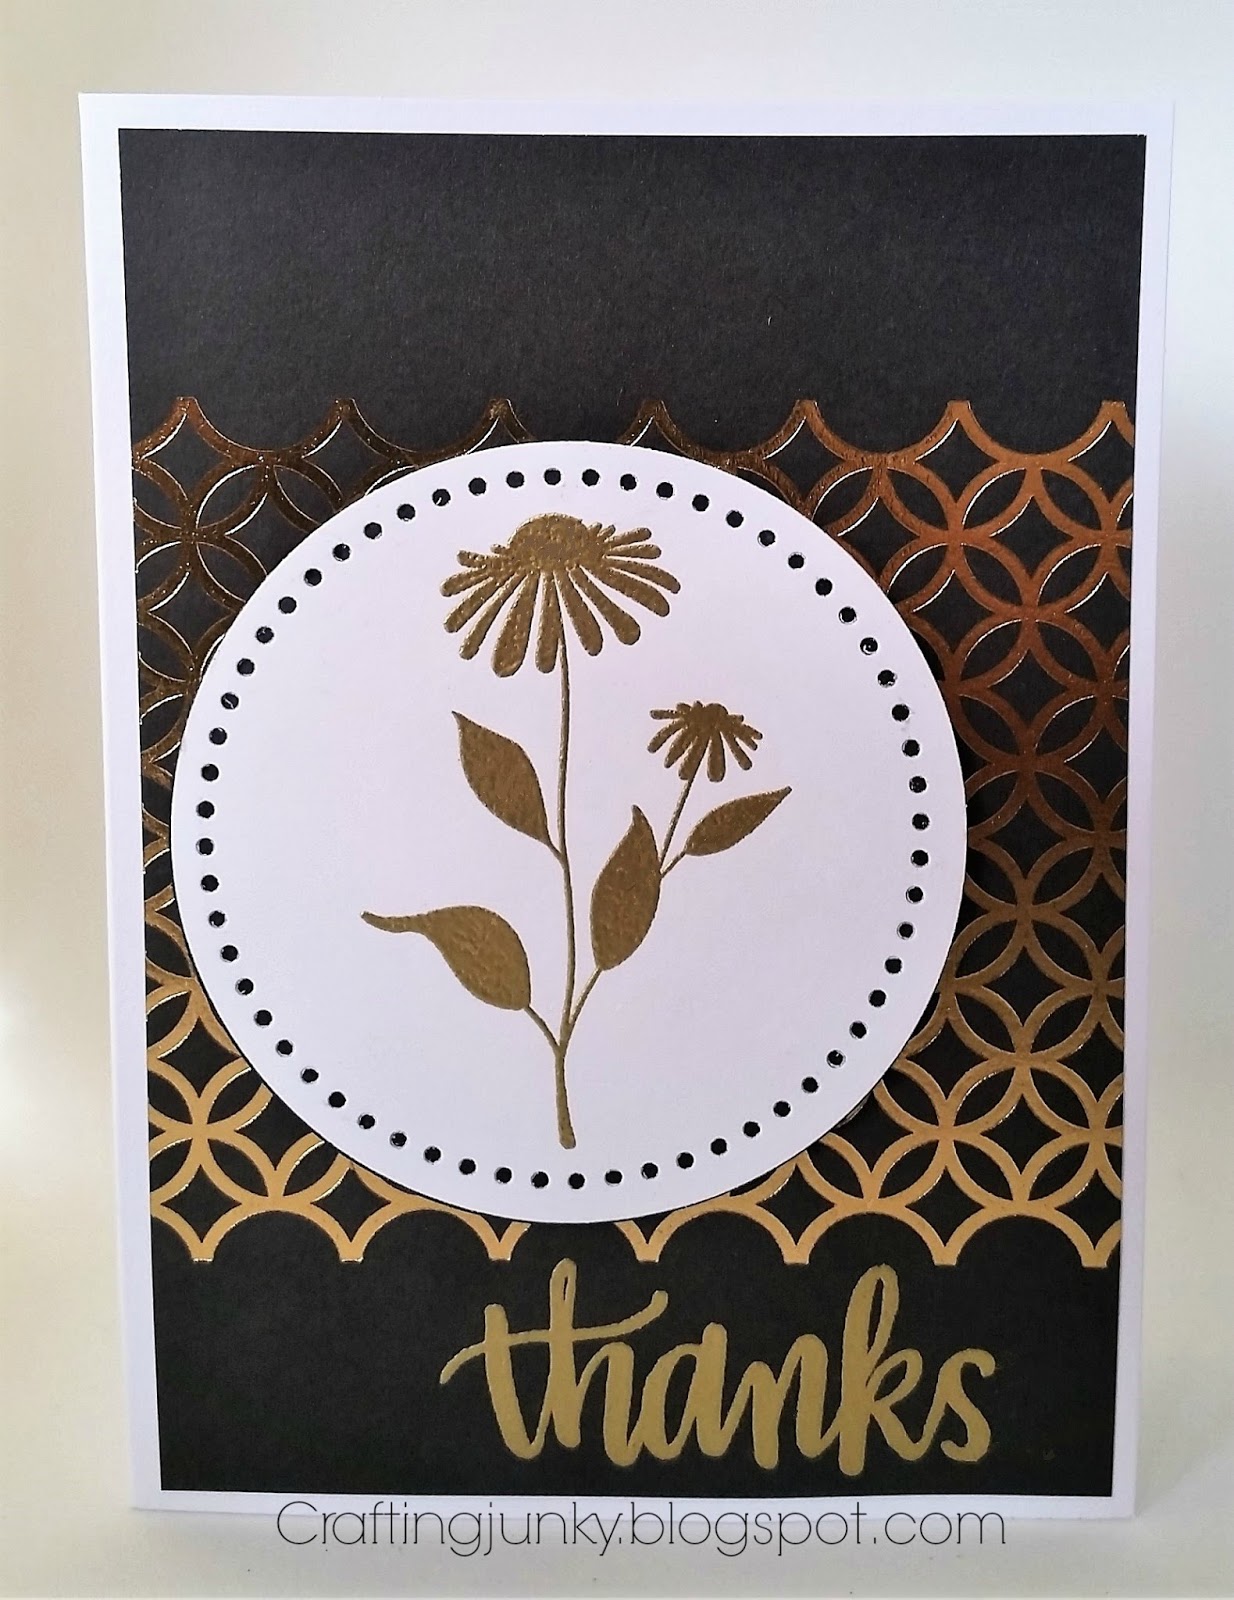
Thanks


Today's card was created for the latest Just Us Girls Challenge. To create my card I started by prepping a pretty piece of foiled patterned paper from the My Mind's Eye Fancy That 6x6 paper pad with my EK Success powder tool. I then stamped the sentiment from the Simon Says Stamp Hand Lettered Winter Wishes stamp set using Versamark ink and heat set it with Ranger gold embossing powder to match the gold foiling on the paper. I then stamped the silhouette flower image from Unity Stamp Company onto some plain white cardstock using the same ink and heat set it using more of the same gold embossing powder. I die cut the panel using dies from Little B and backed it onto some dark grey cardstock. To finish my card I simply popped the focal panel up off of the card using some 3M foam tape and offset on the card for some fun interest. Thank you for visiting my blog today and I hope you like my card!

Sunday, August 13, 2017

Hello


My second card today was created for the latest Just Us Girls Challenge. I love the idea of using sparkly and shiny things on my card. My daughter calls it bling. A girl just can't have too much bling, right? To create my card I started by edging a piece of white cardstock with Versamark and sprinkling on some Ranger embossing powder in gold. After heat setting the powder and letting it cool, I adhered the panel directly onto my card base. I then die cut a panel of gold foil ikat patterned paper from The Paper Studio The Shoppe On The Square 4x6 paper pad using a stitched rectangle die from Gina Marie Designs. I adhered that directly onto my heat embossed panel. I die cut the heart using an Essentials By Ellen folk heart die and stamped the hello sentiment from the Winnie & Walter The Big, The Bold, and The Happy stamp set and heat embossed it using the same embossing powder. To finish my card I simply popped the heart up using some 3M foam tape. Love how simple this card was to create. I hope you like it too!