Showing posts with label Tim Holtz distress ink. Show all posts

Sunday, July 20, 2025

Relax And Enjoy Your Day-Coffee And Cards With Celeste And Deb


Hello! We are well into July now, and man is it hot! Debra and I decided to go with a summer theme this month for our coffee and cards collaboration. I wanted my card to look very similar to our inspiration photo. I started with some crumb cardstock and added sandy texture to it by stamping the dotted detail from the Stampendous Sunny Flowers stamp set onto the paper using Sahara Sand ink from Stampin' UP. Then I took a piece of textured white cardstock from my stash and inked it up with Tim Holtz Salvaged Patina distress ink. I then tore the edges and created 4 panels. I adhered them to my panel at an angle to look similar to the inspiration photo. I stamped the seashells, and flip flops from Honey Bee's Flippin' Fabulous stamp set, colored them with alcohol markers, die cut them, and adhered them to my beachy scene using liquid glue. I stamped the sentiment from the same set, die cut it, and popped it up using foam tape. I added stardust Stickles to the foam on the waves, the shells, and my flipflops. I added some clear rhinestones from Recollections to the flip flops for a finishing touch. 

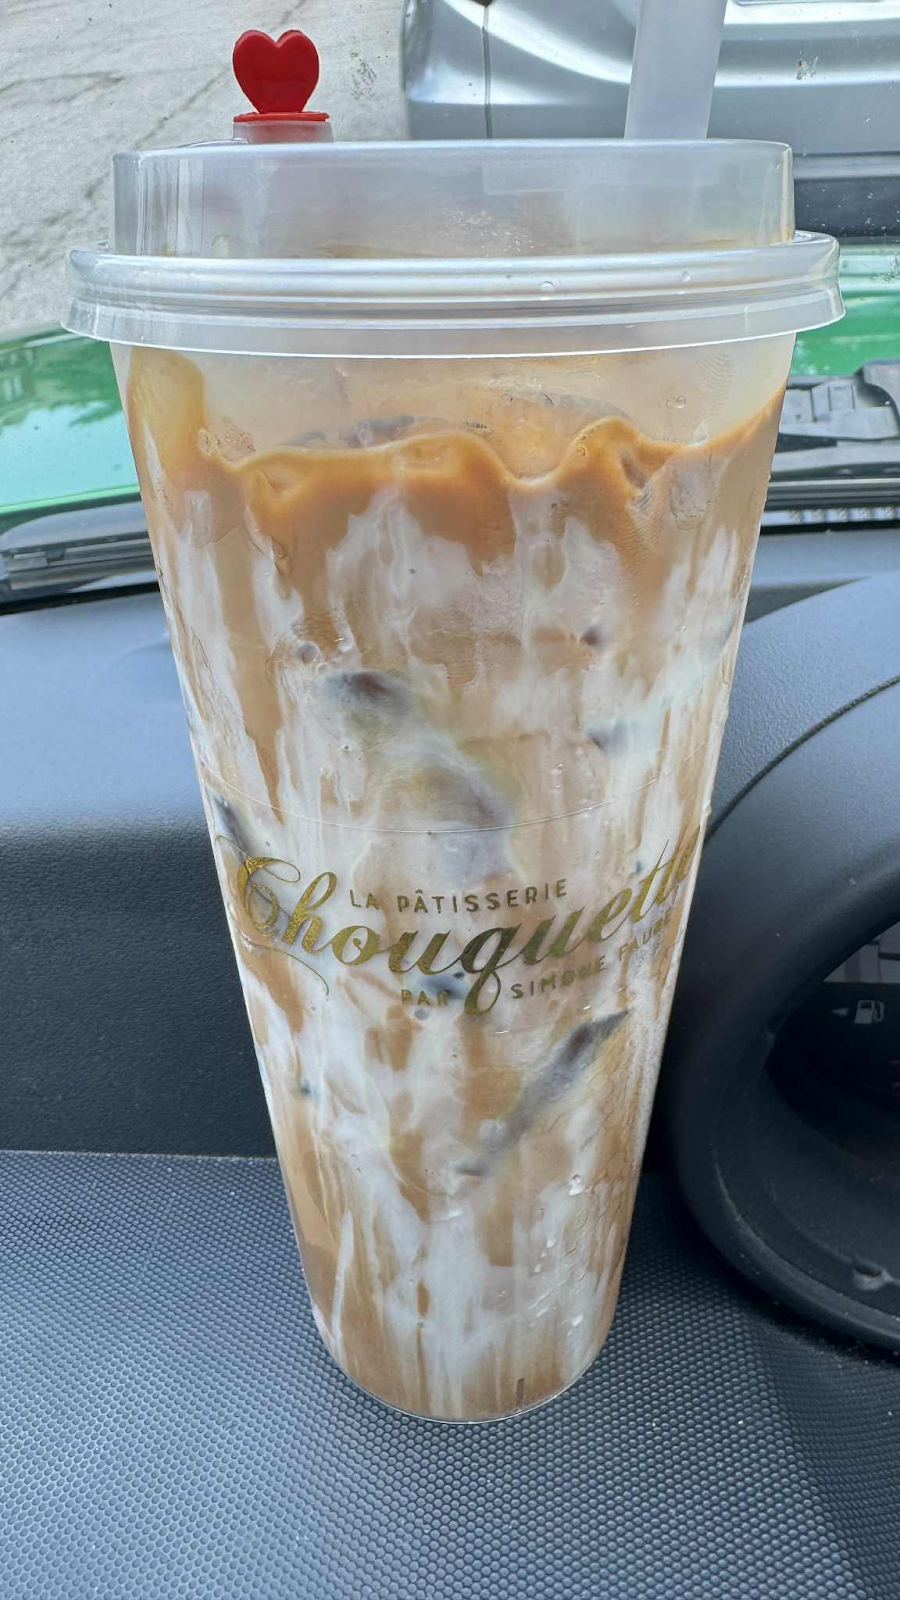
For my coffee this month, I opted for a lovely iced, Vietnamese latte that I got when my boyfriend and I visited La Patisserie Choquette in St. Louis this week. It's my favorite French-style bakery, and their coffees are as amazing as their pastries! Now, be sure to head over to Deb's blog and see how she was inspired by our summer theme this month! I have also decided to enter this card in the AAA card challenge. 

Friday, January 10, 2025

Hello Sweet Friend


It's snowing pretty hard here in Southeast Missouri, and I am off work today. What a perfect day to sit in the house, sip coffee, and create cards, right? Today's card was created for the latest AAA Card challenge. I created my card by layering some pretty patterned papers from Studio Calico's Take Note 6x6 paper pad onto my white A2 card base. On a separate white cardstock panel, I stamped the Stampabilities Cherry Blossom Bird stamp using Memento tuxedo black ink and colored it using my Copic markers. I lightly water colored the background using Tim Holtz distress ink and then stamped the Unity Stamp Company's Small Details background stamp on the panel using Memento's London fog ink and 2nd generation stamping for a faint detail. I stamped the sentiment from Honey Bee's Sweet Sunflowers stamp set using Versafine onyx black ink. I cut the panel down using a Spellbinders rectangle postage edge die and adhered it to the card using thin foam tape. 

Sunday, October 20, 2024

Happy Halloween-Coffee And Cards With Celeste and Deb


Hello, and welcome to the October collaboration of Coffee and Cards with Celeste and Deb. We are excited to announce that we have Michael Trent guest designing with us this month. I love Michael's work, so it's always a treat when he joins us! Debra chose this fun image as our inspiration, and I thought it was perfect with Halloween upon us in two short weeks. I created my card by laying the medium Tim Holtz Moon Mask onto my white cardstock, and inking the paper using Tim Holtz distress inks carved pumpkin, fireside brick, and black soot. I removed the moon mask and inked the moon with squeezed lemonade, and then added the detail stenciling with wild honey. I then stamped the bats and the sentiment from Picket Fence's Triple Trouble stamp set right over the moon using Versafine onyx black ink for a nice, crisp image. I stamped the pumpkins from the same stamp set onto white Copic-friendly cardstock using Memento tuxedo black ink and colored the images using alcohol markers. I fussy cut the images out, popped them up off of the card using thin foam tape, and added white gel pen highlights for additional interest. 
For my coffee this month, I got a freebie from my local Ziggi's coffee shop for using my rewards and I opted for a warm pumpkin pie latte, because it's October and I love all things pumpkin! Now, be sure to stop over at Deb's and Michael's blogs and see what fun they created using this month's inspiration photo. 

Monday, September 30, 2024

Merry Christmas


Hello, and thank you for stopping by my blog today! Today's card was created for the latest Just Add Ink card challenge. I created my card by stenciling some Tim Holtz distress ink in vintage photo onto a piece of kraft cardstock using the Tim Holtz Holiday Knit stencil. I then stamped the Heidi Swapp woodgrain background stamp onto more kraft cardstock using Memento cocoa ink, and then cut that into a frame. Using Whimsy Stamps Tattered Christmas stamp and die set I created my little scene using white and kraft cardstocks and my alcohol markers. I arranged my scene on the card. Popped the frame and the ornaments up off of the card using thin foam tape. I stamped the sentiment from the same Whimsy Stamp set onto the bottom right-hand corner and added a bit of white gel pen for highlights and some pretty clear rhinestones from Recollections for additional shine. 

Friday, September 27, 2024

Believe In The Magic Of Christmas


Hello, and happy Friday! Today's card was created for the latest Freshly Made Sketches card challenge. I created my card by stamping the adorable snowmen from Close To My Heart's Snow Friends stamp set onto my card base using a Copic-friendly ink. I colored the snowmen with my alcohol markers and then masked them off using a bit of painter's tape. Using the Falling Snow stencil from Simon Says Stamp and Hero Paste in white, I added my snow. Once that dried, I ink blended several shades of Tim Holtz distress inks in shades of blue to create my sky. I stamped the sentiment from Miss Inks Stamps Season's Greetings stamp set onto white cardstock, created a fishtail banner, and adhered it directly to the card panel. This was a very simple card to create and think I might make several more of this one to send out at Christmas. Thank you for stopping by my blog. All comments are read and appreciated greatly. Have a safe and dry weekend!


Saturday, July 6, 2024

Santa Has Favorites-Send A Smile 4 Kids


This month at Send A Smile 4 Kids Send A Smile 4 Kids we are celebrating Christmas for kids. I thought it would be fun to create a sweet card for my youngest granddaughter. I stamped the adorable images from My Favorite Things Jingle All The Way onto Copic-friendly cardstock using Memento tuxedo black ink. I colored the images using my alcohol markers, and fussy cut them out. I then die cut a panel of white cardstock using a layering shaped die from Spellbinders. Using Simon Says Stamp's Falling Snow stencil white Hero Paste, I created a snowy background. Once the paste was dried, I inked the background using Tim Holtz distress inks in blues. I mounted the panel directly to my A2 cardbase and stamped the sentiment below it is using Gina K Designs black ink. I popped the images up on the focal panel using foam tape to create a fun, wintery scene. I added some white gel pen details to finish up this cute Christmas card. Thank you for stopping by my blog and be sure to head over to the Send A Smile 4 Kids blog and join us in this fun challenge. 

Thursday, June 13, 2024

It's Your Day-Relax Your Way!


Today's card was created for the latest AAA cards challenge. I created my card by stamping the focal image from Stampin' UP's Good Man stamp set onto white alcohol-friendly cardstock using Memento tuxedo black ink. I colored the image with my Copic markers and fussy cut the image out. Using the Stampin' UP Oceanfront stamp set I created the background using Tim Holtz distress inks in tea dye, antique linen, salvaged patina, salty ocean, and prize ribbon. I stamped the grasses in Memento tuxedo blank ink and the sentiments in Versafine onyx black ink. I popped the focal image up off of the card using foam tape and added some hand drawn seagulls in the background with a Memento dual tip marker. I finished the card up by popping the entire focal panel up off of the card using foam tape.  

Sunday, June 9, 2024

Mom


Today's card was created for the latest Color Throwdown card challenge. I created this card by stamping the My Favorite Things Roses All Over background stamp onto some white cardstock using Versamark ink and heat embossed it with Ranger's white detail embossing powder. I water colored the panel using Tim Holtz distress inks. I die cut two white cardstock panels using a stitched sloping edge die from Paper Smooches and created an upper and lower panel to flank the watercolor paper. I stamped the sentiment from Verve Stamps Because Of You stamp set using Versafine onyx black ink and flanked the panels with some clear rhinestones from Recollections. I popped the whole panel up off of my A2 white card base using some foam tape. Thank you for stopping by my blog today and leaving a comment. 

Saturday, May 18, 2024

Take Me To The Beach


My card today was created for the latest Just Us Girls card challenge. I love this beautiful mood board, and just had to play along! I created my card by stenciling the Newton's Nook Retro Sun & Palms stencil (a freebie that I won recently) onto some white cardstock using Tim Holtz distress inks. I die cut the panel using a wonky stitch stacking rectangle die from Gina Marie Designs. I stamped the images and sentiment from Honey Bee's Flippin' Fabulous stamp set and used the coordinating die cuts to cut them out. I colored them and adhered them to my focal panel. I popped the focal panel up off of the card using foam tape and added a few clear rhinestones from Recollections for a pretty finishing touch. Thank you for stopping by my blog today. I hope you have a fabulous day!


Sunday, April 28, 2024

Happy Birthday


Happy Sunday! Today's card was created for AAA Birthday card challenge. This month's challenge is to create a shaker card. I thought it would be fun to create a fun underwater scene using fish and an adorable mermaid. I started by inking an ombre background panel using Tim Holtz distress inks an Altenew's Scales Debossing cover die. I die cut a large circle in the middle of the panel using a stacking circle die from Spellbinders. I inked another panel to go behind the circle. I popped the main panel up using foam tape and added some clear, marshmallow, and turquoise sequins from The Ton in the shaker panel and adhered it to the card. I then stamped the beautiful mermaid image from Lily of the Valley's Mermaid 1 stamp set and inked her up using my Copic markers. I stamped a few fish and some seaweed from Lawn Fawn's Fintastic Friends and colored them using my alcohol markers. I fussy cut the mermaid and die cut the fish and seaweed images using coordinating dies and adhered them all to the card to create my underwater scene. I created my sentiment by die cutting the Birthday Wishes die set using white cardstock and colored them using my Copics to create an ombre look that matched the card. I attached them to the shadow piece and adhered them to the card. I finished off this card by added some pretty glitter glue using Nuvo crystal glitter drops and some white gel pen for additional details on the mermaid. Thank you for stopping by my blog! 


Sunday, February 25, 2024

Sending You Lots Of Love-Coffee And Cards With Celeste And Deb


Hello, welcome to the February Coffee and Cards with Celeste and Deb collaboration. This month, Deb and I decided to create cards that honor snail mail. We thought it was perfect. As card makers, we love creating cards for those we care about. We also love receiving a hand-written note card too! My card was created with gorgeous patterned paper from 7Gypsies Postale 8x8 paper pad, distress inks, Unity Stamp Company banner dies, and Altenew's Postal Heroes and My Favorite Things Abstract Art stamp sets. All of the images were colored with my Copic alcohol markers and fussy cut. I plan to give this card to my daughter, who is a postal carrier. I know she will love it. 
My coffee this month is Kahlua's Espresso Martini served in one of my gorgeous Miss Etoile Espresso cups and matching saucer. 
Now, be sure and stop off at Deb's blog and see what fun she created this month with our snail mail theme. And thank you for stopping by and checking out my latest creation. I appreciate you! 


Friday, January 5, 2024

Happiness Is A Warm Cup Of Coffee


Hello, and Happy New Year! Today's card was created for the latest Color Throwdown card challenge. To create my card I started by die cutting a piece of dark olive cardstock using Gina Marie Designs nesting scalloped rectangle dies. I adhered that directly onto my white A2 card base. I then die cut a piece of watercolor paper using Paper Rose nesting stitched rectangle dies. I stamped the image from Unity Stamp Company's Pure And Simple stamp set using Versafine ink. I stamped the happiness sentiment from the same stamp set right below it. Using Papertrey Ink's Simple Alphabet, I stamped the rest of the sentiment. Using Unity Stamp Company's Scallops & Banners die set I die but a few fishtail banners using more of the olive cardstock and a piece of patterned paper from Authentique's Remembrance 6x6 paper pad. Using Tim Holtz distress inks and some watercolor brushes I picked up from Hobby Lobby, I water colored the image to match the colors of the card challenge. To finish of the card I added Nuvo glitter drops in white blizzard to the snow around the image. Thank you for visiting my blog today. If you like my card, please be sure to leave a kind word. I read, and appreciate, them all! 


Wednesday, November 15, 2023

Merry Christmas-Caffeinated Christmas


Hello, and welcome to the November Caffeinated Christmas card challenge. This month we are featuring projects with coffee and holly. One lucky participant will be chosen to win a $15 gift card to one of the list of participating sponsors, so be sure to link up a project! I was so sad to hear that Ellen Hutson was closing her shop, but was tickled to pick up the adorable Cozy Cuppa stamp set on clearance before they closed shop. And it came in just in time for this month's challenge! It's like it was meant to be!  I created this adorable card by stamping out all of the images onto Copic-friendly cardstock and coloring them with my alcohol markers. I fussy cut them out leaving a small white border around the edges. I created the background by stamping the Recollections Christmas small wood block background stamp onto some watercolor paper using Versamark ink. I heat embossed the background using Ranger's detail white embossing powder. I then inked the background with spun sugar and saltwater taffy distress inks. I added splatter for additional interest. Using the small Spellbinders nestabilities deckled edge dies I die cut a focal panel. I adhered the panel directly to my white A2 card base and stamped the sentiment from the Crate Paper Snow and Cocoa mini stamp set at the bottom using Versafine onyx black ink. I adhered all of my images together the way I wanted them and then popped them up off of the focal panel using 3M foam tape. For a finishing touch, I added white gel pen detail to the images. Thank you for stopping by my blog today. And thank you to Caffeinated Christmas card challenge for letting me guest design this month! 


Thursday, October 19, 2023

Happy Halloween


Hello, happy Thursday! I recently won the Picket Fence Studios Triple Trouble stamp and die set and could not resist using it for this challenge. I created this card by stamping the pumpkins, the witch hat, and the sentiment onto white Copic-friendly cardstock, coloring them with alcohol markers, and die cutting the images with the coordinating dies. I cut a frame using Paper Roses stitched stacking rectangle dies and pretty patterned paper from Recollections Midnight Magic Halloween 6x6 paper pad. I popped the frame up using foam tape. I traced along the frame onto the card base, and inked the interior with villenous potion and wilted violet distress inks from Tim Holtz. I sprized the panel with some water for a little distressed interest, and then stamped the bats from the stamp set onto the background. I popped the images and the sentiment up with foam tape and then adhered them to the frame. I mounted the whole thing to my card base. I finished off the card by adding white gel pen to all of the elements. Thank you for stopping by my blog today. I appreciate you! 


Friday, September 29, 2023

Nutty For You


Hello, and happy end of September! Today's card was created for the latest Color Throwdown card challenge. I thought the inspiration photo was so perfect being that we are on the cusp of Autumn and all things fall! I started by stamping the acorns from Paper Smooches Falling For You stamp set onto plain kraft cardstock and inking them up with Tim Holtz walnut stain distress ink. I stamped the leaves separately onto white cardstock and inked them with Tim Holtz mowed lawn distress ink. I fussy cut the images out and adhered the leaves with both liquid glue and foam dimensionals to give them a bit of interest. I created a card base out of linen textured kraft creamy brown cardstock and adhered a panel of gorgeous fall plaid patterned paper from Design Group that I picked up last year at Target in the dollar bin and mounted that onto some early espresso cardstock that I had border cut using a pretty border die from My Favorite Things. I adhered my focal panel onto my card base, attached the acorns using foam dimensionals, added some cream colored twine to the tops of them, and finished the card off with some white gel pen highlights and gorgeous coppery sequins from The Ton. Thank you so much for stopping by my blog today!  


Friday, August 4, 2023

Thank You


Today's card was created for the latest Color Throwdown card challenge. To create my card I started by taking a strip of white cardstock and blending Tim Holtz Distress ink in picket fence all over the panel. I added some water droplets to it for a distressed look. I then blended more of the same ink onto a piece of white scrap cardstock and then die cut the sentiment using Paper Rose's Thank You layered die, and die cut the shadow portion from plain white cardstock. I layered the two together and set them aside. I then took a piece of plain kraft cardstock from my stash and die cut a panel using a Paper Rose layered stitched rectangle die. I then die cut the decorative panel using Paper Rose's Gum Leaf Border die. I popped the kraft panel up off of the card using 3M foam tape. I finished my card off using some Paper Studio clear gems that I colored green with a Copic marker. Thank you for stopping by my blog today. 


Saturday, June 3, 2023

Happy Birthday


Today's card was created for the latest Color Throwdown challenge.To create my card, I started by stamping a few of the adorable cactus images from Pawsome Stamps Prickly Friend stamp set onto some white Copic-friendly cardstock and colored them using my alcohol markers. I fussy cut them out and set them aside to work on the background. I layered a piece of bright yellow patterned paper from Simple Stories Sunkissed paper pad onto my card base. Using a scalloped edge rectangle die from Gina Marie Designs I cut a smaller white focal panel. I inked it with a bit of squeezed lemonade and mowed lawn distress ink from Tim Holtz, and then attached my cactus images. I stamped the sentiment from the same Pawsome Stamps set using Gina K Designs black ink. I popped the focal panel up off of the card using 3M foam tape and added a few green gems from Honey Bee Stamps around the images and sentiment for a little additional interest. Thank you so much for stopping by my blog today.  I hope you all have a wonderful weekend!


Saturday, April 1, 2023

For A Special Day-Send A Smile 4 Kids April 2023

Happy April! This month at Send A Smile 4 Kids we are celebrating moms/special ladies. My card could work for Mother's Day, birthday, or simply any special occasion. To create my card, I started by stamping the blooms from Simon Says Stamp's Like Your Style stamp set onto some crumbcake cardstock from Stampin' UP using Colorbox frost white pigment ink. I then stamped the black lines, the hanger, and the sentiment from the same stamp set using Gina K Designs black pigment ink. On a separate piece of white cardstock I stamped the dress and more of the florals onto the dress using Tim Holtz carved pumpkin distress ink and did a little ink blending at the bottom. I also stamped the mini hearts in the same color. I fussy cut all of the images out. I adhered the hearts directly to the card using liquid glue. I added some peach twine from Stampin' UP directly to the card and tied a bow and popped the image up off of the card using Stampin' UP foam dimensionals. To add a little interest to the card I added a strip of patterned paper by My Mind's Eye from the Follow Your Heart 12x12 paper pad directly to the bottom of the card panel and then added a tiny strip of cardstock I had colored with the same carved pumpkin distress ink to match. I adhered the focal panel to my white A2 card base and then added some white gel pen details for some added interest. Thank you for stopping by my blog today! Be sure to pop over to the Send A Smile 4 Kids blog to see how the rest of the design team was inspired by this month's challenge. 


Sunday, February 19, 2023

Be A Pineapple


Today's card was created for the latest Color Throwdown card challenge. I created my card by layering some light green cardstock from Hobby Lobby directly onto my A2 cardbase. I then took a piece of cream cardstock from Hobby Lobby and did some ink smooshing directly onto it using some acetate and Tim Holtz kitch flamingo distress ink. I then added some embossed detail to the panel using Honey Bee Stamps Spring Leaves pierced detail background plate. I then cut the panel down using a stitched edge rectangle die from Paper Roses and adhered it to my card base using some 3M foam tape. I stamped the pineapples from the Honey Bee Stamps Pineapple mini stamp set onto my cardstock using Gina K Design black ink for the outline and Altenew Inks for the layering portion of the stamps. I enhanced them a bit by adding some detail to the coloring with my Copic markers and a white gel pen and then cut them out with the coordinating dies. I adhered them together in a trio with some liquid glue and then popped them up off of the card with more 3M foam tape. I stamped the sentiments from the same stamp set using Versamark ink and embossed them in gold embossing powder from Ranger and then die cut them using the coordinating dies. I adhered the top sentiment directly to the trio of pineapples and then popped the bottom sentiment up with foam tape. I finished this adorabale card off using some creamy yellow sequins from Pretty Pink Posh. Thank you for visiting my blog. I hope you have a beautiful day! 


Saturday, October 1, 2022

Warm Winter Wishes


Hello! I was invited to guest design for the October Caffeinated Christmas Card Challenge! This month's challenge is sponsored by Miss Ink Stamps, and they were kind enough to send me some goodies for the challenge. To create my card I started by die cutting the focal panel from a Gina Marie Designs scalloped rectangle die and some real red cardstock from Stampin' UP. I then cut down a smaller panel and using the Miss Ink Stamps Diagonal Lines stencil and Tim Holts distress inks in Shabby Shutters and Fired Brick I created the inked plaid background. To create more interest I freehand drew in some white lines with my white gel pen and added some tiny black dots at each intersecting line. I mounted that panel onto some plain white cardstock and die cut an oval window using a My Favorite Things oval die. I then die cut a smaller oval window into the red scalloped panel using a Spellbinders oval die. I adhered all of the panels together and mounted them up off of the card using 3M foam tape. I stamped the gnome from Miss Ink Stamps Big Mugs stamp set, colored it using my Copic markers, fussy cut the image out, and mounted it in the oval window with more foam tape. I stamped the sentiment from Miss Ink Stamps Season's Greetings stamp set onto white cardstock using Versafine onyx black ink and cut it down to a small sentiment strip. I mounted more red cardstock behind it and adhered it to the card. I finished the whole thing off with some cute little black gem stickers from Honey Bee Stamp's Fresh Brewed collection.