Showing posts with label Memento ink. Show all posts

Friday, January 10, 2025

Hello Sweet Friend


It's snowing pretty hard here in Southeast Missouri, and I am off work today. What a perfect day to sit in the house, sip coffee, and create cards, right? Today's card was created for the latest AAA Card challenge. I created my card by layering some pretty patterned papers from Studio Calico's Take Note 6x6 paper pad onto my white A2 card base. On a separate white cardstock panel, I stamped the Stampabilities Cherry Blossom Bird stamp using Memento tuxedo black ink and colored it using my Copic markers. I lightly water colored the background using Tim Holtz distress ink and then stamped the Unity Stamp Company's Small Details background stamp on the panel using Memento's London fog ink and 2nd generation stamping for a faint detail. I stamped the sentiment from Honey Bee's Sweet Sunflowers stamp set using Versafine onyx black ink. I cut the panel down using a Spellbinders rectangle postage edge die and adhered it to the card using thin foam tape. 

Monday, September 30, 2024

Merry Christmas


Hello, and thank you for stopping by my blog today! Today's card was created for the latest Just Add Ink card challenge. I created my card by stenciling some Tim Holtz distress ink in vintage photo onto a piece of kraft cardstock using the Tim Holtz Holiday Knit stencil. I then stamped the Heidi Swapp woodgrain background stamp onto more kraft cardstock using Memento cocoa ink, and then cut that into a frame. Using Whimsy Stamps Tattered Christmas stamp and die set I created my little scene using white and kraft cardstocks and my alcohol markers. I arranged my scene on the card. Popped the frame and the ornaments up off of the card using thin foam tape. I stamped the sentiment from the same Whimsy Stamp set onto the bottom right-hand corner and added a bit of white gel pen for highlights and some pretty clear rhinestones from Recollections for additional shine. 

Friday, September 6, 2024

Love And Best Wishes


Today's card was created for the latest Color Throwdown card challenge. I started by layering some light purple cardstock from my stash onto my white A2 card base. I then cut down a panel of white cardstock and stamped the background images from the Craft Stash Wild Meadows stamp set using Stampin' UP's tempting turquoise and Versafine onyx black inks. I stamped the main floral image from the same stamp set using Memento tuxedo black ink and Copic-friendly white cardstock. I colored the image using the colors in the challenge, fussy cut it out, and mounted it onto a vellum oval. I popped the vellum panel up off of the card using thin foam tape, added a sentiment from the same stamp set, and a few pretty clear rhinestone gems from Recollections to finish off this card. Thank you for stopping by my blog today. I hope you have a wonderful weekend! 


Sunday, August 18, 2024

Thank You-Coffee And Cards With Celeste And Deb


Hello, and a very happy Sunday to you! This month Debra and I thought it would be fun to create a project using twine. I have way more twine and ribbon then I could ever possibly use and am always looking for an excuse to use it up. Following an idea I found on Pinterest, I decided to create a super cute flower out of a large button I had in my stash and some pretty jute twine from American Crafts. I created the flower by adhering an extra-large glue dot on the back of the button and looping the twine around until I got the desired look. Using patterned papers from the Authentique Delightful 6x6 paper pad and more of the same American Crafts twine, I created a focal panel. I stamped the sentiment from Stampin' UP's Curly Cute stamp set and Memento Ink in London fog. I adhered the panel to a light kraft A2 card base and adhered some clear rhinestone gems around the sentiment and flower for a nice finishing touch. 
I wish I could say that our cool streak has lingered, but sadly it has not. We had temps over 105 degrees today with the heat index, so I opted for an iced S'mores cold brew from Dunkin Donuts to quench my thirst. Tastes like autumn but cold enough to fight off the summer heat! Now, be sure to pop over to Deb's blog and see how she was inspired by our twine challenge!


Thursday, June 13, 2024

It's Your Day-Relax Your Way!


Today's card was created for the latest AAA cards challenge. I created my card by stamping the focal image from Stampin' UP's Good Man stamp set onto white alcohol-friendly cardstock using Memento tuxedo black ink. I colored the image with my Copic markers and fussy cut the image out. Using the Stampin' UP Oceanfront stamp set I created the background using Tim Holtz distress inks in tea dye, antique linen, salvaged patina, salty ocean, and prize ribbon. I stamped the grasses in Memento tuxedo blank ink and the sentiments in Versafine onyx black ink. I popped the focal image up off of the card using foam tape and added some hand drawn seagulls in the background with a Memento dual tip marker. I finished the card up by popping the entire focal panel up off of the card using foam tape.  

Wednesday, May 8, 2024

I Donut Know What I'd Do Without You!


Today I am guest designing for the Color Throwdown challenge. I started with a cream A2 card base. Using a piece of cream cardstock and Stampin' UP's crumb cardstock, I stenciled the coffee mugs using the Newton's Nook Mugs Stencil. I die cut a banner using light kraft cardstock and a nesting banner die from Unity Stamp Company. I adhered that to the stenciled panel, and cut the whole thing down using a stacking, stitched rectangle die from Paper Rose. I stamped the sentiment onto the banner using a sentiment stamp from Close To My Heart's Treats Of Friendship Occasions and Memento cocoa brown ink. I adhered that panel onto a piece of royal blue cardstock, popped it up with some foam tape and adhered that to the card.  I stamped the coffee cup and donut from Close To My Heart's Pumpkin Treats stamp set and Copic-friendly ink. I colored the images using my alcohol markers and die cut them out using the coordinating dies. I popped those up off of the card using more foam tape and added some white gel pen detail and some fun blue enamel dots from Recollections for some additional interest. Thank you so much for stopping by my blog today. I would love it if you played along with us this week for our color challenge!


Wednesday, August 16, 2023

Handpicked For You


Hello! Thank you for visiting my blog today. I am guest designing for the latest Color Throwdown card challenge. For my card I started by layering some olive green cardstock onto my white A2 card base. I then layered some olive green gingham patterned paper from Paper Studios on top. I die cut a scalloped edge rectangle panel using a Gina Marie Designs die, and stamped the sentiment from Stampendous True Friens on the lower right corner using Versafine onyx black ink. I then stamped the sunflower image and some leaves from Honey Bee Stamp's Sweet Sunflowers stamp set using Memento tuxedo black ink and some white Copic-friendly cardstock. I colored the images using greens, oranges, and browns from my alcohol markers. I then fussy cut the images out and mounted them onto the card panel to frame the sentiment. I popped the whole panel up off of the card using 3M foam tape. My granddaughter absolutely loves sunflowers, so I suspect this will go to her for her upcoming birthday in September.


Sunday, March 26, 2023

Happy Easter-Coffee And Cards With Celeste And Deb


Hello, and thank you for visiting my blog today! Deb and I are celebrating Spring in our coffee and cards collaboration. I recently picked up a few new stamp sets on clearance from Whimsy Stamps, and thought it would be fun to use one of my new sets for this card. I started by die cutting a panel of pretty green gingham patterned paper from Simple Stories  Summer Lovin' 6x8 paper pad using a stitched rectangle die from Paper Rose, and matted it with some olive green cardstock that I had in my stash. I adhered that panel directly onto my white A2 card base. Using a lacy border metal die I cut down more of the olive green cardstock and adhered that onto the card slightly lower than halfway. I stamped out my images from Whimsy Stamps Easter Memories stamp set onto some white Copic-friendly cardstock and colored the images using my alcohol markers. Using a scalloped and pierced edge rectangle die from Gina Marie Designs I created a focal panel. I matted that panel onto another piece of olive cardstock and popped the panel up using 3M foam tape. I stamped Happy directly onto the focal panel using Memento tuxedo black ink. I then stamped the Easter sentiment onto a seperate piece of paper using Gina K Designs ink in Avocado and fussy cut the sentiment out. I adhered it to the card using liquid glue and finished my card off my added some white gel pen detail to all of the images. 
For my beverage this month, I opted to create a nice "adult" hot chocolate by using a chocolate bomb with a huge dollop of Whip Shots vodka infused whipped cream in Mocha! Now, be sure to stop by Debra's blog and see how she was inspired by this month's theme!


Monday, March 13, 2023

Thank You For Being A Ray Of Sunshine


Happy Monday! Today's card was created for the latest Color Throwdown card challenge. I just picked up this adorable lemon stamp from Stampabilities at Hobby Lobby on clearance and couldn't resist using it for this challenge. I stamped the image twice, colored it using my alcohol markers, fussy cut them out, adhered them together and added foam dimensionals from Stampin' UP behind them. I stamped the background using an abstract background stamp from Spellbinders and bashful blue ink from Stampin' UP. I cut the panel down using a stitched rectangle die from Paper Roses and adhered it to some light blue cardstock from Paper Crafts. I adhered that panel directly to my white A2 card base. Using the same blue cardstock I cut down a small banner and ran it through the same stitched rectangle die to get the stitched edges. I stamped the sentiment from Stampendous True Friends stamp set using Memento tuxedo black ink. I adhered it to the card and added the lemons to the left of the sentiment. To finish off my card I added some white gel pen detail to the lemons and some pretty light blue sequins from Pretty Pink Posh around the focal panel. Thank you for stopping by my blog today!


Saturday, September 3, 2022

You're Boo-Tastic!-Send A Smile 4 Kids


Hello! This month at Send A Smile 4 Kids we are creating fun Halloween cards for kids. I picked up a few gently used stamp sets on a destash and just had to use one of them for this challenge. To create my card I started by stamping the spider web background stamp (maker unknown) onto white cardstock using Memento tuxedo black ink and inked it up using Tim Holtz distress inks in Villainous Potion and Black Soot. I then spritzed it with water and cut the panel down using a Pink & Main stacked rectangle die. I layered it onto my card and then cut down a strip of basic black cardstock and die cut three holes in it. I popped the panel up using foam tape and adhered it to my card panel. I then stamped all of the fun Halloween images from Mama Elephant's Bootastic stamp set. I colored them in fun Halloween colors using my Copic markers, fussy cut them out and adhered them to the card in the die cut holes. I stamped a few of the spiders from the same stamp set, fussy cut them out, and adhered them directly to the spider web panel. The sentiment is from the same stamp set and was stamped using Memento tuxedo black ink and die cut using a small fishtail banner from Jillian Vance Designs. I completed my card by adding some white gel pen details around the characters. Thank you for stopping by my blog today. Be sure to pop over to the Send A Smile 4 Kids blog and see how the rest of the design team was inspired by this month's challenge.  

Friday, August 19, 2022

We're The Perfect Pair

I have an old Army mom friend who has her 45th wedding anniversary coming up next month, and she reached out to me to have me create a fun, unique card that she could give her husband. She told me that he loves squirrels and wanted there to be 7 acorns on the card...two for their children and 5 for their grandchildren. I have had the Darcie's Heart & Home Busy Beaver stamp set for years and knew it would be perfect for this card since it had all of the elements she asked for. I stamped the squirrel twice and then the acorns, tree trunk, mushroom, and flowers all from the same stamp set onto white Copic-friendly paper using Memento tuxedo black ink. I colored all of the images using my alcohol markers, fussy cut each image out, and edged them with my Memento dual tip marker in black. I then layered some pretty fall patterned papers from the American Crafts Autumn Crisp 6x6 paper pad onto my white A2 card base. I die cut a white panel using a stitched edge A2 layering rectangle die from Paper Roses. I die cut another small piece of white paper using a Lawn Fawn grass border die and colored it green using an alcohol marker. I used the bottom of the Paper Roses rectangle die to cut it to match my main focal panel. Using the My Favorite Things mini cloud stencil I created a background of fluffy clouds and then adhered the grassy strip to the bottom. I stamped the fun sentiment from Amy R Stamps Wedding Sentimens II using Versafine onyx black ink and then popped the whole panel up off of the card for some dimension. I added my squirrels, tree trunk, acorns, and other accessories directly onto the panel. I love how adorably sweet this card turned out. Happy Anniversary to Colleen and Marv! Thank you for stopping by my blog today. 


Sunday, July 24, 2022

Sending You Cozy Winter Wishes-Coffee And Cards With Celeste And Deb


Hello, and welcome to the July Coffee and Cards with Celeste and Deb! This month we are celebrating Christmas in July. I created my card by layering a pretty kraft snowflake patterned paper from American Crafts Noel 6x6 paper pad onto my white A2 card base. I then die cut a hillside with white cardstock and the Drifting Stitched Border die from Simon Says Stamp. I stamped the sentiment directly onto the hillside panel using My Favorite Things Cozy Winter Wishes stamp set and Memento tuxedo black ink. I popped the panel up using some 3M foam tape and adhered it to the card panel. I then  stamped, colored, and fussy cut the house, tree, and snowman images from the same My Favorite Things stamp set and adhered them to my card. Love how adorably this little winter scene came together.
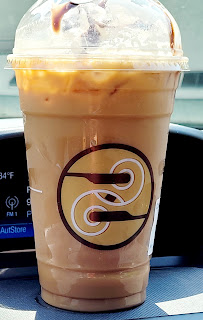
We just got a new coffee shop here in our little town, and since it's ridiculously hot (triple digits today) I had to try an iced coffee. This is the iced Colorado Mocha from Ziggi's coffee, and it definitely hit the spot while I was out running my errands. Now be sure to head over to Debra's blog and see what fun she created for us this month!


Sunday, June 19, 2022

Hello Honey-Coffee And Cards With Celeste And Deb

Hello and Happy Father's Day! For this month's Coffee and Cards with Celeste and Deb we chose bees as our main theme for our cards. To create my card I started by layering some basic black cardstock onto my white A2 card base and then stamped the bee onto some white cardstock using Hampton Art Hello Honey stamp set and Memento tuxedo black ink. Using one of the foliage stamps in the set I created an oval wreath around my bee, stamped the sentiment above and below the bee, and added some honey comb elements in the corners. I colored all of the images using my Copic markers and die cut that panel using a Paper Rose stitched edge stacking die. I mounted the focal panel onto my card base using 3M foam tape and then finished the card off with some Wink of Stella clear shimmer pen onto the wings and some pretty gems from the Honey Bee Stamps Fresh Brewed gem collection. 
My coffee selection this month is kind of coffee themed. I went this past week to St. Louis with some friends and stopped at a local restaurant that microbrews their own beer. I couldn't turn down this amazing maple coffee stout, especially given how hot it's been here in the Midwest this past week. This stuff really hit the spot! Now be sure to stop by Debra's blog to see what fun she created this month! 


Wednesday, June 1, 2022

America, Home Of the Brave


Hello! Can you believe it's June 1st already? This year seems to just be flying by. My card today was created for The Card Concept card challenge. To create my card I started by stamping the sentiment from Taylored Expressions Patriotic stamp set using Memento inks in reds and blues. I cut the panel down using a Pink & Main stacking rectangle die and then mounted it onto a scalloped edge panel I die cut using some navy cardstock from my stash and a die from Gina Marie Designs. I added a few navy 4mm sequins from Pretty Pink Posh in the four corners of the panel. For my card base I layered more navy cardstock and layered a piece of plain white cardstock on top for a frame. Die cutting pieces of patterned paper from the American Crafts American 6x6 paper pad using a zig zag border from Pretty Pink Posh I layered all of the pieces together to create a background and then cut it down into a rectangle slightly smaller than my white panel. I then mounted the focal panel on top using 3M foam tape. Thank you for stopping by my blog today!

Sunday, May 15, 2022

Let It Snow


My card was created for the latest Freshly Made Sketches and Jingle Belles card challenges. I started by layering some patterned paper from the My Mind's Eye Vintage Christmas 6x6 paper pad onto my card. I die cut a circle panel using a pierced edge circle die from My Favorite Things and then did some light inking on the background with Tim Holtz distress ink in faded jeans. I stamped the adorable images from My Favorite Things Cozy Winter Wishes onto some white Copic-friendly cardstock and colored them with alcohol markers, fussy cut them out, and adhered them directly onto my inked circle panel, with the exception of the snowman and one of the trees, which I popped up with Stampin' UP foam dimensionals. Using Memento London fog ink and a small snowflake stamp from Papertrey Ink Winter Snow Globe I added some snow to the background. I then stamped the sentiment from the same set using Memento tuxedo black ink at the bottom of one of the strips of patterned paper. I adhered the panel to the card and finished it off by added some smokey grey 6mm sequins from The Ton to the card. I just love that adorable little snowman and can't wait to use the stamp set again!