Showing posts with label Pretty Pink Posh sequins. Show all posts

Tuesday, February 25, 2025

Thinking Of You On Your Birthday


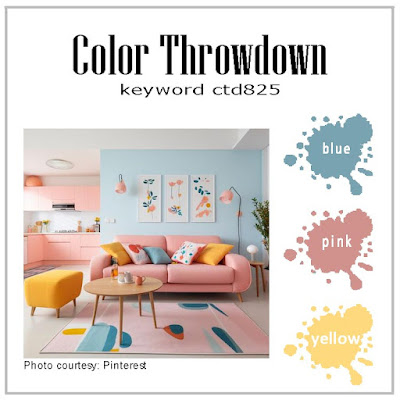
My card today was created for the latest Just Us Girls card challenge. I tried to use some of the fun colors in the mood board on my card. I started by die cutting a piece of bright pink cardstock from Colorbok's Cardstock Carton paper pad using CTMH Stitched Lattice background plate. The "thinking of you on your" sentiment came from The Greetery's PreText Sentiments stamp set. And the remainer of the images were from the SSS Birthday Mail freebie I received from my last order with them. The images were all stamped onto white Copic-friendly cardstock, colored with my Copic markers, and fussy cut out. I popped them all up using foam tape and arranged them on the card. I finished off the card using 6mm and 3mm clear sequins from Pretty Pink Posh. Thank you for stopping by my blog today! 

Monday, January 20, 2025

Just A Note To Say


Today's card was created for both the Freshly Made Sketches and Color Throwdown card challenges. I stamped the butterfly image from Skipping Stones Designs Heartsong 1 stamp set onto white cardstock and colored them with my Prismacolor colored pencils. I stamped the sentiment from the same stamp set onto black cardstock using embossing ink and heat embossed it using Ranger's white embossing powder. Using an embossing folder from Lifestyle Crafts, I created a textured background that I matted with black cardstock. I arranged the sentiment and butterflies onto the panel using thin foam tape. I finished my card off by adding clear sequins from Pretty Pink Posh around the panel and clear rhinestones from Recollections to the bodies of the butterflies. Thank you for stopping by my blog today. I hope you have a wonderful day!

Tuesday, June 4, 2024

Bride & Groom

My daughter asked me to create a wedding card for a couple she knows that are getting married this fall. She wanted the colors to match those of the flowers the bride will be carrying. I stamped the background using those colors in chalk inks from VersaMagic and the Hero Arts Leaf & Floral background stamp. I stamped the wedding image from the Inkadinkado Wedding stamp set using Memento tuxedo black ink, colored it with my Copic markers, and fussy cut the image out. I stamped the sentiment using Versafine onyx black ink and a stamp from Paper Inspirations and cut it down to a banner using a straight edge die from Lawn Fawn. I mounted it to my background panel and die cut the entire thing using a stitched rectangle die from Paper Rose. I popped the panel up off of my A2 white card using thin foam tape and popped the couple up as well. I finished the card off by adding some clear sparkling sequins from Pretty Pink Posh for a little extra sparkle. Thank you for stopping by my blog today. I appreciate you, and hope you have a wonderful day!
 

Saturday, June 3, 2023

Hip Hip Hooray-Send A Smile 4 Kids


Happy June! This month at Send A Smile 4 Kids we are creating cards for Tweens/Teen kids. I have a lot of friends who have kiddos and am always in need of a kids birthday card. I was recently at my local Tuesday Morning, which is closing for good, and picked up a set of balloon dies from Crafter's Edge. Using the 2nd to smallest of the nesting dies, I die cut 6 balloons using cardstock from my stash of scraps. I adhered some white twine from Stampin' UP to the base of each balloon. I adhered a piece of neutral grid patterned paper from We R Memory Keepers Bewitched 6x6 paper pad to my white A2 card base. I then layered the balloons directly to the card and glued the strings down with liquid glue. I cut the strings at the base of the card and trimmed down any excess cardstock that overhung the edge of the card on the sides and top. I stamped the sentiment from the My Favorite Things Birthday Chalkboard Sentiment stamp set with Versamark ink onto black cardstock and heat embossed it in white. I trimmed down the sentiment strip and popped it up with 3M foam tape and adhered it to the bottom of the card. I love how easy this card was to create. I can't wait to play more with these fun dies. 

Friday, April 28, 2023

It's A Brew-tiful Day


Happy Friday! Today's card was created for the latest Color Throwdown Challenge. To create my card I started by die cutting a panel using a piece of crumb cake cardstock from Stampin' UP and a Gina Marie Designs scalloped edge rectangle die. I adhered that directly to my white A2 card base. I then die cut a focal panel using white cardstock and a stitched rectangle die from Paper Rose. I stamped the sentiment from Reverse Confetti's Drink More Coffee stamp set using Versafine onyx blank ink. I stamped the mugs, saucers, and a single spoon from the same stamp set onto some white Copic-friendly cardstock and colored the images using alcohol markers. I fussy cut the images out and adhered them onto my focal panel using Stampin' UP foam dimensionals. To finish my card I added some mocha 6mm sequins from Pretty Pink Posh and white gel pen accents on the mugs. I appreciate you stopping by my blog today. I hope you have a wonderful weekend!

Monday, March 13, 2023

Thank You For Being A Ray Of Sunshine


Happy Monday! Today's card was created for the latest Color Throwdown card challenge. I just picked up this adorable lemon stamp from Stampabilities at Hobby Lobby on clearance and couldn't resist using it for this challenge. I stamped the image twice, colored it using my alcohol markers, fussy cut them out, adhered them together and added foam dimensionals from Stampin' UP behind them. I stamped the background using an abstract background stamp from Spellbinders and bashful blue ink from Stampin' UP. I cut the panel down using a stitched rectangle die from Paper Roses and adhered it to some light blue cardstock from Paper Crafts. I adhered that panel directly to my white A2 card base. Using the same blue cardstock I cut down a small banner and ran it through the same stitched rectangle die to get the stitched edges. I stamped the sentiment from Stampendous True Friends stamp set using Memento tuxedo black ink. I adhered it to the card and added the lemons to the left of the sentiment. To finish off my card I added some white gel pen detail to the lemons and some pretty light blue sequins from Pretty Pink Posh around the focal panel. Thank you for stopping by my blog today!


Sunday, January 15, 2023

Between The Pages Of A Book-Coffee And Cards With Celeste And Deb


Happy Sunday! This month Debra and I decided to use this lovely photo as our inspiration celebrating books and warm beverages. To create my card I started by layering some pretty patterned paper from the My Mind's Eye Lost & Found Market Street 6x6 paper pad onto some royal blue cardstock from Hobby Lobby. I rounded the outer corners on both the patterned paper and the cardstock before adhering them together and mounting directly to my ivory A2 card base. Using more of the patterned papers from the same paper pad I printed images from the Gracielle Designs Vintage Tea Cup-Stacked Books digital stamp set and paper pieced the images together. I fussy cut the entire peice out, edged it with my Memento tuxedo black dual tip marker and adhered the image directly onto the focal panel. I printed the sentiment from the same digital stamp set onto more patterned paper from the same paper pad, cut it down into a strip, bordered it with more royal blue cardstock, and adhered it below the focal image. To finish the card off I added some royal blue 4mm sequins from Pretty Pink Posh around the card. Love how big and beautiful these images are and think it would be fun to create a whole card set to give as a gift! 
I got a beautiful new stoneware set from my boyfriend this Christmas and thought I'd drink my coffee from one of the mugs this morning. Isn't the finish on this set just so pretty? 
Now be sure to head over to Deb's blog and see how she was inspired by this month's photo. 


Saturday, July 2, 2022

Let It Snow-Send A Smile 4 Kids


Hello and happy July! I cannot believe the year is already half over. This month at Send A Smile 4 Kids we are having Christmas in July. To create my card I started layering some dark navy cardstock directly onto my card base. Then I die cut the snow globe and sloped hillside using My Favorite Things Snow Globe die set. I stamped the snow on the background using Papertrey Ink's Winter Snow Globe stamp set with Versamark ink. I heat set it using Ranger fine white detail embossing powder, and then inked the background with Stampin' UP's bashful blue ink. I adhered the background hillside that I die cut using the same MFT die. I then stamped the trees and skiing penguin using the My Favorite Things Snow Globe Singles stamp and die set. I colored the images using my Copic markers. I adhered them directly to the snow globe panel. I stamped the sentiment from the same stamp set onto the bottom portion of the snow globe and heat set that using more Ranger white embossing powder. I popped the snow globe up off of the card using Stampin' UP foam dimensionals. I finished this card by adding some Nuvo white blizzard glitter drops to the trees and snow drift and some blue 4mm sequins from Pretty Pink Posh. 


Sunday, June 5, 2022

Noel


Happy Sunday! Hope everyone is enjoying beautiful weather in their area. Today's card was created for the latest CAS Christmas card challenge. To create my card I started by embossing some kraft cardstock using a Spellbinders plaid embossing folder. I mounted that directly onto my white A2 card base. I then stamped, colored, and die cut the images from Concord & 9th's Merry Mantle stamp and die set. I die cut the sentiment using the same die set and black cardstock. I popped all of the images up off of my card using Stampin' UP foam dimensionals and finished the card off by adding a few clear sequins in 4mm and 6mm from Pretty Pink Posh. Thank you for stopping by my blog today!


Sunday, October 24, 2021

Boo!-Coffee And Cards With Celeste And Deb


Hello, and welcome to the October Coffee and Cards with Celeste and Deb! With Halloween right around the corner Deb and I thought it would be fun to create a Halloween card. I love making Halloween cards and always send out at least a half dozen every year. I created this fun card for my bestie who absolutely loves Halloween. To create my card I started by die cutting the Lil' Inkers ghost die from white cardstock and then cut it out with a stitched edge circle die from My Favorite Things using white cardstock. I then cut the circle again using black cardstock and mounted the two together. I then stamped the sentiment from My Sentiments Exactly's Halloween Innies & Outies stamp set using Versafine onyx black ink. I poured some Zing clear embossing powder over it and heat set it. Then using Pink and Main's stacking rectangle dies I layered some patterned paper from American Crafts Halloween 6x6 paper pad onto some black cardstock and adhered it directly onto my white A2 card base. I then cut a smaller strip of spider patterned paper from the same American Crafts paper pad and mounted that onto more black cardstock. I adhered that to the top of the card and then glued the focal circle panel lower onto the card. To finish this fun card off I added some 6mm black matte sequins from Pretty Pink Posh to the top right and bottom left. I love how this turned out!

For my coffee this month I decided to try something new that my running buddy suggested to me...Protein coffee! I am drinking Bang's chocolate peanut butter blast and, I have to say, it's pretty good! I drank it cold and it's very creamy and tasty! Now, be sure to pop on over to Deb's blog and see what sort of Halloween fun she created this month! And thank you for visiting my blog today. I appreciate all of your support!


Wednesday, October 6, 2021

Have A Frightfully Spooky Halloween!


Today's fun Halloween card was created for both The Paper Players and Just Us Girls card challenges. To create my card I started by die cutting a panel of plain white cardstock using a Paper Rose stitched rectangle die. Using some Inkadinkado masking paper I masked off a large circle in the upper right hand corner and inked the panel using Tim Holtz distress inks and a blending tool. I Then removed the mask and added some color to the moon using my Copic markers. I then stamped the witch from the Pebbles/American Crafts Midnight Haunting stamp set using Versafine onyx black ink and heat embossed it using my heat tool and some clear embossing powder from Zing. I then stamped the sentiment from the My Sentiments Exactly Halloween Innies & Outies stamp set and heat embossed it. Finally, I stamped the trees on the bottom of the panel using Close To My Heart's Always Grateful Seasons & Nature stamp set and heat embossed them. To finish my card off I popped the panel up off of the card using some fun foam, added a few 6mm clear sequins from Pretty Pink Posh, and a few twinkly stars in the sky using my white gel pen. Thank you for stopping by my blog!


Sunday, September 19, 2021

It's Pumpkin Spice Season-Coffee And Cards With Celeste And Deb


Hello and welcome to the September Coffee and Cards with Celeste and Deb collaboration. This month Deb and I are celebrating all things pumpkin spice! I recently picked up the Simon Says Stamp Pumpkin Spice Season stamp set and I couldn't think of anything more perfect for this collaboration than that, right? I started by stamping the focal image and sentiment onto some white Copic-friendly cardstock and colored it using my alcohol markers. I die cut it down to a small panel using a Paper Rose stitched rectangle die. Using papers from Echo Park Reflections Fall 12x12 paper pack and some early espresso cardstock from Stampin' UP I created some stacked rectangle panels and mounted them to my card. I popped my focal panel up off of the card using 3M foam tape and finished it off by added some details with my white Gelly Roll pen and some 4mm espresso sequins from Pretty Pink Posh. I love this card so very much and will probably create a few more in different color combos. 
For my coffee I opted for a nice iced pumpkin spice Frappuccino from Starbucks. I can't wait to see what fun Deb created for this month's challenge!


Thursday, August 12, 2021

'Twas The Night Before Christmas


Hello, happy Thursday! I don't know what the weather is like where you live but here in SE Missouri Mother Nature is being quite rude! It's just too hot to do anything comfortably outside. So, after getting off work early today I opted for air conditioning and crafting. I created this fun and pretty Christmas card for the latest Watercooler Wednesday card challenge. To create my card I started by die cutting an A2 using patterned paper from Fancy Pants MeOlogy Painterly 12x12 paper and a die from Pink & Main. I adhered it directly to my white A2 card base. I then stamped the mantle, wreath, candles, vase, and stockings onto some white Copic-friendly cardstock using the Concord & 9th Merry Mantle stamp set and Memento tuxedo black ink. I colored the images and fussy cut them out. I popped all of the elements up off of the card using 3M foam tape and adhered them onto my card creating a nice mantle scene. I stamped the sentiment from the same stamp set onto some Stampin' UP basic black cardstock using Versamark ink and heat embossed it using Ranger's detail gold embossing powder. I cut the sentiment down into a thin strip and adhered it to the wreath using snail glue and foam tape. To finish my card off I added some 6mm clear sparkling sequins from Pretty Pink Posh. Thank you for stopping by today and, if you like my card, be sure to leave a comment. 


Sunday, May 23, 2021

If Friends Were Flowers-Coffee And Cards By Celeste And Deb


Hello and welcome to the May Coffee and Cards with Celeste and Deb collaboration! This month Deb and I thought it would be fun to play with stencils. To create my card I started by inking a background using some basic 110lb white cardstock, the Sunrise Radiating Rays stencil by My Favorite Things, and Tim Holtz squeezed lemonade distress oxide ink. Using my mini Misti I stamped the sentiment from the Stampendous Hand Of Friendship stamp set directly onto the panel using Memento tuxedo black ink. I stamped the hand and the flower from the same stamp set onto some separate white Copic-friendly cardstock, colored it using my alcohol markers, and then fussy cut the entire image out. I mounted it onto the panel using some 3M foam tape. To finish off the card I added some yellow Stickles to the center of the flower and the bracelets and some pretty yellow 6mm sequins from Pretty Pink Posh. Love how this card turned out! 

For my coffee this month I popped by my local Dunkin Donuts for a nice iced matcha latte! Now be sure to pop over to Deb's blog and see what she created using stencils!


Sunday, March 21, 2021

Sending Warm Thoughts-Spring/Summer Coffee Lovers Hop 2021

Today's card was created for the 2021 Spring/Summer Coffee Lovers Hop. I created my card using the fun patterned papers from the Echo Park Coffee 6x6 paper pad that I found at my local Tuesday Morning. I paired all of that with some basic black cardstock from Stampin' Up, a buffalo plaid embossing folder from Sunny Studios, and some gorgeous black 6mm sequins from Pretty Pink Posh to create this fun spring time coffee card. Thank you for stopping by my blog today and, if you like my card, be sure to leave a comment. I read and appreciate them all! Happy hopping!


Saturday, March 20, 2021

Stay Wild


Hello and happy first day of spring! It's still a little cool here in Southeast Missouri but things are definitely starting to bloom here and I suspect I will have to start mowing my lawn in the next few weeks. I created this fun springtime card for the latest Addicted To Stamps And More card challenge. To create my card I layered some beautiful springtime patterned papers from Echo Park's Spring Fling 6x6 paper pad onto my white A2 card base. I added some black lines around the outer edge of the blue paper for a bit more visual interest and contrast. The focal image is a digital stamp from Angie Blom that I was gifted from a friend on a recent card swap. She shipped it to me uncolored so I colored it using my Copic markers to matc the colors in the plaid patterned paper and die cut it into a focal panel using a Gina Marie stitched rectangle die. I popped the panel up using 3M foam tape and adhered it to the card at a wonky angle. To finish it off I added some clear sparkling 6mm sequins from Pretty Pink Posh. Thank you for stopping off at my blog today and enjoy your weekend!

Sunday, March 14, 2021

Make Your Own Luck

Spring is right around the corner and St. Patrick's Day is just three days away. I typically don't sent St. Patty's Day cards but like the colors and the whole shamrock image, so I thought it would be fun to create a card that had all of the elements without actually referencing the holiday. This card will be entered in the Inspired By and CASology challenges. To create my card I started by die cutting the tshirt using some Paper Studio green patterned paper and the MFT Girly Graphic T-Shirt die. I stamped the shamrock and sentiment from the coordinating stamp set. I then layered some basic black cardstock from Stampin' UP onto my white A2 card base and then layered some more of the Paper Studio patterned paper and some specialty paper that I had in my stash onto the card using layers to delinate between the patterns. I die cut an oval from white cardstock from Staples and a pierced edge oval die from MFT.  I stamped the shamrock again using Tim Holtz distress ink in peeled paint all over the background of that panel and adhered that to a slightly larger oval that I die cut using more black cardstock and a Spellbinders oval die. I added a few pastel green 6mm sequins from Pretty Pink Posh to add a bit more bling and that finished my card. Thank you for stopping off at my blog today!


Hello Sunshine-Coffee And Cards With Celeste And Deb


Hello and happy Sunday! In celebration of spring coming right around the corner Deb and I decided to create pretty springtime cards for this month's collaboration. Deb picked this beautiful inspiration photo to help inspire us both. I happened upon the gorgeous Echo Park Flower Market 6x6 paper pad at my local Tuesday Morning and couldn't resist picking it up and using it for this month's card. There was absolutely no stamping on this card...it's all patterned papers and the cut apart is included in the paper pad! This card took me all of 10 minutes to assemble and turned out gorgeous! The only finishing touch I had to add were a few sequins from The Ton and Pretty Pink Posh and a little bit of glitter pen to the flowers on the cut apart. I also figured out how to add transparency to my stamped logo I include on the back of my cards and I decided to add it to my photo. Now I just need to figure out how to add it to cards with dark backgrounds, which I'm sure will take me months. LOL
I opted for a medium Dunkin Donuts Charli's foamy cold brew this month. It was full of cinnamon and very tasty! Now be sure to head over to Deb's blog and see how she was fun she created with our inspiration photo! 


Sunday, October 25, 2020

Spooktacular-Coffee And Cards With Celeste And Deb


This month in honor of Halloween Deb and I decided to do Halloween themed cards. We also decided to use the same sketch. For my card I started by layering some grey cardstock from Stampin' UP onto my white A2 card base. I then layered some fun Halloween themed patterned papers from the We R Memory Keepers Bewitched 6x6 paper pad on top. I stamped the skull and sentiment from an old Stampin' Up bundle I bought from a crafting destash years ago using Versafine smokey grey ink. I trimmed the focal panel down and matted it with more grey cardstock and glued it directly onto my card. I added a matted strip of the patterned paper from some added interest and to break up the image from the sentiment. To finish off my card I added some clear sparking sequins from Pretty Pink Posh in both 6mm and 4mm. This fun little gem will be given to my best friend Alana, who adores Halloween!!
As for my coffee this month I opted for some McGregor's Jamaican Me Crazy with a little cream in it. It's a nice cozy treat on a chilly morning! Now be sure to pop on over to Deb's blog and see what fun she crafted for this month's card collaboration!


Sunday, July 26, 2020

Gnome For The Holidays-Coffee And Cards With Celeste And Deb

Hello and welcome to the July installment of Coffee and Cards with Celeste and Deb. We decided we would do a Christmas in July theme this month. Those of us who create our own Christmas cards know you have to get a jump start on those. I typically send out anywhere between 50-75 cards per year so this is about the time of year I usually get started on that. To create my card I started by layering some patterned papers from the Heidi Swapp Noel 6x6 paper pad onto my white A2 card base. I then die cut a sloped snow bank using white cardstock and a border die from Simon Says Stamp and adhered that directly on the patterned paper panel. I die cut the tree image from some light green cardstock using one of the Taylored Expressions Evergreen dies. I added some snow to the image using my white gel pen and colored the trunk brown using a Memento cocoa brown dual tip marker and adhered that to the card. I then die cut some sweet little snowflakes using a Paper Smooches die, adhered them to the card, and added a little sparkle to the centers by applying a dot of Nuvo Glitter Drops in white blizzard. I die cut the adorable little gnome using a Gina Marie Designs die and more of the patterned papers from the Heidi Swapp Noel collection, colored his nose and beard using my Copic markers, and popped that fun little guy up using some foam squares from Scrapbook Adhesives. I stamped the sentiment from the Simon Says Stamp Gnome For The Holidays stamp set onto the snow bank using Versafine onyx black ink for a nice, crisp look. I added a sweet little red heart sequin from Pretty Pink Posh to the gnomes hat and finished him off by added some drops of Stickles in Christmas red to his shirt and to the tip of his hat. Love how adorable this turned out!
For my coffee choice this month I opted for a nice, tall iced mocha latte from Duncan Donuts because it's ridiculously hot here and I had to mow my lawn this morning. This really hit the spot!
Now, be sure to stop over at Deb's blog and see what fun Christmasy goodness she's created this month!