Showing posts with label 3M foam tape. Show all posts

Saturday, September 2, 2023

You're Boo-Tastic-Send A Smile 4 Kids


This month at Send A Smile 4 Kids we are celebrating all things Fall/Halloween. I thought it would be fun to create an adorable Halloween card since I have two granddaughters I usually send cards to for that holiday. I created this card by stamping the adorable witch from the Mama Elephant Bootastic stamp set onto white Copic-friendly cardstock. I colored the image using my alcohol markers and fussy cut the image out. I then inked a background using Stampin' UP's perfect plum ink and added water to it for a nice distressed look. I cut down a white focal panel using white cardstock and my Fiskars wire trimmer and created a window in the panel. I stamped the sentiment under the window opening, adhered the witch to the opening, and popped the whole panel up using 3M foam tape. I finished the card off by added some black gems from Paper Rose. Love how adorably this card turned out. Now, be sure to head over the Send A Smile 4 Kids blog and see how everyone else was inspired by this month's challenge. 

Wednesday, August 16, 2023

Handpicked For You


Hello! Thank you for visiting my blog today. I am guest designing for the latest Color Throwdown card challenge. For my card I started by layering some olive green cardstock onto my white A2 card base. I then layered some olive green gingham patterned paper from Paper Studios on top. I die cut a scalloped edge rectangle panel using a Gina Marie Designs die, and stamped the sentiment from Stampendous True Friens on the lower right corner using Versafine onyx black ink. I then stamped the sunflower image and some leaves from Honey Bee Stamp's Sweet Sunflowers stamp set using Memento tuxedo black ink and some white Copic-friendly cardstock. I colored the images using greens, oranges, and browns from my alcohol markers. I then fussy cut the images out and mounted them onto the card panel to frame the sentiment. I popped the whole panel up off of the card using 3M foam tape. My granddaughter absolutely loves sunflowers, so I suspect this will go to her for her upcoming birthday in September.


Friday, August 4, 2023

Thank You


Today's card was created for the latest Color Throwdown card challenge. To create my card I started by taking a strip of white cardstock and blending Tim Holtz Distress ink in picket fence all over the panel. I added some water droplets to it for a distressed look. I then blended more of the same ink onto a piece of white scrap cardstock and then die cut the sentiment using Paper Rose's Thank You layered die, and die cut the shadow portion from plain white cardstock. I layered the two together and set them aside. I then took a piece of plain kraft cardstock from my stash and die cut a panel using a Paper Rose layered stitched rectangle die. I then die cut the decorative panel using Paper Rose's Gum Leaf Border die. I popped the kraft panel up off of the card using 3M foam tape. I finished my card off using some Paper Studio clear gems that I colored green with a Copic marker. Thank you for stopping by my blog today. 


Sunday, June 25, 2023

Thanks-Coffee And Cards With Celeste And Deb


This month's Coffee and Cards collaboration with Deb and I will feature cards using items we "lost" or stored away and recently found again. I have long time been a fan of the bargains I would find at my local Tuesday Morning. Last year I picked up a pack of puffy stickers and washi tapes from Heidi Swapp and recently found them cleaning out my craft closet. When Deb suggested this idea for our collaboration this month I just knew I'd have to use them. I created my card by layering the washi tape strips from Heidi Swapp onto a piece of plain white cardstock and then added the sentiment and puffy hearts from Heidi Swapp's Buzzwords sticker pack above the tape. I die cut the panel down using a stitched stacking rectangle die from Paper Roses and added some black twine from American Crafts at the top of the washi tape. I popped the panel up using 3M foam tape. I added a panel of dusky blue linen cardstock from the K&Company Designer Mat pad of cardstock and added the panel onto the card. I love when I can put a card together with no stamping! 
This month I opted for tea instead of coffee. I chose a lovely and fragrant Earl Gray from Harney & Sons. Now be sure to hop on over to Deb's blog and see what fun she created for us this month! 


Sunday, May 28, 2023

Hello-Coffee And Cards With Celeste And Deb


Hello! I cannot believe we are almost to the end of May. We are almost officially halfway done with this year. It just goes by too quickly for me these days. Debra and I decided to just let our creative juices flow and do an "anything goes" theme for this month's coffee and cards collaboration. To create my card I started by layering a strip of basic black cardstock from Stampin' UP onto my white A2 card base. I then stamped the flowers from Stampin' UP's Flower Shop stamp set onto yellow cardstock from my stash, and punched them out using the coordinating punch. I then layered some patterned papers from Authentique's Essential's 6x6 paper pad onto some dark grey cardstock from Hobby Lobby and created a fun layout with them. On the upper layer I stamped the sentiment from Bo Bunny's Just My Type stamp set. I added some Doodlebug Designs yellow baker's twine to the far left of the focal panel and adhered all of the panels to the card using 3M foam tape. To finish off my card I added the flowers to the focal panel, popped the center one up using Stampin' UP's foam dimensionals for a little added dimension and interest. 
For my coffee, I had a lovely and creamy Cordato in the Bahamas this week while on vacation. I opted for almond milk in mine and it was so creamy and good! Now, be sure to head on over to Debra's blog and see what loveliness she's created for our anything goes challenge this month. 


Sunday, August 7, 2022

Sending Hugs


Hello, and happy Sunday! Today's card was created for the latest Color Throwdown card challenge. To create my card I started by stamping the elements from Stampin' UP's Kinda Eclectic onto a white card base using inks from Gina K Designs that matched the color challenge. I cut the panel down to be slightly smaller than my A2 card base and attached it using 3M foam tape for some dimension. I then stamped the butterflies from the same stamp set using more Gina K Designs inks and fussy cut them out. I stamped the sentiment from Simon Says Stamps Friendship Messages stamp set using black ink and die cut the panel down using a fish tail banner die from Jillian Vance Designs. I adhered the banner and layered butterfly onto the card panel using mini Stampin' UP foam dimensions. To finish off the card I added some gem stickers from Honey Bee Stamps Freshly Brewed collection. I love how pretty this card turned out and think it would make a lovely note card set by adding different sentiments. Thank you for stopping by my blog. I hope you have a wonderful rest of your weekend!


Saturday, August 6, 2022

Hey! Thanks Dude-Send A Smile 4 Kids


Hello, happy August! This month at Send A Smile 4 Kids we are creating thank you cards for kids. To create my card I started by stamping the sentiment from Simon Says Stamp's All Boy stamp set at an angle on a cardstock panel using various colored inks. I stamped the thanks Dude from the same stamp set and used my Copic markers to color it to match the inks I used to stamp the rest of the card. I stamped the gaming controllers onto a separate piece of white Copic-friendly cardstock, colored them using my alcohol markers, and then fussy cut them out. I adhered them to the panel using my snail adhesive and then die cut the panel using a rectangle stitched die from The Paper Rose. I matted that panel onto some basic black cardstock and then popped the panel up using some 3M foam tape. My camera didn't pick it up on the photo, but I added some Glossy Accents to the buttons on the controllers for some gloss and shine. Thank you for stopping by my blog and be sure to head over to the Send A Smile 4 Kids blog to see how the other design team members were inspired this month. 

Sunday, May 22, 2022

Sending An Ocean Of Birthday Wishes


Hello, and happy Sunday! Today's card was created for the latest Color Throwdown card challenge. To create my card I started by stenciling the background onto my A2 white card base using the My Favorite Things Wave Maker stencil and Tim Holtz distress ink in broken China. I then took some Prized Ribbon distress ink and smooshed it onto the card using a cellophane panel and some spritzed water. I stamped the sentiment from The Cat's Pajama's Seas The Birthday stamp set directly onto the card base using Versafine onyx black ink. I then stamped the octopus and party hat from the same stamp set onto some Copic-friendly cardstock, colored it with my alcohol markers, and fussy cut the image out. I popped the image up off of the card using some 3M foam tape, added some white gel pen details, and a few sequins from The Ton to finish off this cute birthday card! 


Sunday, April 24, 2022

Hope Your Birthday Is Flippin' Fabulous


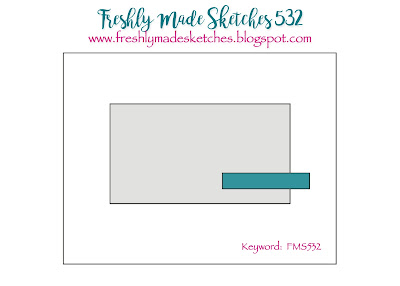
Oh my gosh...how is it Sunday already? I sometimes feel like I blink on Friday and blink again and it's Sunday evening. Sigh! My card today was created for the latest Freshly Made Sketches card challenge. I recently picked up the Honey Bee Stamps Flippin' Fabulous stamp and die set and had to use it. Following the sketch pretty closely I layered some beachy patterned papers from Gina K Designs onto my white A2 card base. I stamped the flip flops onto more patterned paper by Gina K Designs and fussy cut them out and adhered them onto the stamped image. I colored the tong portion of the flip flips, fussy cut those, and adhered them on top of the patterned paper flip flop. I stamped the sentiments and then the sea shells, colored them, and then die cut them all out using their coordinating dies. I adhered the flip flops flat onto the focal panel and popped the remaining images and the sentiments up using 3M foam tape. For a finishing touch I added some blue gems from Simon Says Stamp to each of the flip flops for some added bling.  Love how cute this card turned out! Thank you for stopping by my blog today. Enjoy what's left of your weekend!


Friday, April 22, 2022

Thinking Of You


Hooray, we've all made it to Friday! Today's card was created for the latest Global Design Project card challenge. I created my card by stamping the sunflowers and leaves from the Sunny Studio Sunflower Fields stamp set onto some 110lb cardstock using various inks from Gina K Designs, Altenew, and Ranger Archival. I fussy cut the images out. I then embossed a focal panel for the front of my card using a Spellbinders starburst folder and adhered that to my card. I diecut the sentiment from Stampin' UP's early espresso cardstock and Unity Stamp Company's On My Mind die three times and adhered them together using some liquid adhesive. I adhered it to my card toward the top and then popped the sunflowers up off of the card using some 3M foam tape. I adhered the leaves around the flowers using liquid glue and finished my card off by adding some clear rhinestone gems from Paper Studio around the images. 


Thursday, April 21, 2022

April Showers


I could not think of a more appropriate theme for a card challenge than the April Showers theme at The Paper Players. I'm not sure what the weather is like anywhere else in the world, but here in Southeast Missouri we have had more than our fair share of rain. It's actually raining right now as I am crafting. So, in honor of all of that rain I created this card. I stamped this beautiful image from the Unity Stamp Company Harmony girl in Memento tuxedo black ink onto Copic-friendly cardstock. I colored it with my alcohol markers and then die cut the panel using a Gina Marie Design stitched edge rectangle die. Using some cellophane from a recent stamp purchase I added some Tim Holtz distress ink in broken china and spritzed it with a mini mister. I then selectively added the ink around the colored image to create a misty, rainy sky. I stamped the sentiment from the same stamp set and die cut it using a fishtail banner die from Jillian Vance Designs. I attached it to the card and then popped the panel up off of the card using 3M foam tape for a little dimension. Love how beautifully simple this card is! Thank you for stopping by my blog. I hope you're dry wherever you are. 


Sunday, April 17, 2022

Holiday Cookie Swap?-Coffee And Cards With Celeste And Deb


Happy Easter! Hopefully you are all enjoying time spent with family and beautiful weather today. Deb and I are back for another Coffee and Cards collaboration and this month we wanted to create something with a retro vibe. I started by stamping the fabulous retro image and sentiment from Riley & Company onto some Copic friendly white cardstock. I colored her skin and hair using my alcohol markers. I then paper pieced her dress and apron using patterned papers from the My Mind's Eye Yuletide 6x6 paper pad and adhered them directly onto the image using. I die cut the panel using a stitched edge rectangle die from Paper Rose. I then layered more of the same patterned papers onto my A2 white card base.   I separated the papers by using a white scalloped border I created with a Fiskar's punch and added a small fish tail banner to the top. I popped the focal panel up off of the card using 3M foam tape and then added some black gems that were left over from a diamond art kit I created over the summer. I love recycling little items like that! To finish off the card I added some white gel pen details to her jewelry and her eyes. 
I got up early this morning and joined a few of my running buddies for a 6 mile run/walk. I rewarded myself afterward with an iced Matcha latte from my local Dunkin Donuts. It definitely hit the spot.
 Be sure to stop by Deb's blog to see how she was inspired by our retro theme. Have a beautiful day, and thank you for stopping by my blog!


Saturday, April 2, 2022

Flowers For You-Send A Smile 4 Kids


Hello, happy April! This month at Send A Smile 4 Kids we are creating cards for Mom. I have been on a mission to try and start using more of my older stash of crafting supplies. I was gifted this image last year on a card swap and have never used it. I'm not even sure now who gave it to me or who created this sweet digital image. Even my patterned paper is so old I no longer recall who makes it. LOL. Anyway, I colored this darling image using my Copic markers and die cut it using a Gina Marie Designs stitched edge rectangle die. I went around the edge of it using a foam tool and Stampin' UP's perfect plum ink. I adhered some plum cardstock from Hobby Lobby onto my A2 white card base. I then die cut a scalloped edge rectangle using white cardstock and a die from Gina Marie Designs. I cut the panel of patterned paper down to fit inside the scalloped rectangle and then popped the focal image up using 3M foam tape. To finish my card off I added a few 6mm lilac sequins from Pretty Pink Posh around the focal image. I can't wait to see what everyone else creates this month!

Saturday, March 5, 2022

Another Year Older? Send A Smile 4 Kids

This month our Send A Smile 4 Kids challenge is to create card for boys. I'm a complete sucker for Darcie's Heart & Home critters so I had to stamp the sweet little skunk from the Busy Beaver clear stamp set and color him as well as the stump and mushroom from the set. I fussy cut them out and then added them to a die cut circle panel I created using a My Favorite Things stitched edge circle die. Using my Copic markers I created grass and then created the sky using the My Favorite Things small cloud stencil and some Tim Holtz distress ink and a blender tool. I attached the stump, the skunk, and the mushroom onto the panel and then stamped the sentiment from the same stamp set onto the upper left side of the panel. I layered some patterned paper from the American Crafts Autumn Crisp 6x6 paper pad onto my A2 white card base and then popped the the focal panel up off of the card using 3M foam tape. Love how cute this card turned out. I can't wait to see what everyone created this month for our challenge! 


Thursday, August 12, 2021

'Twas The Night Before Christmas


Hello, happy Thursday! I don't know what the weather is like where you live but here in SE Missouri Mother Nature is being quite rude! It's just too hot to do anything comfortably outside. So, after getting off work early today I opted for air conditioning and crafting. I created this fun and pretty Christmas card for the latest Watercooler Wednesday card challenge. To create my card I started by die cutting an A2 using patterned paper from Fancy Pants MeOlogy Painterly 12x12 paper and a die from Pink & Main. I adhered it directly to my white A2 card base. I then stamped the mantle, wreath, candles, vase, and stockings onto some white Copic-friendly cardstock using the Concord & 9th Merry Mantle stamp set and Memento tuxedo black ink. I colored the images and fussy cut them out. I popped all of the elements up off of the card using 3M foam tape and adhered them onto my card creating a nice mantle scene. I stamped the sentiment from the same stamp set onto some Stampin' UP basic black cardstock using Versamark ink and heat embossed it using Ranger's detail gold embossing powder. I cut the sentiment down into a thin strip and adhered it to the wreath using snail glue and foam tape. To finish my card off I added some 6mm clear sparkling sequins from Pretty Pink Posh. Thank you for stopping by today and, if you like my card, be sure to leave a comment. 


Sunday, August 1, 2021

The Early Bird


My second card today was created for the latest Freshly Made Sketches card challenge. Following the sketch I cut down some panels of patterned paper from the Heartland Farm 6x6 patterned paper from American Crafts and popped them up off of the card using 3M foam tape for some added interest. I then stamped the sentiment and the focal character onto some white Copic-friendly cardstock using Memento tuxedo black ink and the Art Impressions Spring Chicken stamp set. I colored the focal image using my alcohol markers and fussy cut her out. I then free handed a speech bubble for the sentiment and mounted them both onto the card using Stampin' UP foam dimensionals. Love how cute this turned out! 


Sunday, July 18, 2021

Baby It's Cold Outside-Coffee And Cards With Celeste And Deb

Hello and welcome to another Coffee and Cards with Celeste and Deb! This month we are celebrating Christmas in July! I recently picked up the Unity Stamp Company's Planner Girl Cold Outside stamp set from a fellow crafter on a destash thought this would be the perfect opportunity to ink it up for the first time. I stamped the image and sentiment out onto some white Copic-friendly cardstock and then die cut the image with a wonky stitch rectangle die from Gina Marie Designs. I colored the image using my alcohol markers and then wrapped some white twine and created a bow from Stampin' UP around the left side of the panel and adhered a small black button on top using a glue dot. Using some pretty patterned papers from My Mind's Eye's Oh What Fun 6x6 paper pad I layered a panel directly onto my white A2 card base, covering the entire front of the card. I popped the focal panel up off of the card using some 3M foam tape. I then die cut a fishtail banner using a Jillian Vance fishtail die and some more of the coordinating patterned paper. I cut the fishtail banner down to a small banner and adhered it directly to the focal panel. To finish my card off I added some Stickles in white blizzard to the hat, scarf, and snowflakes. This card turned out so sweet that I may have to duplicate it using different patterned papers and colors. 
For my coffee selection this month I popped into the Starbucks at my local Target and got myself a tasty caramel ribbon crunch Frappuccino! Now be sure to head over to Debra's blog and see what gorgeousness she created for our Christmas in July collaboration. 


Thursday, July 15, 2021

Season's Greetings


Today's card was created for the latest AAA Cards clean and simple challenge. I will be the first to admit that I struggle with clean and simple cards. I love layers and lots of elements on a card, but I wanted to challenge myself and do something outside of my comfort zone. I just picked up the Concord & 9th Merry Mantle stamp set during a 4th of July sale and thought the wreath in that set would be perfect for this challenge. I stamped it onto some white Copic-friendly cardstock, colored it using my alcohol markers, fussy cut the image, and then edged it with my Memento dual tip marker for nice clean lines. I then die cut a stitched rectangle using Paper Rose stackable dies. I stamped the sentiment from the same Concord & 9th stamp set onto the panel and then popped it up off of my card using 3M foam tape. I then added more foam tape behind my wreath and popped it up over the sentiment. To finish my card off I added some red Stickles around the wreath to mimic berries. Thank you for stopping by my blog today!


Sunday, May 23, 2021

If Friends Were Flowers-Coffee And Cards By Celeste And Deb


Hello and welcome to the May Coffee and Cards with Celeste and Deb collaboration! This month Deb and I thought it would be fun to play with stencils. To create my card I started by inking a background using some basic 110lb white cardstock, the Sunrise Radiating Rays stencil by My Favorite Things, and Tim Holtz squeezed lemonade distress oxide ink. Using my mini Misti I stamped the sentiment from the Stampendous Hand Of Friendship stamp set directly onto the panel using Memento tuxedo black ink. I stamped the hand and the flower from the same stamp set onto some separate white Copic-friendly cardstock, colored it using my alcohol markers, and then fussy cut the entire image out. I mounted it onto the panel using some 3M foam tape. To finish off the card I added some yellow Stickles to the center of the flower and the bracelets and some pretty yellow 6mm sequins from Pretty Pink Posh. Love how this card turned out! 

For my coffee this month I popped by my local Dunkin Donuts for a nice iced matcha latte! Now be sure to pop over to Deb's blog and see what she created using stencils!


Saturday, April 3, 2021

Happy Mother's Day-Send A Smile 4 Kids

Hello, happy Saturday! Today's card was created for this month's Send A Smile 4 Kids, where our challenge was to create a card for a child to give to a mother/grandmother. To create my card I started by stamping the adorable birds and sentiment from Hero Arts Mother's Day stamp set using Memento tuxedo black ink and some 110lb Copic-friendly cardstock. I colored the images in with my alcohol markers and die cut the image into a focal panel using a x-stitch circle die from Gina Marie Designs. Then I picked some plain blue paper from the Echo Park Spring Fling 6x6 paper pad and stamped the Simon Says Stamp Sketchy Lines background stamp onto it using Gina K ink in ocean mist. I cut the panel to fit my A2 card base and adhered it directly to the front. Using the scrap that was left over from the 6x6 blue paper I stamped the same background stamp and cut it down to a smaller strip. I then die cut the scalloped and stitched rectangle panel out using another Gina Marie Designs die and then adhered more of the patterned paper from the same paper pad in the center for some contrast. I adhered the small strip across the center and popped the circle panel up directly in the center using 3M foam tape. That finished up my cute Mother's Day card. Be sure to pop over to the Send A Smile 4 Kids blog and see what the rest of the design team created this month and be sure to play along. I always enjoy seeing how everyone is inspired!