Showing posts with label Jillian Vance. Show all posts

Thursday, April 21, 2022

April Showers


I could not think of a more appropriate theme for a card challenge than the April Showers theme at The Paper Players. I'm not sure what the weather is like anywhere else in the world, but here in Southeast Missouri we have had more than our fair share of rain. It's actually raining right now as I am crafting. So, in honor of all of that rain I created this card. I stamped this beautiful image from the Unity Stamp Company Harmony girl in Memento tuxedo black ink onto Copic-friendly cardstock. I colored it with my alcohol markers and then die cut the panel using a Gina Marie Design stitched edge rectangle die. Using some cellophane from a recent stamp purchase I added some Tim Holtz distress ink in broken china and spritzed it with a mini mister. I then selectively added the ink around the colored image to create a misty, rainy sky. I stamped the sentiment from the same stamp set and die cut it using a fishtail banner die from Jillian Vance Designs. I attached it to the card and then popped the panel up off of the card using 3M foam tape for a little dimension. Love how beautifully simple this card is! Thank you for stopping by my blog. I hope you're dry wherever you are. 


Monday, August 16, 2021

Thankful


Hello and  happy Monday! We are experiencing some cooler temps and lower humidity here in the Midwest and it reminds me of fall. So, it seemed fitting when I saw the latest challenge over at The Sisterhood of Crafters. Why not create a fall leaf card, right? To create my card I started by layering a piece of crumbcake cardstock onto my A2 white card base and then adding a white cardstock panel that I had dry embossed with a woodgrain embossing folder by Darice to the bottom of the card. I then die cut some fall leaves using stitched leaves dies from Jillian Vance and solid cardstock and patterned papers from Paper Rose's Autumn Plaid 6x6 paper pad. I adhered the leaves directly to the card at the cardstock break staggering the solids with plaids. I then stamped the sentiment using Memento cocoa ink and a stamp I had picked up last season at the Target dollar spot. To finish off my card I added some brown and white bakers twine from Stampin' UP above the leaves and a few cocoa colored 6mm sequins from The Ton. I love this card and may have to mass produce it for Thanksgiving. Thank you for stopping  by my blog and, if you like my card be sure to leave a comment. I read and appreciate them all. 


Sunday, July 18, 2021

Baby It's Cold Outside-Coffee And Cards With Celeste And Deb

Hello and welcome to another Coffee and Cards with Celeste and Deb! This month we are celebrating Christmas in July! I recently picked up the Unity Stamp Company's Planner Girl Cold Outside stamp set from a fellow crafter on a destash thought this would be the perfect opportunity to ink it up for the first time. I stamped the image and sentiment out onto some white Copic-friendly cardstock and then die cut the image with a wonky stitch rectangle die from Gina Marie Designs. I colored the image using my alcohol markers and then wrapped some white twine and created a bow from Stampin' UP around the left side of the panel and adhered a small black button on top using a glue dot. Using some pretty patterned papers from My Mind's Eye's Oh What Fun 6x6 paper pad I layered a panel directly onto my white A2 card base, covering the entire front of the card. I popped the focal panel up off of the card using some 3M foam tape. I then die cut a fishtail banner using a Jillian Vance fishtail die and some more of the coordinating patterned paper. I cut the fishtail banner down to a small banner and adhered it directly to the focal panel. To finish my card off I added some Stickles in white blizzard to the hat, scarf, and snowflakes. This card turned out so sweet that I may have to duplicate it using different patterned papers and colors. 
For my coffee selection this month I popped into the Starbucks at my local Target and got myself a tasty caramel ribbon crunch Frappuccino! Now be sure to head over to Debra's blog and see what gorgeousness she created for our Christmas in July collaboration. 


Monday, March 22, 2021

Hope Your Birthday Stacks Up-Spring/Summer Coffee Lovers Hop

Hello and happy Monday! Today's card was created for the 2021 Spring/Summer Coffee Lovers Hop. I belong to a coffee lover's group and we swap cards every month. Sometimes we include little treats for one another to enjoy. The darling little stacked teacup die cut and sentiment were included in my card this last month from one of the members. I decided to pair it with some pretty patterned paper from the Basic Grey Out Of Print 6x6 paper pad, some sequins from The Ton, and a scalloped edge strip that I cut using a Fiskar's punch. I assembled the card by adhering the die cut image onto some deep aqua blue cardstock I had in my stash using Jackie's Craft Table archival glue. I then attached a piece of the Basic Grey patterned paper directly to the cardstock. Using a Pink & Main A2 rectangle die I die cut the panel down. I punched the scalloped edge border using the Fiskar's punch and adhered it the panel at the border to help delineate the cardstock and the patterned paper. Using a Jillian Vance fishtail banner I die cut the sentiment, layered it onto more of the deep aqua cardstock and cut it down to match the fishtail using my detail scissors. I popped it up off of the card using 3M foam tape, added some color to the tea cups using my Copic markers, and finished the card by adding some coordinating sequins. I like how it turned out!


Thursday, February 11, 2021

Monogrammed Cards

Okay, not a great photo but I had no other way to share all six cards at one time in my tiny little photo cube. A friend of mine is having a birthday this coming Monday and I wanted to create something special for her. To create these cards I started by layering some early espresso cardstock from Stampin' UP that I had die cut using Pink & Main A2 rectangle dies and adhered the panels directly to my cream A2 card bases. I took more cream cardstock and stamped them with Stampin' UP's sahara sand ink using Unity Stamp Company's Small Details background stamp. I cut the panel using a small Pink & Main A2 rectangle die. I then matted panels of pattered paper from the My Mind's Eye Lost & Found Market Street 6x6 paper pad onto more early espresso cardstock and adhered them to the card panel. Using a small Jillian Vance Designs fish tail banner die I cut out some fun fish tails for the tops of the cards, which I die cut using more early espresso cardstock. I then stamped the pretty wreaths from the Maggie Holmes Hello Love mini stamp set using Gina K Designs charcoal brown ink. My friend's name is Michelle so I stamped the capital M from The Paper Studios Timeless Alphas stamp set using Gina K Designs innocent pink ink. I die cut the circles out using a Spellbinders circle die and then matted them using early espresso and a larger circle die from My Favorite Things. I finished these pretty cards off with some small and medium clear rhinestones from Recollections. Love how these turned out. I hope Michelle likes them!


Sunday, November 22, 2020

Thankful-Coffee And Cards With Celeste And Deb

Welcome to the November coffee and cards with Celeste and Deb collaboration! This month we decided we'd do something Thanksgiving related since Thanksgiving is this coming week. I know 2020 has been a tough year for all of us, and I know that the holidays are going to be vastly different for many of this year. But we all still have much to be grateful and thankful for. I know I certainly do and I wanted my card to reflect that. To create my card I started by layering some 1" circles I cut using a Stampin' UP circle punch and some pretty patterned paper from the Authentique 6x6 Essentials Collection paper pad directly onto my card panel. I then wrapped some natural twine from American Crafts around the panel, securing it in the back using some scotch tape. I then adhered the panel directly to the front of my A2 card base. I stamped the sentiment using a fun wood block stamp I found at the dollar spot at my local Target using Gina K Designs charcoal brown ink. I die cut the beautiful leaves using Jillian Designs Leaves and Petals dies and some Stampin' UP kraft cardstock. I adhered them to the card using foam squares from Scrapbook Adhesives and then attached a bow using more of the same natural twine from American Crafts using a glue dot. To finish the card off I adhered a small yellow button I had in my stash directly to the leaves. Love how clean and simple this card. 
For my coffee this month I bought a bottle of cinnamon and vanilla cold brew from my local Aldi's and came home and put it on ice. And yes, it's as tasty as it sounds! Anyway, I hope everyone is staying safe out there and we all have a beautiful Thanksgiving. Now be sure to pop over to Deb's blog and see what fun she created for us this month. 


Friday, October 2, 2020

Be Thankful

Hello and happy Friday! Autumn is finally here...the weather has cooled off and the leaves are starting to change! My card today was created for the latest If You Give A Crafter A Cookie card challenge. To create my card I started by layering some burnt orange cardstock from The Paper Studio onto my A2 white card base and then some early espresso cardstock from Stampin' UP on top of that. I then layered a piece of patterned paper from an autumn themed paper pack I picked up at the dollar spot at my local Target on top. I stamped the sentiment from a stamp I also picked up in the dollar bin at Target onto some more early espresso cardstock using Versamagic ink and heat embossed it with some Recollections detail embossing powder in snow. I cut the cardstock down into a sentiment strip, matted it onto more of the burnt orange cardstock and popped it up off of the card using foam tape from 3M. I then die cut some leaves using crumbcake, early espresso, and burnt orange cardstocks and one of the dies from the Jillian Vance Leaves and Petals die set and layered it onto the sentiment strip. To complete my card I topped it off with some white embroidery thread I picked up at Hobby Lobby. I hope you like my adorable (and ridiculously inexpensive to create) card!


Sunday, June 28, 2020

Best Wishes-Coffee And Cards With Celeste And Deb

Hello and happy Sunday! Deb and I decided that "anything goes" this month for our collaboration. I wanted to created a birthday card this month since I noticed I was getting a little low on those and those seem to be what I send the most to friends and family. To create my card I started by layering a pretty piece of gingham patterned paper from the Pink & Main Beach Bum 6x6 paper pad onto my A2 white card base. I then cut a banner out of some patterned paper from the Pebbles Garden Party 6x6 paper pad using a fish tail banner die from Jillian Vance Designs and adhered it onto my card. I then die cut a circle panel using a pierced edge circle die from My Favorite Things and stamped the background image using navy ink from Gina K Designs and an image from the Stampin' UP Wetlands stamp set. I then stamped the sentiment from the Papertrey Ink Botanical Silhouettes stamp set using the same navy ink. I then stamped the layering butterfly from the Bo Bunny Flutter stamp set onto white cardstock using Stampin' UP's bashful blue ink and Gina K Designs navy ink and fussy cut the image out. I popped it up off of the card panel and finished the card off by adding some pretty clear rhinestones from The Paper Studio in various sizes. Thank you for stopping by today and if you like my card be sure to leave a kind word. I appreciate them all! 
For my coffee selection this month I opted for some Cameron's Highlander's Grog served up in my favorite mug (given to me by my son and his wife). 
Now be sure to head over to Debra's blog and see what fun she created for us today!


Sunday, August 25, 2019

Spread Joy Through The Year

Hello and happy Sunday! Thank you for stopping by my blog today. Today's card was created for the latest Watercooler Wednesday Challenge. To create my card I started by layering some Old Olive cardstock from Stampin' UP onto my white A2 card base and then a panel of kraft cardstock from Hobby Lobby on top that I die cut using a Gina Marie Design rectangle stitched die. Using a banner die from Jillian Vance Designs I die cut a banner from some plaid paper from the AmericanCrafts Very Merry 6x6 paper pad and adhered it directly to the card. I stamped the image from the Unity Stamp Company's Old Traditions stamp set onto some white Copic-friendly cardstock and the sentiment below it from the same stamp set. I colored the image using my alcohol markers and then added some shimmer by adding lace Stickles to all of the snow. I finished the card off by popping the circle panel up off of the card using some Scrapbook Adhesives foam squares. I hope you like it!


Wednesday, February 13, 2019

Love Ewe-February Words 2 Craft By

Hello and welcome to the February Words 2 Craft By challenge. This month's word challenge is based on a quote from an A. A. Milne Pooh book "Piglet sidled up to Pooh from behind. "Pooh" he whispered. "Yes, Piglet?" "Nothing," said Piglet, taking Pooh's paw. "I just wanted to be sure of you." I thought since it was so close to Valentine's Day I would create a sweet card for my granddaughter Maddie. She's 11 months old this month. To create my card I started by layering some black and white heart paper from The Paper Studio onto my white A2 card base. I then added a small strip of pink and cream patterned paper from My Mind's Eye Penelope 6x6 paper pad onto the card panel. I then stamped the adorable sheep images from Unity Stamp Company's Love Ewe onto some white Copic-friendly cardstock and colored it using my alcohol markers. I then die cut it into a panel using a stitched edge oval die from My Favorite Things. I adhered it directly to the card and then added a few die cut hearts using some Paper Smooches dies and colored them with my alcohol markers to match the focal image. I then stamped the sentiment onto a small die cut banner I created using a Jillian Vance banner die and adhered it to the top right of the card. To finish my card off I added some black dashed lines around the focal panel, the fishtail banner, and the focal strip. I added some sparkle and shine with my Spectrum Noir clear glitter pen and a few beautiful soft pink sequins in 4mm and 6mm from The Ton. I can't wait to see how this month's challenge inspires the rest of you!


Monday, November 5, 2018

Fall Leaves Thank You

Hello, happy Monday! Fall is here in full effect in Southeast Missouri and the foliage is simply gorgeous, so I was excited to create something reflecting the rich, beautiful colors of the season. I will be submitting this card in both the The Card Concept and The Paper Players card challenges. To create my card I started with an A2 base of crumbcake cardstock from Stampin' UP. I layered on a piece of plaid patterned paper from the Echo Park Reflections Fall 12x12 paper pad that I had die cut using a stitched edge rectangle die from Gina Marie Designs. I then die cut a fishtail banner using more of the patterned paper from the same paper pack and a die from Jillian Vance. I wrapped the bottom of the banner with some brown sugar bakers twine from We R Memory Keepers and adhered it directly to the card. Using a leaf punch from EK Success I punched out more of the patterned paper and heat embossed it with some Recollections brown sugar embossing powder and a sentiment from the WPlus9 Strictly Sentiments stamp set. I popped the leaf up off of the card using Stampin' UP foam dimensionals and finished the card off with some pretty rich bronze sequins from The Ton. I hope you like my card and thank you for visiting my blog today!


Thursday, August 9, 2018

Art Impressions Birthday

My card today was created for the latest The Paper Players theme challenge. To create my card I started by stamping the fun chicken image from the Art Impressions Bird Brains stamp set onto some white Copic-friendly cardstock and colored it using my alcohol markers. I added some sparkle to the image using my Spectrum Noir clear glitter pen on her beak, legs, and the straw. I then cut the image out using a My Favorite Things pierced edge circle die and matted into onto a scalloped edge circle panel in Stampin' UP's real red cardstock that I cut using a Spellbinders die. I stamped the sentiment from the same stamp set onto more white cardstock and cut it down into a strip that I mounted on more red cardstock. I then layered a fun plaid patterned paper from the American Crafts Heartland Farm 6x6 paper pad onto a panel of the red cardstock and then adhered it to my white card base. I die cut a large fishtail banner using more of the same papers from the paper pad a die from Jillian Vance. The inside of the card reads, " They're both a pain in the rear! Happy Birthday anyway!" This stamp set cracks me up! If you like my card be sure to leave a comment. I appreciate them all. 


Sunday, June 24, 2018

Deep Sympathy-Coffee And Cards With Celeste And Deb


Hello, and welcome to the June installment of Coffee and Cards with Celeste and Deb! We decided to combine two different themes this month. In honor of Father's Day we decided to create a masculine card with a sketch. We also have our fabulous and creative friend Michael Trent joining us again this month...thank you Michael! I love sketches and have an entire board of them collected on Pinterest. It's where I go when I need inspiration and am lacking creativity. I wanted to keep my card simple so I pulled out Close To My Heart's Always Grateful stamp set and stamped one of the beautiful trees from the set onto white cardstock. I stamped the sentiment below it from the now retired MFT Essential Sentiments stamp set. I then die cut the image and sentiment using a pierced edge oval die from MFT. I went around the outer edge with a foam dauber and some Tim Holtz distress ink in black soot and added some black dashed lines around the outer edge. I adhered some patterned paper from Basic Grey's Archaic 6x6 paper pad onto my white card base and then cut a few fishtail banners using the same patterned paper pad and a Jillian Vance die. I adhered the longer fishtail banner directly to the card and added some black dashed lines around the outer edge for some visual contrast. I then adhered the shorter banner to the bottom of the oval die cut panel and popped the whole thing up off of the card using some foam squares from Scrapbook Adhesives. 
For my coffee choice I opted for a nice big iced coffee from Dunkin Donuts. I stayed up way too late last night and needed a little extra caffeine boost today!
Thank you for stopping by today. Now be sure and pop on over to Michael and Deb's blog and leave them some love in the way of a comment!


Wednesday, May 23, 2018

Wishing You A Very Happy Birthday

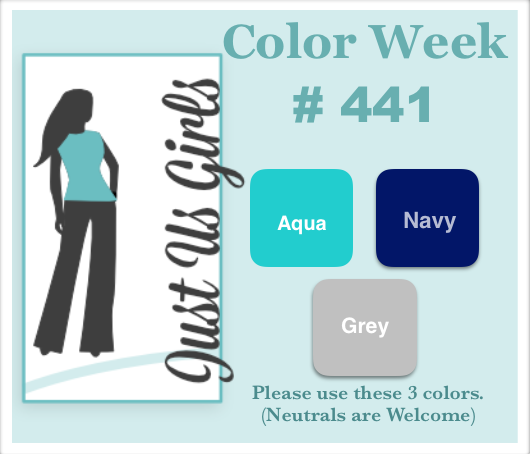
Hello...happy hump day! Today's card was created for the latest Just Us Girls challenge. I don't know why I struggle with color challenges but they are always so hard for me. There is only one more day left to enter this challenge so you know I had to ponder this one all week. LOL. To create my card I started by layering on some inexpensive grey cardstock from Hobby Lobby onto my white card base. I then cut a smaller white cardstock panel and stamped the elements from Stampin' UP's Kinda Ecclectic using Gina K Designs inks in navy and ocean mist and Memento ink in London fog. I then stamped the floral images from the Stampin' UP's Floral Shop and Petite Petals stamp sets using more of the same blue inks and used the coordinating punches to punch the shapes out. I added a small fishtail banner using the same grey cardstock and a Jillian Vance Design die and adhered that down to the card base. I popped the floral images up off of the card using Stampin' UP foam dimensionals. I stamped the sentiment from the Verve Stamps Wishing You stamp set using more of the navy ink and added some pretty little clear rhinestones from Recollections as a finishing touch. Thank you for visiting my blog today and if you like my card be sure to leave a comment and hit the subscription button! 


Sunday, March 25, 2018

Welcome Baby-Coffee And Cards With Celeste And Deb

Hello, and welcome to the March Coffee and Cards with Celeste and Deb collaboration. This month we are joined by another fun guest designer, our friend MariLynn. In honor of the arrival of my newest grandchild, Madelyn Celeste (seriously...how precious is she?), we opted to feature baby cards!
To create my card I started by die cutting a piece of white cardstock using a stitched edge rectangle die from Gina Marie Designs and popped it up off of my card using some inexpensive fun foam I picked up at Hobby Lobby. Using patterned paper from the Authentique Delightful 6x6 paper pad I layered on a circle that I cut using a Spellbinders circle die and a sweet fishtail banner that I created using a Jillian Vance die. To help add some visual contrast I added some black dashed lines around the circle and fishtail banner. I then stamped the images from the Lawn Fawn Critters Down Under stamp set onto some white Copic-friendly cardstock and colored them using my alcohol markers. I then stamped the sweet little scrolled banner from the Reverse Confetti Beautiful Banners stamp set and then stamped the sentiment from the same Lawn Fawn set. To complete my card I adhered all of the images straight down onto the card base. 
As for my coffee choice I opted for my standard Seattle's Best Coffee French roast in the mug my son and his wife got me for Christmas in honor of me being a grandma again!
To see what Deb and MariLynn created be sure to pop on over to their blogs and leave them a little blog love in the way of a comment! Have a great rest of your weekend and thank you for visiting my blog! 

Saturday, July 22, 2017

Winter Greetings

Summertime is here in Southeast Missouri and I've been spending a lot more time outdoors playing and working. As a result my creative mojo has suffered. But we are under a heat advisory here today so I opted to spend the day indoors creating. Today's card was created for the latest Send A Smile 4 Kids card challenge. The challenge, Christmas in July, is to create a holiday card appropriate for a child. I wanted to keep this simple since I will actually be donating this card and opted to not include an interior greeting. To create my card I started by layering some pretty red snowflake patterned paper from the American Crafts Very Merry 6x6 paper pad onto my white card base. I then die cut a fishtail banner using a Jillian Vance die out of white cardstock and adhered it onto the patterned paper. Using the Lawn Fawn Claire's ABC alpha stamp set I stamped the word Winter onto the banner using Gina K Design ink in red hot. I then stamped the word greetings in Memento tuxedo black ink using one of the greetings from the Stampendous Snowy Stacks stamp set. I then stamped the little elf from the same Stampedous stamp set, colored him using my Copic alcohol markers, fussy cut him out, and popped him up off of the banner using Stampin' UP foam dimensionals. To complete my card I added some black dashed lines all around the card and banner. I hope you like it and thank you for visiting my blog!


Tuesday, July 4, 2017

Yay, You!

Hello, and Happy 4th of July! Today's card was created for the latest The Paper Players challenge. To create my card I started by layering some textured cardstock from the Ki natural cardstock 6x6 paper pad onto my white card base. I then die cut some fishtail banners using patterned papers from the K&Company Graduation 4x6 paper pad using a Jillian Vance die. I layered them onto my card at an angle and then stamped the graduation cap and sentiment from the Stampin' UP Pomp & Circumstance stamp set onto a small panel using both Versafine onyx black ink and Memento London fog grey ink. I matted that panel using more of the same Ki cardstock and popped the panel up using some 3M foam tape. I added a few dots of Nuvo Crystal Drops in ebony and some black dashed lines around the card and panel to finish it off. I hope you like it and thank you for visiting my blog!


Wednesday, May 31, 2017

Dad


I decided to try and do a CASE card and I have always been a big fan of Lori Tecler and her fun and creative cards. I decided to do an A2 sized card using some of the same elements she used on her great card. I started with a clean white card base and layered on some kraft cardstock that I picked up at Hobby Lobby. I cut down a navy panel using more Hobby Lobby cardstock and then a plain white panel to go on top. I stamped the Happy Father's Day sentiment over and over using a sentiment from Hero Arts Happy Dad's Day stamp set and some Gina K Designs navy ink and mounted it onto the card panel. I cut a fishtail banner using a Jillian Vance Design banner die and some more kraft cardstock and popped it up off of the card using 3M foam tape for some great dimension. I die cut the pierced edge oval using a My Favorite Things die and more of the same navy cardstock. Finally, I die cut the focal sentiment from kraft three times using a Simon Says Stamp die and adhered them together using my Zig 2 Way glue pen and then adhered it directly onto the oval. A few navy enamel dots from the Simple Stories Life Documented collection finished this fun card off. Thank you Lori for the inspiration!


Sunday, October 16, 2016

Coffee And Cards With Celeste And Deb-Part 3

Hello, and thank you for stopping by! For our third week of our month long collaboration my crafty friend Debra Davison and I decided to do a fall themed card. Years ago, when I first started making cards I was mainly purchasing 12x12 paper pads, which I quickly learned were too large scaled in pattern to work for a standard A2 sized card. The larger patterns just get lost on such a small surface. As a result, I have a large collection of 12x12 papers that I am hoarding, waiting for the right moment to use them. While digging through my stash of papers I discovered a paper pad that I had purchased years ago to create a family themed mini photo album and felt they would be perfect for my fall themed card. All of the papers are from the Simple Stories Generations paper collection. I started with a floral base and layered on some craft paper on top that I added some dimension to by popping it up with some 3M foam tape. I then die cut some of the patterned papers from the collection using a Jillian Vance fishtail banner die. I arranged them onto the card and popped them up using more foam tape. I die cut some very small circles from more of the same craft cardstock using a My Favorite Things pierced edge circle die. I then stamped all of the coffee images onto white card stock using the Unity Stamp Company Coffee Side By Side stamp set. I colored the images using Copic markers, added glossy accents to a few of the images and some Stickles to others and then fussy cut them out. I mounted them directly to each little circle and then adhered them directly onto each banner. I stamped the sentiment in a dark charcoal brown ink from Gina K Designs using The Latina Crafter's Need Caffeine stamp set. I added some dark brown baker's twine to the ends of the banners and some dark brown faux stitches around the inside edge of the focal panel and called this card done. As for my coffee choice this week, I actually opted for a Chai Tea Latte from Panera's. Yesterday was a beautiful day and after a 3 mile run, laundry, grocery shopping, a haircut, and catching up with a couple of friends I opted to end my day with a nice Greek salad, a small cup of warm pumpkin soup, and a latte! It was the perfect ending to a long but wonderful day! Now, pop on over to Deb's blog, Meticulosity and show her some love! 

Friday, October 7, 2016

Christmas Wishes

Today's adorable little elf Christmas card was created for the latest Merry Monday and Send A Smile 4 Kids challenges. I created my card by layering on some adorable printed papers from the American Crafts Wish List 6x6 paper pad onto my white card base. I then added a small strip of glitter paper from the Paper Studio Glittered Cardstock paper pad in a coordinating green. I cut some fishtail banners using some more of the same green glitter paper, some cherry cobbler red cardstock from Stampin' UP, and some white cardstock from Staples using some Jillian Vance dies and adhered them directly onto the card. I then die cut a scalloped circle using a Spellbinders die and a white circle using a My Favorite Things pierced circle die. I stamped the tree onto the white circle panel using the larger tree stamp from the Simon Says Stamp Be Joyful stamp set and the stump from the WPlus9 Pretty Patches stamp set. I then stamped the adorable little elf onto some Copic-friendly cardstock using the Stampendous Snowy Short Stacks stamp set and colored him in using Copic markers. I fussy cut him out and went all around the edges with my dual tip Memento black marker for a nice clean look. I popped him up off of the focal panel using some Stampin' UP foam dimensionals. Using my We R Memory Keepers corner chomper I rounded the corners and added some black dashed lines all around the outer edge of the card and the focal circle panel. I also added some pretty shimmer to the elf and the tree using my Sakura clear star gelly roll pen. I love how adorably this turned out and plan on mass duplicating it to donate to the Send A Smile 4 Kids card drive. I hope you like it and don't forget to leave a comment and subscribe. Thanks!