Showing posts with label Verve Stamps. Show all posts

Saturday, February 5, 2022

Have A Magical Day-SAS4Kids


Hello and happy February! This month's Send A Smile 4 Kids challenge is focusing on spring/Easter cards for kids. My sweet granddaughter is having a birthday early next month and I wanted to create a fun card for her. I've never made a 3D box card before. I wish I had dies to create the base, but unfortunately, I don't. So, I created one from scratch using white cardstock and pretty patterned papers from Pebbles Sunny Side 6x6 paper pad. The adorable images and sentiment were stamped using My Favorite Things Pure Innocence Fairy Girl mini stamp set using Memento tuxedo black ink and colored using Copic markers. I fussy cut the images out and adhered them strategically on the box so they could all be seen when the box is open. The sentiment was die cut using a pierced edge oval die from My Favorite Things and layered onto a piece of patterned paper die cut using a Verve Stamps label die and adhered directly onto the front of the card. To finish it up I added some white gel pen details to her hair, wings, mushrooms and a little Nuvo clear glitter to the wings, pom poms on her shoes, and the dots on the mushrooms! And finally, I added a few clear rhinestones from Recollections on either side of the sentiment and on the fairy's wand. I can't wait to see what everyone else has created for this month's challenge. 

Monday, March 1, 2021

Sending Bright And Sunny Wishes


Hello and happy Monday! Today's card was created for the latest The Paper Players card challenge. To create my card I started by layering one of the Simon Says Stamp A2 masks onto my A2 card and stamping the A Faithful Letter background from Unity Stamp Company onto the card using Versamark ink. I heat set the text background using white embossing powder from Ranger and then inked the background using Tim Holts salty ocean distress ink. I stamped the globe and the sentiment from the Jillibean Soup shaker globe stamp set onto white cardstock from Staples. I die cut the globe using the matching die from the set and colored the globe portion using more blue distress ink. The sentiment was die cut using a die from Verve Stamp company. I wanted to keep the card fairly clean and simple but I did mount the globe and sentiment panel up off of the card using 3M foam tape. 


Sunday, March 31, 2019

Happy Birthday-Coffee And Cards With Celeste And Deb

Hello, and welcome to the March Coffee and Cards with Celeste and Deb collaboration. We decided in honor of Spring we would create a floral card in honor all of the beautiful things that are blooming right now. To create my pretty little springtime card I started by layering some pretty yellow patterned paper onto my white card base. I'm not sure who made the paper since it was sent to me by a craft friend in a destash sale she had. But I loved the buttery color and decided to let that dictate my color palette. I die cut a wonky edge panel from white cardstock using a Gina Marie Designs rectangle die and then stamped the birthday sentiment from the Verve Stamps Poppy Birthday stamp set at the bottom using Versafine onyx black ink. I then stamped the floral images using fresh lemon and citrus burst Altenew crisp dye inks and then stamped the outlines on top and cut them out using the coordinating dies from the same set. I then die cut the stems and the leaves and stamped the outline image for them and colored them in using a Copic alcohol marker in YG61. I glued the stems directly onto the focal panel using my Zig two-way glue pen and then popped the flowers and leaves up using some scrapbook adhesives foam squares. I added some white enamel dots to the center of the flowers using Ranger enamel accents and then popped the whole thing up off of the card using some foam tape. I added a few buttery yellow enamel dots from My Mind's Eye Now and Then collection and added some beautiful shimmer to the leaves and flowers using my Spectrum Noir clear shimmer pen. I love this clean and simple look. 
For my coffee choice this month I opted for Barissimo Seasonal Blend Pumpkin Spice iced coffee! It really hit the spot after my run this morning! 
Be sure to pop on over to Deb's blog and see what she created for us this month. And if you like my card be sure to leave a comment. I read and appreciate them all!

Tuesday, October 2, 2018

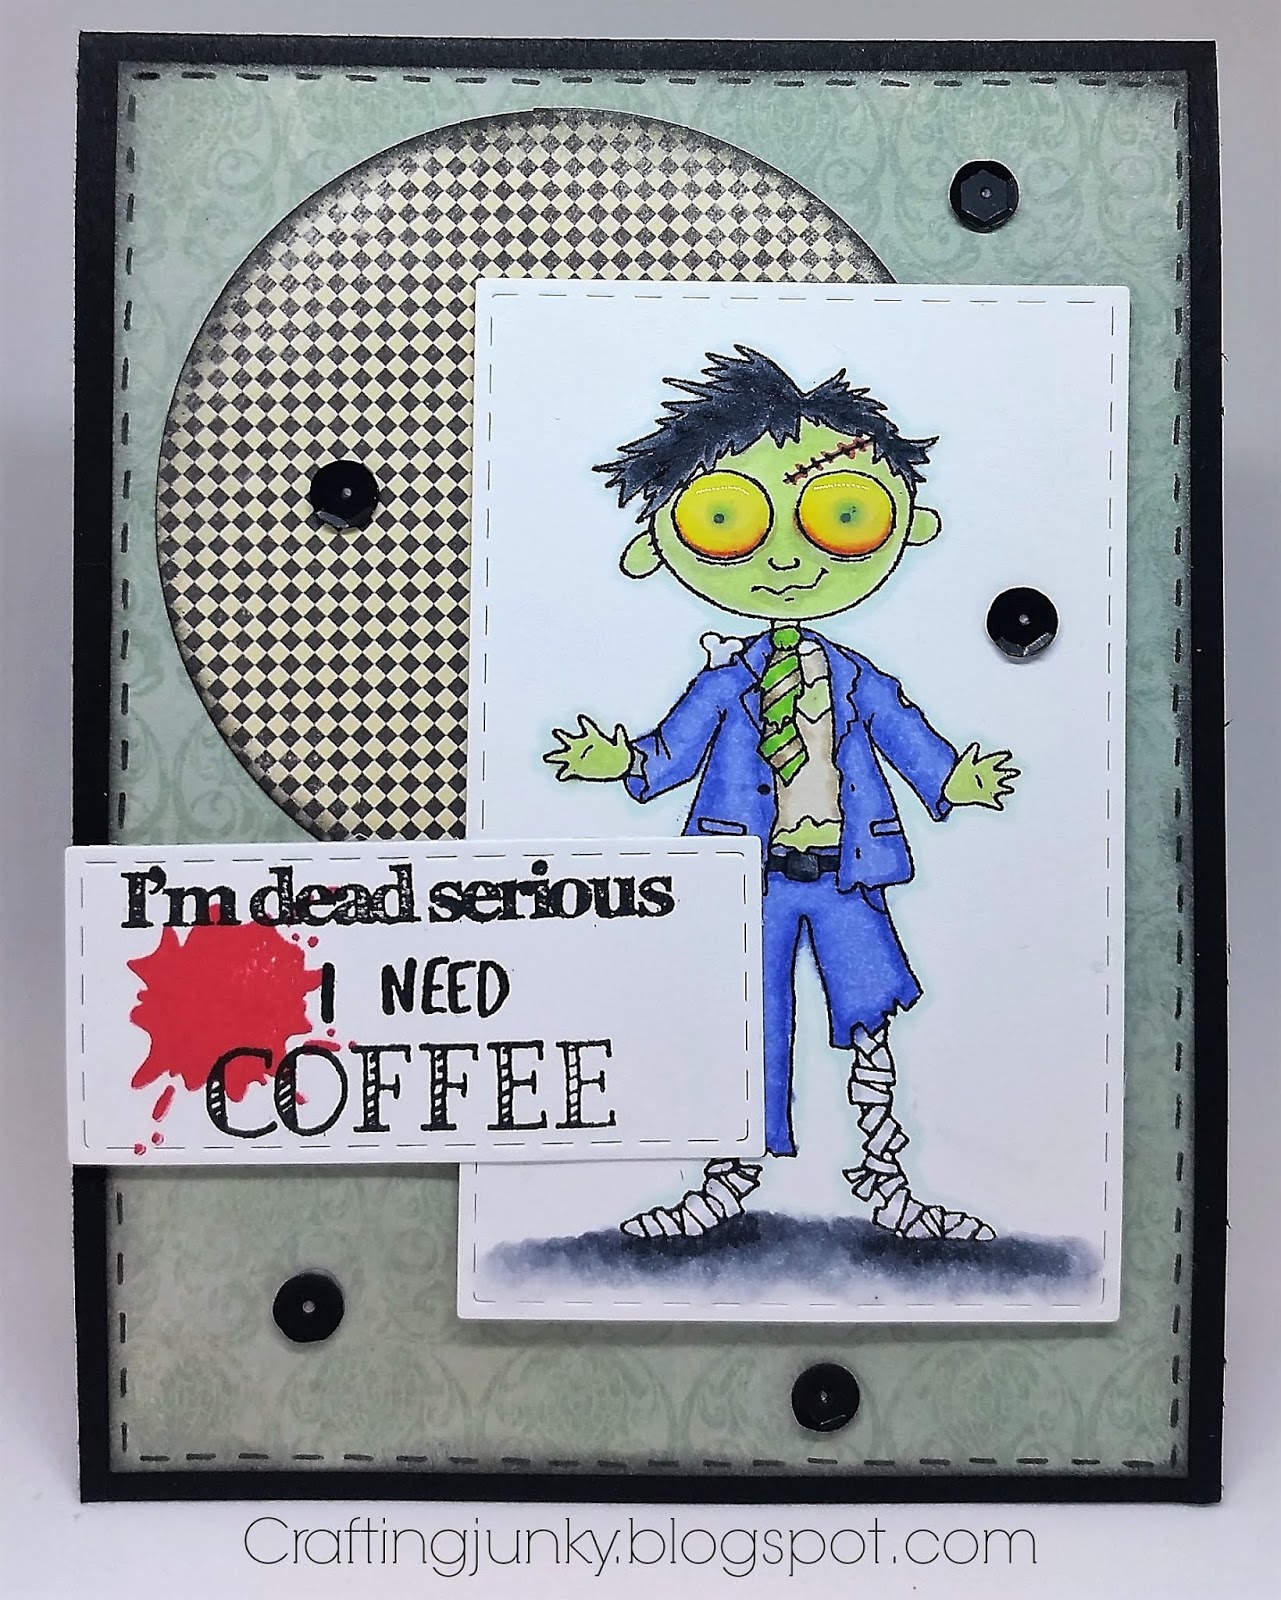
Zombie Coffee Card


Today's card was created for the latest Cards In Envy card challenge. The challenge is to create a "spooky" card. I can't think of anything spookier or scarier than someone jonesing for their caffeine fix! This is pretty  much me every single morning after my 5 am run...LOL. To create this fun card I started with a base of basic black cardstock by Stampin' UP and layered on a piece of patterned blue paper from the 7 Gypsies Venice 6x6 paper pad on top that I had inked around the edges with black soot distress ink by Tim Holtz. I die cut a circle of more patterned paper from the same paper pad, inked the edges, and adhered it to the card in the upper left hand corner. I stamped the zombie from the Sugar Pea Designs Undying Love stamp set onto some Copic-friendly white cardstock and colored him using my alcohol markers. I die cut the image into a focal panel using a stitched edge rectangle die from Gina Marie Designs. I popped him up off of the card using some 3M foam tape. To create the sentiment I used several different stamp sets...Sugar Pea Designs Undying Love, Honey Bee Stamps Blah, Blah, Blah, Verve Stamps Coffee, and Sweet Stamp Shops Zombies. I die cut the sentiment using a smaller stitched edge rectangle die by Gina Marie Designs and popped it up onto the card. To finish my card off I added some Glossy Accents to the zombie's eyes and added some 6mm black sequins from Pretty Pink Posh around the card for some balance and interest. Thank you for visiting my blog today and if you like my card please be sure to leave a comment. I appreciate them all!

Sunday, September 23, 2018

Happy Birthday-Coffee And Cards With Celeste And Deb

Hello, and welcome to another Coffee and Cards with Celeste and Deb! I can't believe it's September already! Unfortunately we are still experiencing summer weather here in Southeast Missouri so not really fall here yet but I'm sure it will be here before we know it. Deb and I decided to create cards this month using washi tape as our focal point. I am ashamed to admit that I have tons of washi tape that I've accumulated over several years that sit in a container in my craft closet completely unused. I simply forget I have it. So, I thought it would be fun to pull it out and use a large portion of it on a card. I love these gorgeous patterns and colors and thought they  complimented each other nicely. It was fairly easy to pull together. I started by layering a piece of soft pink cardstock from Hobby Lobby onto my white A2 card base. I then cut down a thinner panel of white cardstock from Staples and adhered my washi tapes (all from Recollections) at a diagonal onto the panel. Using my mini-Misti I stamped the sentiment from the Verve Stamps Poppy Birthday stamp set directly onto the panel using Versafine onyx black ink. I adhered the panel directly to the center of the card. I then stamped one of the floral images from the Stampin' UP Flower Shop stamp set onto more of the same pink cardstock using Versamark clear ink and heat embossed it using Recollections detail embossing powder in snow white. I then punched the image out using the coordinating punch. To finish this card off I adhered a bit of pink bakers twine to a blue button I had in my stash and adhered it to the card using a glue dot and some foam squares from Hobby Lobby. Love how beautifully it turned out!
As for my coffee choice I opted for a cool salted caramel iced coffee. So very yummy! Now be sure to pop over to Deb's blog and check out her card creation!

Wednesday, May 23, 2018

Wishing You A Very Happy Birthday

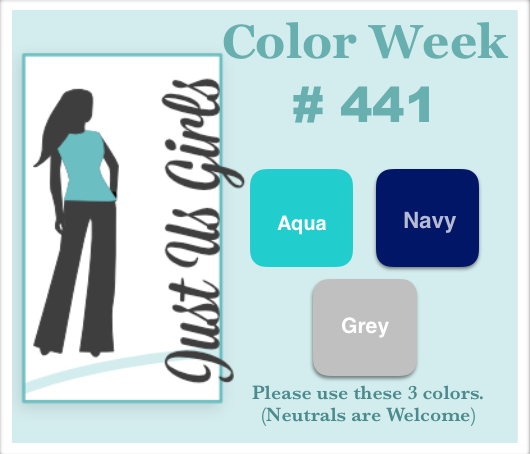
Hello...happy hump day! Today's card was created for the latest Just Us Girls challenge. I don't know why I struggle with color challenges but they are always so hard for me. There is only one more day left to enter this challenge so you know I had to ponder this one all week. LOL. To create my card I started by layering on some inexpensive grey cardstock from Hobby Lobby onto my white card base. I then cut a smaller white cardstock panel and stamped the elements from Stampin' UP's Kinda Ecclectic using Gina K Designs inks in navy and ocean mist and Memento ink in London fog. I then stamped the floral images from the Stampin' UP's Floral Shop and Petite Petals stamp sets using more of the same blue inks and used the coordinating punches to punch the shapes out. I added a small fishtail banner using the same grey cardstock and a Jillian Vance Design die and adhered that down to the card base. I popped the floral images up off of the card using Stampin' UP foam dimensionals. I stamped the sentiment from the Verve Stamps Wishing You stamp set using more of the navy ink and added some pretty little clear rhinestones from Recollections as a finishing touch. Thank you for visiting my blog today and if you like my card be sure to leave a comment and hit the subscription button! 


Sunday, March 12, 2017

Celebrate Your Day


Hello, and welcome to another installment of Coffee and Cards with Celeste and Deb. This month's guest designer is Liz McGuire. She creates the most adorable and fun cards and her coloring skills are amazing! Deb and I couldn't be more pleased to have her aboard this month. Liz created our color challenge this month. I love it...it's so pretty and just screams springtime! To create my card I started by layering on some light grey cardstock from Hobby Lobby onto my white card base. I then layered a smaller panel of very pale yellow cardstock from Hobby Lobby onto the card. I cut down a piece of yellow and cream cardstock from the American Crafts Polka Dot Party 6x6 paper pad that I had cut at an angle on top. I stamped the pretty flowers and leaves from the Verve Stamps Poppy Birthday stamp set onto some Copic-friendly cardstock and die cut the images using the coordinating dies. I colored them in using colors from the challenge and then poppped them up off of the card using Stampin' UP foam dimensionals. I added a few decorative dots from the same stamp set around the flowers for some additional interest. 

As for my beverage of choice this month, I am writing this blog post later in the evening and I don't usually do coffee this late. So, I opted for an adorable monkey love mug full of Stash orange spice black tea with a touch of cinnamon in it. The perfect end to a long, cold weekend day! 
Be sure to pop on over to Deb's and Liz's sites and show them some blogging love by leaving a comment!

Sunday, January 15, 2017

Mom


My second card today was created for the latest Mojo Monday sketch challenge over at the Verve Stamps blog. I recently picked up the Authentique Remembrance 6x6 paper pad on sale at my local Hobby Lobby and thought the beautiful papers in this pad would be perfect for this fun little sketch. I started with a white card base and layered on some Stampin' UP early espresso cardstock. I cut and layered the patterned papers onto my card to fit the sketch, and matted some of the elements with the same early espresso cardstock to help break up the patterns. I stamped the floral element and sentiment from Verve Stamps Because Of You stamp set onto some white cardstock using Gina K charcoal brown ink. I popped the focal panel up off of the card using Stampin' UP foam dimensionals. I finished the card by adding some stitched lines in dark brown ink around the outer edges. I hope you like it and if you do don't forget to leave a comment!


Sunday, August 14, 2016

Have A Wonderful Day


Today's card was created for the latest Just Us Girls challenge. I have to admit that watercoloring is not really my coloring medium of choice. The truth is I'm just not that good at it. I like to do the smooshing technique but actual painting is not really my forte. But I thought I would work with an image that didn't really require a lot of painting skills and would be forgiving of my somewhat sloppy painting skills. I started with a piece of cold pressed Canson watercolor paper and stamped the Stampendous Ranunculous Fields stamp using Versafine onyx black ink. I immediately covered the stamped image with clear embossing powder from Zing and heat embossed it. I like using this technique because the heat embossing creates a small ridge on the paper that helps keep the paint in check and, trust me, I need all of the help I can get when it comes to painting! LOL. I painted the image in using Tim Holtz distress inks and once I was finished I dried it with my heat tool and then covered the entire panel with some pretty Tsukineko sheer shimmer spritz for a nice, all over shine and shimmer. The distress inks react to the moisture from the spray so it leaves pretty little water droplets all over the image too. I cut the panel down and added some foam tape to the back and mounted it onto my card base, which I had covered with some bright canary yellow cardstock from Hobby Lobby. I die cut the sentiment panels using Verve Stamps Mini Classy Label dies and stamped the greeting from the Waltzing Mouse Old Country Roses stamp set. I popped the sentiment panel up off of the card using more foam tape and added a few 6mm clear sequins from Pretty Pink Posh to complete my card. I hope you like it! 


Monday, August 1, 2016

Wishing You


Today's card was created for the AAA Cards and CYCI challenges. I started by layering some pretty washi tapes by Tim Holtz and Recollections onto a white base. I added a piece of smokey grey cardstock above the tape and added some faux stitching around the edges. I die cut some black, grey, and white cardstock using MFT's layered labels dies. I stamped the sentiment from Verve Stamps Wishing You stamp set onto the white oval using Versafine onyx black ink for a nice crisp look. I added some additional faux stitching around the oval and the inner die cut frame. Using the Stampin' UP Beautiful Wings embosslit die I die cut a few little butterflies using the same washi tape I used on the border. I mounted them to the oval using mini glue dots and them popped the entire focal piece up using 3M foam tape. A few little clear rhinestones from Recollections finished this card off nicely! I hope you like it!


Thursday, June 23, 2016

I'd Like To Espresso My Thanks


My card today was created for the Summer Coffee Lovers Bloghop using a digital freebie from Verve Stamps. I started with a panel of cherry cobbler cardstock from Stampin' UP and cut some strips of patterned paper from the Authentique Pride 6x6 paper pad. I cut the strips into a starburst pattern and layered them onto my cardstock starting from a center point. I adhered the panel down to my white card base and added some faux stitched lines all around. I die cut the sentiment from the digital freebie out using a pierced oval die from My Favorite Things and added some faux lines around the edge for a cohesive look. I colored the coffee cups using Copic markers in colors to match the papers, fussy cut them out, and edged them with a Memento dual tip marker for a nice, clean die cut look and popped them and the sentiment panel up using Stampin' UP foam dimensionals. I plan on giving this card to a good friend of mine who always buys her cards from me. This will be my little "thank you" to her. I hope you like it!


Tuesday, June 21, 2016

Relax And Enjoy


I have had a lot going on personally lately and was planning on bowing out of the Summer Coffee Lovers Bloghop but after seeing Julee's digital freebie on the Verve web site I really couldn't pass up the chance to play with it and create something fun. I will plan on giving this card to my swap buddy on this month's Coffee Lover's card swap. I started by printing the digi page out onto some Copic friendly white cardstock and die cut one of the sentiments out using an MFT pierced circle die. I added some black dashed lines around the outer edge of the circle for some additional impact and interest. I colored one of the cups using Copic markers, fussy cut it out, and edged the outer edges with a dual tip Memento marker. I adhered a panel of cherry cobbler cardstock by Stampin' UP to my white card base and then layered on some patterned paper from Authentique's Pride 6x6 paper pad for a nice patriotic color scheme. I added some more dashed lines around the edge of the patterned paper to match the die cut piece and adhered my die cut piece directly onto the card base. I popped the cup up off of the card using Stampin' UP foam dimensionals and added a tiny clear rhinestone in the center of the star on the cup as a finishing touch. I hope you like it!


Thursday, June 16, 2016

Father

A friend of mine asked me to make her a card for her father who she recently reconnected with after many years of separation. I felt honored to make such a special card for her. I decided to keep it simple and let the inside sentiment stand out. I stamped the beautiful pocket watch from Forever In Time's Timepieces stamp set using Memento rich cocoa ink. I stamped the front panel sentiment using Verve Stamps World's Best stamp set. I matted the sentiment strip onto some rich cocoa cardstock from Hobby Lobby and then adhered it onto the main panel. Using a stitched rectangle die from Gina Marie Designs I die cut the panel out and then mounted it onto some more of the dark brown cardstock. I popped the center panel up using 3M foam tape for some added dimension. For the inside I formatted a personal message using a word document and printed it out onto some coordinating cardstock. I love how clean and simple this turned! I hope you like it too!

Saturday, January 23, 2016

Wishing You


Today's card was created for two different challenges...CAS(E) This Sketch and Curtain Call. I loved the layout on the CAS(E) challenge and adore the inspiration photo on the Curtain Call challenge. I decided to combine both and create one card. I started with a gorgeous stamp from Unity Stamp Company called Wishing You Joy. I love paper piecing with this fun stamp set and thought it would be fun to try in various shades of pink. I started with some pretty patterned papers from the Crate Paper Little Bo Beep 6x6 paper pad. I stamped and fussy cut the flowers in different shades of pink from the paper pad. Once those were all cut out I layered one of the patterned papers onto my white card base and then die cut a white panel using a stitched rectangle die from Gina Marie Designs. Using my Stamp-a-ma-jig tool I selectively stamped the flowers several times in varying heights and then glued on my fussy cut papers and did a little shading on them with some Copic markers. I heat embossed the sentiment from Verve Stamps Wishing You stamp set using Versamark ink and Recollections snow white detail embossing powder. I glued the sentiment panel to the focal piece and then mounted it up off of the card using some 3M foam tape for some nice dimension. I just love the way this turned and think it would be fun to make a set of these in different colors with different sentiments. I hope you like it too!


Sunday, December 13, 2015

May Your Cup


Today's card was created in honor of National Cocoa Day. I was so bummed out during the Fall Coffee Lovers Blog Hop that I wasn't able to use the free digi file that Verve generously provided for the hop because my printer was out of commission at the time. My printer is up and running now so I knew I wanted to use the great little cocoa mugs from this hop's free digi found here for the Holiday Coffee Lovers Bloghop. I colored them using Copic markers and fussy cut them out. I layered on some of the gorgeous papers from the American Crafts Hot Cocoa 6x6 paper pad. I added a bit of red and white braiding ric rac that I found in the dollar bin this morning at Target. I cut one of the sentiments from the digital and cut a fishtail banner out of it. I mounted it up onto some foam squares from Scrapbook Adhesives and placed it near the top of the card. I popped the cocoa mugs up with the same foam squares and added some clear Wink of Stella to them and the sentiment for some added shine and glimmer. A few bright red sequins I picked up at my local dollar store complete the card. I plan on sending this out to a very crafty friend for Christmas. 


Saturday, December 12, 2015

Merry Coffee Wishes


Today's card was created for the Holiday Coffee Lovers Bloghop. I recently picked up a few Unity Stamps on sale during Black Friday and just had to use one of them to create a fun holiday coffee card that I plan on sending to a crafty friend. I started by stamping the darling image from Hello Love onto some 110 lb cardstock from Staples and colored the skin and hair using Copic markers. I then stamped all of the clothing onto patterned papers from My Mind's Eye's The Merry Days of Christmas 6x6 paper pad and paper pieced them onto the image, shading them with Copic markers. I die cut the focal panel using a My Favorite Things pierced oval die and added some black dashed lines with a Memento tuxedo black dual tip marker to really make it pop. I layered some more patterned papers from the same MME paper pack to create my layered card base, popped the main image up using some Stampin' UP foam dimensionals, and added more dashed lines to add more interest. I stamped the Merry and Wishes from Amy R Big Christmas Wishes using Versamark onyx black and cut them out into little panels. I die cut the Coffee sentiment from Verve Stamps coffee die using more patterned paper and popped it up using foam dimensionals. To finish the card off I added a few red sequins that I picked up at my local dollar store and some clear Wink of Stella glitter pen all over the image and the lettering. I hope you like it!