Showing posts with label Simon Says Stamp. Show all posts

Monday, August 8, 2022

Merry Everything


Today's card was created for the latest Caffeinated Christmas Card Challenge. I created my card by stamping the adorable bear from My Favorite Things Cool Day stamp set and coloring him in using my Copic markers. I then cut some frames using my paper trimmer and cherry cobbler cardstock from Stampin' UP and black and white striped paper from the American Crafts Christmas 6x6 paper pad and layered them on top of my focal panel in a wonky fashion. I stamped and hand cut the sentiment banner using My Favorite Things Jingle All The Way stamp set and Versafine onyx black ink. I popped the whole panel up off of the card using 3M foam tape for some fun dimension. I die cut some snowflakes using white cardstock and a die from Simon Says Stamp and layered them around the focal image. I topped them off with some glittery white gems from Honey Bee Stamps Fresh Brewed gem stickers. To finish off my card I added some white gel pen detail to the bear's cheeks. Thank you for stopping by my blog today!


Saturday, June 4, 2022

You Rock!-Send A Smile 4 Kids


I cannot believe it's June already! Where is this year going? This month Send A Smile 4 Kids is focusing on cards for teens. I dug into my stash and found a scrap of old patterned paper that is so old I cannot recall who made it. I cut it down using a stitched rectangle die from Gina Marie Designs and cut it into two parts. I adhered it to a panel of dusty pink cardstock I picked up at Hobby Lobby. Using a Spellbinders decorative edge circle die I die cut a focal panel and stamped the sentiment from the My Favorite Things Essential Sentiments stamp set using Memento tuxedo black ink. I added some faux stitched lines using my dual tip Memento marker in black and adhered it to the card. I then die cut a lace border using a My Favorite Things border die and white cardstock. I adhered that where I cut the patterned paper to separate the two patterns. I then stamped, colored, fussy cut, and popped up the adorable focal image from the All Dressed Up Girl's Night Out stamp set using Memento tuxedo black ink and my alcohol markers. To finish the card off I added some white gel pen details to the girl and a few berry colored gems from Simon Says Stamp. I can't wait to see how everyone is inspired by this month's challenge! 


Sunday, May 22, 2022

Just A Note To Say


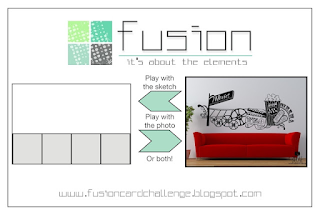
My card today was created for the latest Fusion Card Challenge. To create my card I started by stamping the music notes from the Kaisercraft Sheet Music border stamp directly onto my white A2 card base using Versafine onyx black ink. I stamped the sentiment from Skipping Stones Design Heartsong I stamp set to the right above the border. I then stamped the flowers from the Papertrey Ink Funky Flowers stamp set using red, yellow, and black inks from Gina K Designs. I fussy cut them out and popped them up off of the card using 3M foam tape. To finish off my card I added some multi sized black gems I got from Simon Says Stamp in various places around the card and in the centers of each flower. Thank you for stopping by my blog today!


Sunday, April 24, 2022

Hope Your Birthday Is Flippin' Fabulous


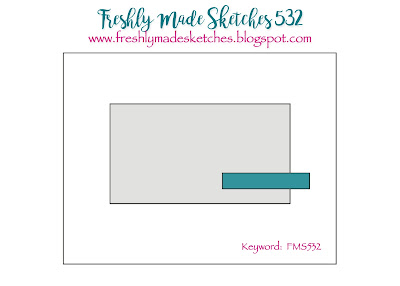
Oh my gosh...how is it Sunday already? I sometimes feel like I blink on Friday and blink again and it's Sunday evening. Sigh! My card today was created for the latest Freshly Made Sketches card challenge. I recently picked up the Honey Bee Stamps Flippin' Fabulous stamp and die set and had to use it. Following the sketch pretty closely I layered some beachy patterned papers from Gina K Designs onto my white A2 card base. I stamped the flip flops onto more patterned paper by Gina K Designs and fussy cut them out and adhered them onto the stamped image. I colored the tong portion of the flip flips, fussy cut those, and adhered them on top of the patterned paper flip flop. I stamped the sentiments and then the sea shells, colored them, and then die cut them all out using their coordinating dies. I adhered the flip flops flat onto the focal panel and popped the remaining images and the sentiments up using 3M foam tape. For a finishing touch I added some blue gems from Simon Says Stamp to each of the flip flops for some added bling.  Love how cute this card turned out! Thank you for stopping by my blog today. Enjoy what's left of your weekend!


Sunday, July 26, 2020

Gnome For The Holidays-Coffee And Cards With Celeste And Deb

Hello and welcome to the July installment of Coffee and Cards with Celeste and Deb. We decided we would do a Christmas in July theme this month. Those of us who create our own Christmas cards know you have to get a jump start on those. I typically send out anywhere between 50-75 cards per year so this is about the time of year I usually get started on that. To create my card I started by layering some patterned papers from the Heidi Swapp Noel 6x6 paper pad onto my white A2 card base. I then die cut a sloped snow bank using white cardstock and a border die from Simon Says Stamp and adhered that directly on the patterned paper panel. I die cut the tree image from some light green cardstock using one of the Taylored Expressions Evergreen dies. I added some snow to the image using my white gel pen and colored the trunk brown using a Memento cocoa brown dual tip marker and adhered that to the card. I then die cut some sweet little snowflakes using a Paper Smooches die, adhered them to the card, and added a little sparkle to the centers by applying a dot of Nuvo Glitter Drops in white blizzard. I die cut the adorable little gnome using a Gina Marie Designs die and more of the patterned papers from the Heidi Swapp Noel collection, colored his nose and beard using my Copic markers, and popped that fun little guy up using some foam squares from Scrapbook Adhesives. I stamped the sentiment from the Simon Says Stamp Gnome For The Holidays stamp set onto the snow bank using Versafine onyx black ink for a nice, crisp look. I added a sweet little red heart sequin from Pretty Pink Posh to the gnomes hat and finished him off by added some drops of Stickles in Christmas red to his shirt and to the tip of his hat. Love how adorable this turned out!
For my coffee choice this month I opted for a nice, tall iced mocha latte from Duncan Donuts because it's ridiculously hot here and I had to mow my lawn this morning. This really hit the spot!
Now, be sure to stop over at Deb's blog and see what fun Christmasy goodness she's created this month!


Tuesday, April 16, 2019

Celebrate

Today's card was created for my good friend Freda's upcoming birthday. I will be entering this card into the Cards 4 Galz card challenge. To create my card I started with some gorgeous patterned papers from the American Crafts Stay Colorful 6x6 paper pad, and layered them onto my A2 white card base by cutting them down using a stitched curved edge die from Paper Smooches and added a lacy border using a Simon Says Stamp eyelet border die. I then stamped the beautiful girl image from the Stamping Bella Uptown Girl Posh Has A Present stamp set onto some white Copic-friendly cardstock and colored her in using my alcohol markers in colors that coordinated with the papers. I fussy cut the image out using my detail scissors and popped her up onto my card using some Scrapbook Adhesives foam dimensionals. To finish my card off I rounded the bottom corners using my We R Memory Keepers Corner Chomper, stamped the sentiment from the Stampers Anonymous Crazy Talk stamp set using Versafine onyx black ink, and added a few turquoise sequins from The Ton around the card. Love how beautifully this card turned out. I know my friend will like it.  


Sunday, March 24, 2019

Peaceful & Joyful


My second card today was created for the latest CAS Christmas card challenge. To create my card I started by die cutting the adorable deer from some brown cardstock from Hobby Lobby using the Newton's Nook Splendid Stags die and the wreath from Gina Marie Designs die. I cut the berries and the holly using the same Gina Marie Designs die set and some green and red cardstock from Hobby Lobby. Using some white cardstock from Staples and a Richard Garay sweater embossing folder I created the beautiful textured background. I adhered the embossed background down onto my white A2 card base and then glued the other elements down the center of the card using Tombow Mono liquid glue. I stamped the sentiment using Gina K Designs charcoal brown ink and the Simon Says Stamp mini Christmas stamp set and cut it down into a thin banner strip and adhered it directly to the card panel. I finish my card off I added some red Stickles to the deer's nose and to the berries on the holly. I hope you like my card and thank you for visiting my blog today!

Sunday, December 16, 2018

Merry & Bright-Coffee And Cards With Celeste And Deb

Hello and welcome to our final Coffee and Cards with Celeste and Deb for the year! This month we have Shanna of Caffeinated Craftiness joining us as a guest designer. She makes the loveliest coffee cards! Debra chose our inspiration photo this month and I think it's absolutely perfect for a December/holiday card! To create my card I started by layering some red cardstock from Stampin' UP onto my white A2 card base. I then layered on some fun coffee, Christmasy patterned papers from the American Crafts Hot Cocoa 6x6 paper pad. I then stamped the coffee cup image from the Unity Stamp Company's KOTM We Can Rise stamp set onto some Copic-friendly white cardstock using Memento tuxedo black ink and colored it to match the inspiration photo. I masked the image and then stamped some small snowflakes around it using a stamp from the Inkadinkado Christmas Characters stamp set. I die cut the image into a circular focal panel using a pierced edge circle die from My Favorite Things and then matted it onto more red cardstock using a Spellbinders die. I stamped the sentiment and the hearts from the Simon Says Stamp Christmas mini stamp set using both Versafine onyx black ink and Memento lady bug red ink. I cut it down into a think sentiment strip, matted it onto some more red cardstock and adhered it directly to the card. To finish this card off I added some clear shimmer to the colored image using my Spectrum Noir clear glitter pen and scattered a few red sequins from Craft Medley for some additional pops of color and interest. 
For my coffee choice this month I opted for a Starbucks white mocha latte to help warm me up on this rainy, cold day. Now pop on over to Deb and Shanna's blogs and see what fun they created! 


Tuesday, December 4, 2018

Have A Sweet Holiday and winner announcement


Please Grab Our Badge!
Hello and thank you for popping on over to my blog today. I can't believe it's December already! Today's yummy card was created for both The Card Concept and The Sisterhood Of Crafters card challenges. To create my card I started by coloring the edges of piece of white Copic-friendly cardstock green and adhered it to my white A2 card base. I then die cut a pretty stitched and scalloped panel using a Gina Marie Designs die. I stamped the sentiment from the Avocado Arts Gingerbread Goodness stamp set onto the panel using Versafine onyx black ink. I then stamped the gumdrop and the peppermint from the same Avocado Arts stamp set and the holly cluster from the Simon Says Stamp Ugly Sweater stamp set onto white Copic-friendly cardstock. I created masks for the 3 images and then stamped the cupcakes from Hero Arts Cupcakes stamp set onto them. I colored each of the images using my alcohol markers and fussy cut them out. I popped them up using foam squares from Scrapbook Adhesives. To finish this adorable card off I added some clear shimmer and shine using my Spectrum Noir clear glitter pen on the cupcakes frosting, added some sequins from Pretty Pink Posh, and some crystal and red Stickles to the gumdrop, holly, and peppermint. 
I also wanted to announce the winner of the blog candy from last week's Coffee And Cards Collaboration With Celeste and Deb. Congratulations Sue D! I will be shooting you an email to get your mailing address. 

Friday, October 12, 2018

Welcome Baby

Hello and happy Friday! Today's card was created for a co-worker's baby shower and I thought I would enter it into the latest Watercooler Wednesday "all about occasions" card challenge. To create my card I started by ink smooshing some Tim Holtz distress inks onto some Canson watercolor paper and then inking over it using a handmade stencil I created with some plastic packaging and a wave shaped die. I spritzed the panel with my mini Mister and then sprinkled some clear water droplets onto it as well as some Distress Spray Stain in picket fence. Once it was dry I stamped the sentiment from the Simon Says Stamp Baby stamp set onto the panel using Versafine onyx black ink. I die cut the panel using a Gina Marie Design stitched edge rectangle die and popped it up off of my white A2 card base using fun foam from Hobby Lobby . I then stamped the whales from The Alley Way Stamps Little Fellas and Something's Fishy stamp sets onto white Copic-friendly cardstock. I colored them using my alcohol markers, fussy cut them out, edged them using my dual tip Memento marker, and popped them up off of the card using Scrapbook Adhesives foam squares. My co-worker loved the card and I hope you do too. Thank you for visiting my blog and if you enjoyed my card be sure to leave a comment below. I appreciate them all!


Sunday, April 22, 2018

Merry Christmas

Today's card was created for the latest Christmas Card Throwdown theme challenge. To create this fun all white card I started by cutting a focal panel and adhering a snow drift to it that I had created using a Paper Smooches stitched line die. I then die cut the entire panel using a stitched edge rectangle die from Gina Marie Designs. I then adhered both of the trees from the Taylored Expressions Evergreen die set onto the panel followed by two of the deer from the Impression Obsession Deer Trio die set directly onto my winter scene panel using my Zig two way glue pen. I die cut the Simon Says Stamp Merry Christmas sentiment and adhered that directly onto the panel. I popped the entire panel up off of the card using fun foam from Hobby Lobby and then finished it off with some 6mm and 4mm clear sparkling sequins from Pretty Pink Posh. I love how pretty this turned out. Thank you for visiting my blog today and don't forget to leave a comment if you liked my card. 

Monday, April 16, 2018

Winter Wishes


Hello, and happy Monday! Today's card was created for the latest Jingle Belles photo challenge. I have to be honest...I would never think to put orange on a Christmas card so this one perplexed me for a few minutes until I remembered my fun Simon Says Stamp set Hand Lettered Winter Wishes. I love the graphic diagonal stripe and bold sentiments in this set and thought it might be fun to combine them with some traditional blue and white cardstock for a fun mix of colors. I started by stamping the sentiment from the SSS stamp set directly onto my card base using Memento tangelo ink. I then die cut a piece of white cardstock using a pierced scalloped edge rectangle die from Gina Marie Designs and cut down one edge for a fun border to my blue and white patterned paper from Gina K Designs. I stamped the diagonal border onto some white cardstock using the same Memento ink and cut it down into a thin strip and layered it onto my patterned paper. I die cut a few snowflakes in two different sizes and colored one using the Memento tangelo ink and adhered them together using a glue dot and then glued them down to the card panel. I popped the entire focal panel up off of the card using some inexpensive fun foam from Hobby Lobby. I finished the card off by adding some enamel dots from Simple Stories Life Documented and some Recollections clear rhinestones. For some additional sparkle and shine I added some clear Spectrum Noir glitter pen to the snowflakes and the sentiment. Thank you for visiting my blog and if you like my card please leave a comment and subscribe!

Friday, November 24, 2017

Have Yourself A Merry Little Christmas


Today's card was created for the latest The Paper Players and Watercooler Wednesday Challenges. To create my card I started by embossing a piece of red cardstock with a Stampin' UP embossing folder and layering it onto my white card base. I then die cut a stitched rectangle panel using a Gina Marie Designs die and then wet embossed it using a Simon Says Stamp falling snow stencil and Ranger texture paste in white. I die cut the mittens from red cardstock using the coordinating die from the My Favorite Things Cozy Mittens stamp and die set. Using a Richard Garay sweater embossing folder I partially embossed the mittens and then stamped the details on the cuffs using some white chalk ink by VersaMagic. I stamped the Christmas trees onto some plain white cardstock using the same mittens stamp set and then die cut them using the coordinating dies. I added clear rhinestones to the tops to mimic stars and popped the images up off of the mittens using some 3M foam tape. I then die cut the cocoa mug using a die (maker unknown) and some patterned paper from the American Crafts Hot Cocoa paper pad. I colored in the cocoa portion of the drink using a dark brown Copic Marker and then added the marshmallows using the coordinating die. To finish my card I stamped the sentiment from the Essentials By Ellen Christmas Scribbles stamp set onto white cardstock using Versafine onyx black ink and popped the sentiment strip up using more foam tape. Thank you for visiting my blog today. I hope you like my card!


Sunday, November 12, 2017

Thanks


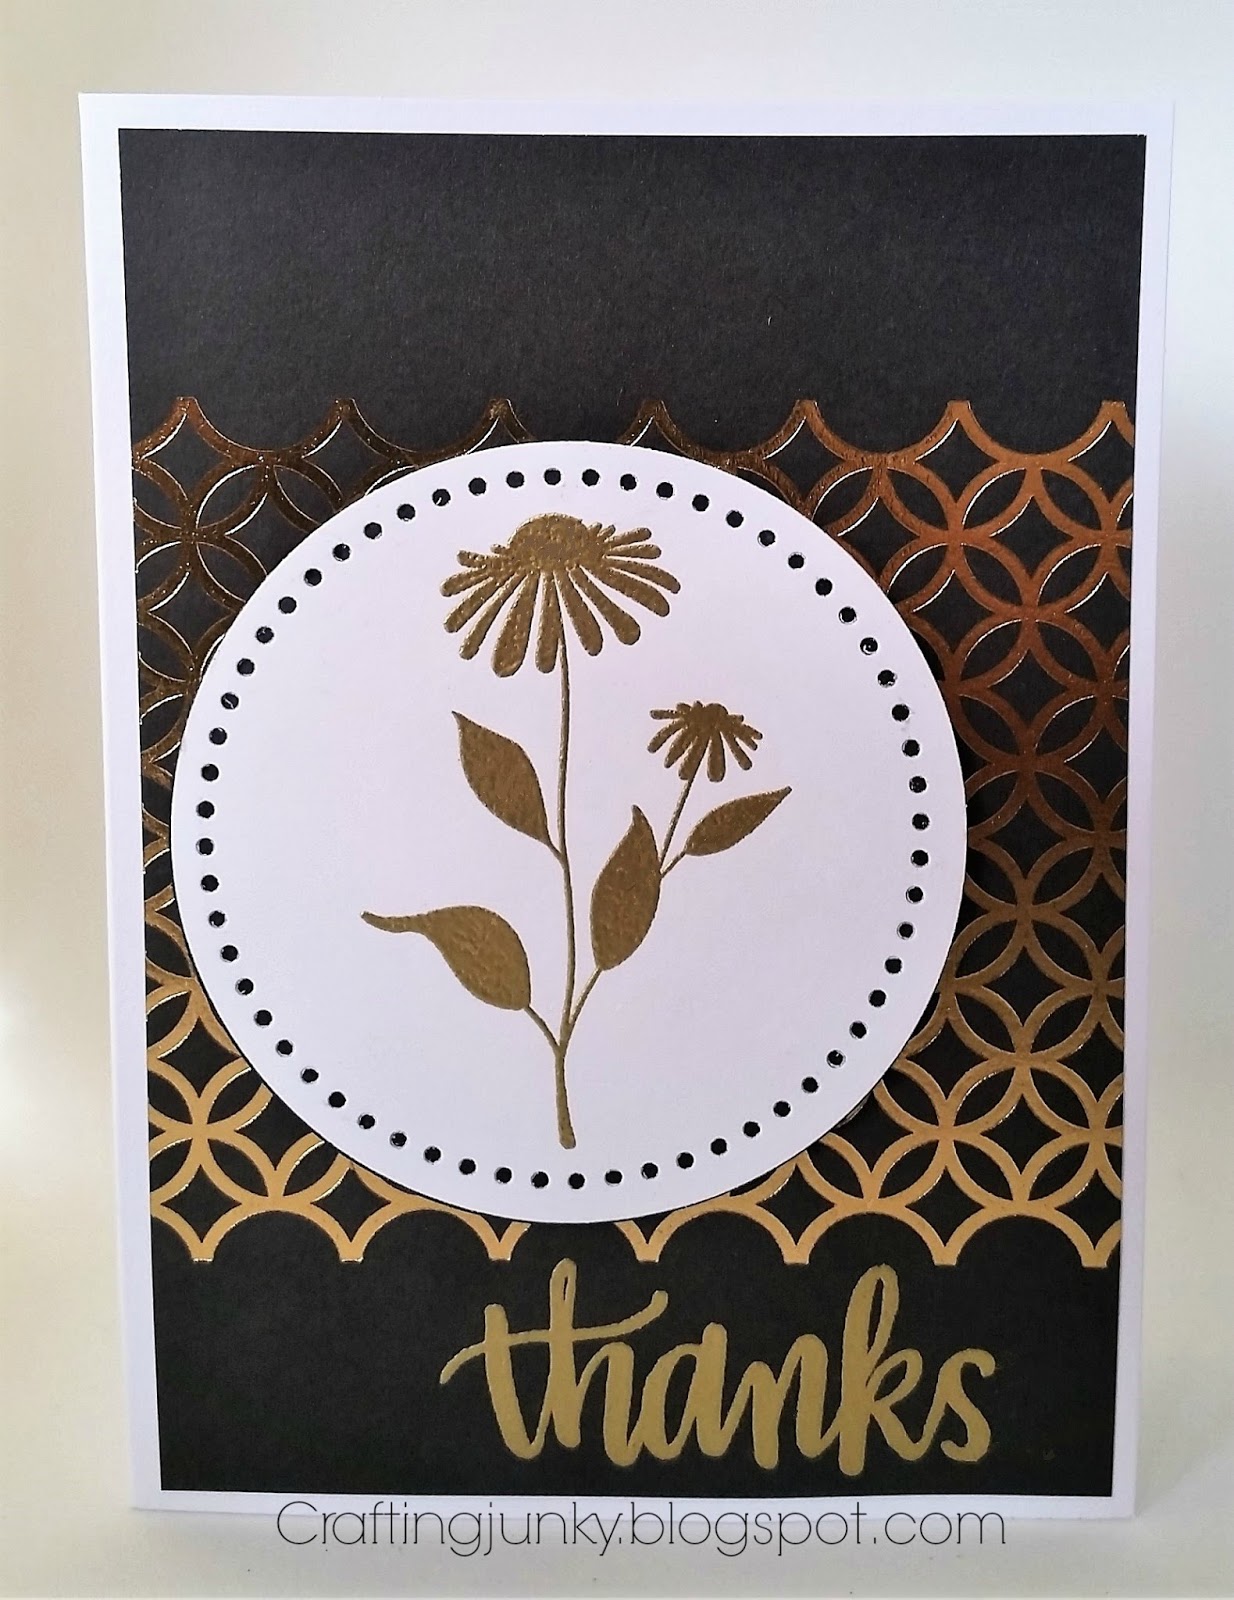
Today's card was created for the latest Just Us Girls Challenge. To create my card I started by prepping a pretty piece of foiled patterned paper from the My Mind's Eye Fancy That 6x6 paper pad with my EK Success powder tool. I then stamped the sentiment from the Simon Says Stamp Hand Lettered Winter Wishes stamp set using Versamark ink and heat set it with Ranger gold embossing powder to match the gold foiling on the paper. I then stamped the silhouette flower image from Unity Stamp Company onto some plain white cardstock using the same ink and heat set it using more of the same gold embossing powder. I die cut the panel using dies from Little B and backed it onto some dark grey cardstock. To finish my card I simply popped the focal panel up off of the card using some 3M foam tape and offset on the card for some fun interest. Thank you for visiting my blog today and I hope you like my card!

Saturday, November 4, 2017

Your Friendship Means The World To Me


Today's card was created for the latest Watercooler Wednesday card challenge. I love this challenge because I'm much more comfortable creating feminine cards than masculine ones. To create my card I started by layering some early espresso and crumb cake cardstocks onto an ivory card base, all by Stampin' UP. Before adhering the crumb cake panel I glued down a piece of lacy ivory ribbon from Stampin' UP directly in the center of the panel. On a seperate piece of ivory cardstock I stamped the pretty ornate stamp from Stampin' UP's Bliss stamp set using the rock and roll inking method and some Gina K Designs charcoal brown ink. I cut it down to a smaller rectangle panel and matted it onto more early espresso cardstock. I stamped the butterfly from the same stamp set onto a seperate piece of paper and fussy cut the image out. I adhered the butterfly down in the center of the focal panel using a glue dot and some foam dimensionals. I then stamped the sentiment from the Simon Says Stamp Friendship Messages stamp set below the focal panel. To finish this pretty and feminine card I simply added a few small pearls to the center of the butterfly. Thank you for visiting my blog. If you like my card be sure to leave some blog love by leaving a comment. 


Saturday, September 23, 2017

Hello My Friend-Coffee And Cards With Celeste And Deb Collaboration

Hello, and welcome to the October installment of Coffee and Cards with Celeste and Deb. We have another fabulous guest designer with us this month as well as a fun and as well as a fun twist to our collaboration. Our wonderful guest designer this month is Jennifer Loftfield. We also have an additional surprise for our dear crafty friend Terri Burson. We all decided to create our cards using the brand new wreath stamp she created for So Suzy Stamps courtesy of Deb, who purchased them for all three of us! Thank you Deb!
To create my card I started with some gorgeous patterned papers from the Authentique Remembrance 6x6 paper pad and layered them onto my white card base. I then stamped the wreath onto a piece of distressed patterned paper from the same paper pack using Copic-friendly ink. I colored the image using my alcohol markers in coordinating colors to match the paper. I stamped the sentiment from the Winnie & Walter The Big, The Bold, and The Happy stamp set in the center of the wreath. I felt that the focal panel looked a bit empty so I went through my stamps and used the beautiful decorative scroll from the Simon Says Stamp Inside Holiday Greetings stamp set at the top and bottom. To finish my card off I added some Recollections clear rhinestones to the scroll and the berries on the wreath and popped the whole focal panel up off of the card using some 3M foam tape. I hope you like it!
As for my coffee choice I opted for a nice maple pecan iced coffee from Dunkin' Donuts. The calendar may state that fall is here but mother nature apparently didn't get the memo. It was 98 degrees here in southeast Missouri today and I was out running around in shorts and flip flops. I'm hoping it will cool off soon and we can start to enjoy fall. Anyway, be sure and pop on over to Deb and Jennifer's blogs and show them some love by leaving a comment on their posts! 

Tuesday, August 29, 2017

Sending Christmas Cheer


Today's card was created for both the 52 {Christmas} Card Throwdown and The Paper Players challenges. To create my card I started by embossing a piece of white cardstock using a random dot Stampin' UP embossing folder. I adhered that panel directly onto my white card base. I then stamped the adorable little snowman from the My Favorite Things Happy Heart Snowman stamp set onto some Copic-friendly cardstock, colored him using my alcohol markers, and then fussy cut him out. I die cut a snow bank using some more white cardstock and the stitched edge die from the Simon Says Stamp Drifting Stitches Border die set. I stamped the sentiment from the My Favorite Things Cheerful Christmas Greetings stamp set directly onto the snow bank using some Versafine onyx black ink for a nice crisp look. I went all around the edges of my snowman image with my dual edge Memento tuxedo black marker and adhered him to the snow drift using some snail adhesive. Once attached I popped the entire panel up off of the card using some 3M foam tape for some nice dimension. Some clear Wink of Stella on the heart, hat, and scarf finished this card off nicely. I hope you like it and thank you for visiting my blog today!

Sunday, August 27, 2017

Sending Hugs


Today's card was created for the latest Less Is More Challenge. I created my card by layering some pretty patterned paper from the American Crafts Neopolitan 12x12 paper pad onto my card base. I cut down a piece of Canson cold press watercolor paper and added some dashed lines to the edges by using a Paper Smooches edge die. I wet the paper and added a light circular wash of Tim Holtz distress ink in worn lipstick to the paper and dried it with my heat tool. I inked up the edges of one of the cute little jars I fussy cut from the same American Crafts paper pad using Versa Magic chalk ink in pink grapefruit and added some pretty crinkle ribbon from Diana Larson's shop. I glued an adorable wood veneer butterfly from American Crafts in the center for a nice touch of interest. To finish my card I stamped the sentiment from the Simon Says Stamp Friendship Messages stamp set directly onto the jar and then popped the whole thing up with some 3M foam tape. I plan on sending this to my daughter who is in need of some encouragement right now.  I hope you like it and thank you for visiting my blog today!


Monday, August 7, 2017

We Three Kings


Today's card was created for the latest Addicted To Stamps And More Challenge. To create my card I started with a white card base and stamped the sentiment from the Penny Black We Three Kings stamp set directly onto the card. I then attached some pretty patterned papers from the Heidi Swapp Noel 6x6 paper pad onto the card. I die cut a circle panel out of white cardstock and embossed it using an embossing folder from Lifestyle Crafts and adhered it directly onto the card. I stamped the flourish from the Simon Says Stamp Inside Holiday Greetings stamp set directly onto the patterned paper below the focal panel using Versafine onyx black ink for a nice crisp impression. I then stamped the wise men from the Penny Black stamp set onto some Copic-friendly cardstock and colored them using my alcohol markers. I fussy cut the image out and edged around it with my Memento tuxedo black dual tip marker for a nice clean look. I popped the wise men up off of the card using some Stampin' UP foam dimensionals and adhered them onto the card on top of the focal panel. A few gold sequins finished this card off nicely. I hope you like it and thank you so much for visiting my blog!

Saturday, July 22, 2017

Ho Ho Ho


Today's card was created for the latest Jingle Belles card challenge. The challenge is to create something with Santa Claus on it. I created my card by layering some fun, festive patterned papers from the Doodle Bug Home For The Holidays 6x6 paper pad onto my white card base. I added a small strip of green cardstock from the American Crafts Christmas cardstock 6x6 paper pad to the edge just to break up the patterned paper. I stamped the adorable little Santa onto some Copic friendly cardstock and colored him using my alcohol markers. I die cut him out using an x-edge die by Gina Marie Designs. I die cut another of the same panels using the green cardstock. I layered them together and stamped the greeting from the Simon Says Stamp Gnome For The Holidays at the bottom. I popped the focal panel up off of the card using Stampin' UP foam dimensionals and added some Nuvo Crystal Drops in rhubarb crumble for some fun interest. I finished the card by adding a fun dotted border that I die cut using more of the green cardstock and a fun little Papertrey Ink die. I hope you like it!