I have been hopping along all week on this amazing Coffee Lover's Blog Hop and just couldn't resist submitting a fun card for the challenge. To create my card, I stamped the adorable girl image from Photoplay's Say It With Stamps I Love Fall stamp set onto white Copic-friendly cardstock. I colored her with my alcohol markers and fussy cut her out. I masked off a small area on my white A2 card base and then inked up the Tim Holtz Holiday Knit stencil using Stampin' UP bashful blue ink. I stamped a few snowflakes on top of the stenciling using the same ink and a snowflake stamp from Crate Paper's Snow and Cocoa stamp set. I die cut a white rectangle panel using Paper Rose nesting stitched rectangle dies and carefully created a snow bank using a Paper Smooches stitched hillside die. I stamped the sentiment to the bottom left of the panel using Versafine onyx black ink and a sentiment from Simon Says Stamp's Hand Lettered Winter Wishes stamp set. I popped the focal panel up off of the card using 3M foam tape and adhered the girl to the right of the sentiment using glue and more foam tape. I added some clay polymer candy apple hearts around the sentiment and on the background for a fun pop of color. I finished the card off using some white gel detail. Thank you for stopping by my blog today. I hope you are well caffeinated and having fun on this amazing hop!
Welcome to my blog and thank you for visiting! I'm a Surgical Scheduler who loves exercise, coffee (sometimes too much coffee), and creating fun things in my spare time. I'm a single mom to two wonderful grown children and grandma to two beautiful granddaughters! I love sharing my card creations with my friends and the crafting world. To subscribe to my blog please click the "follow" button below or enter your email address in the "follow by email" box to the right.
Thursday, November 9, 2023
Winter Wishes-2023 Fall Winter Coffee Lovers Blog Hop
Saturday, November 4, 2023
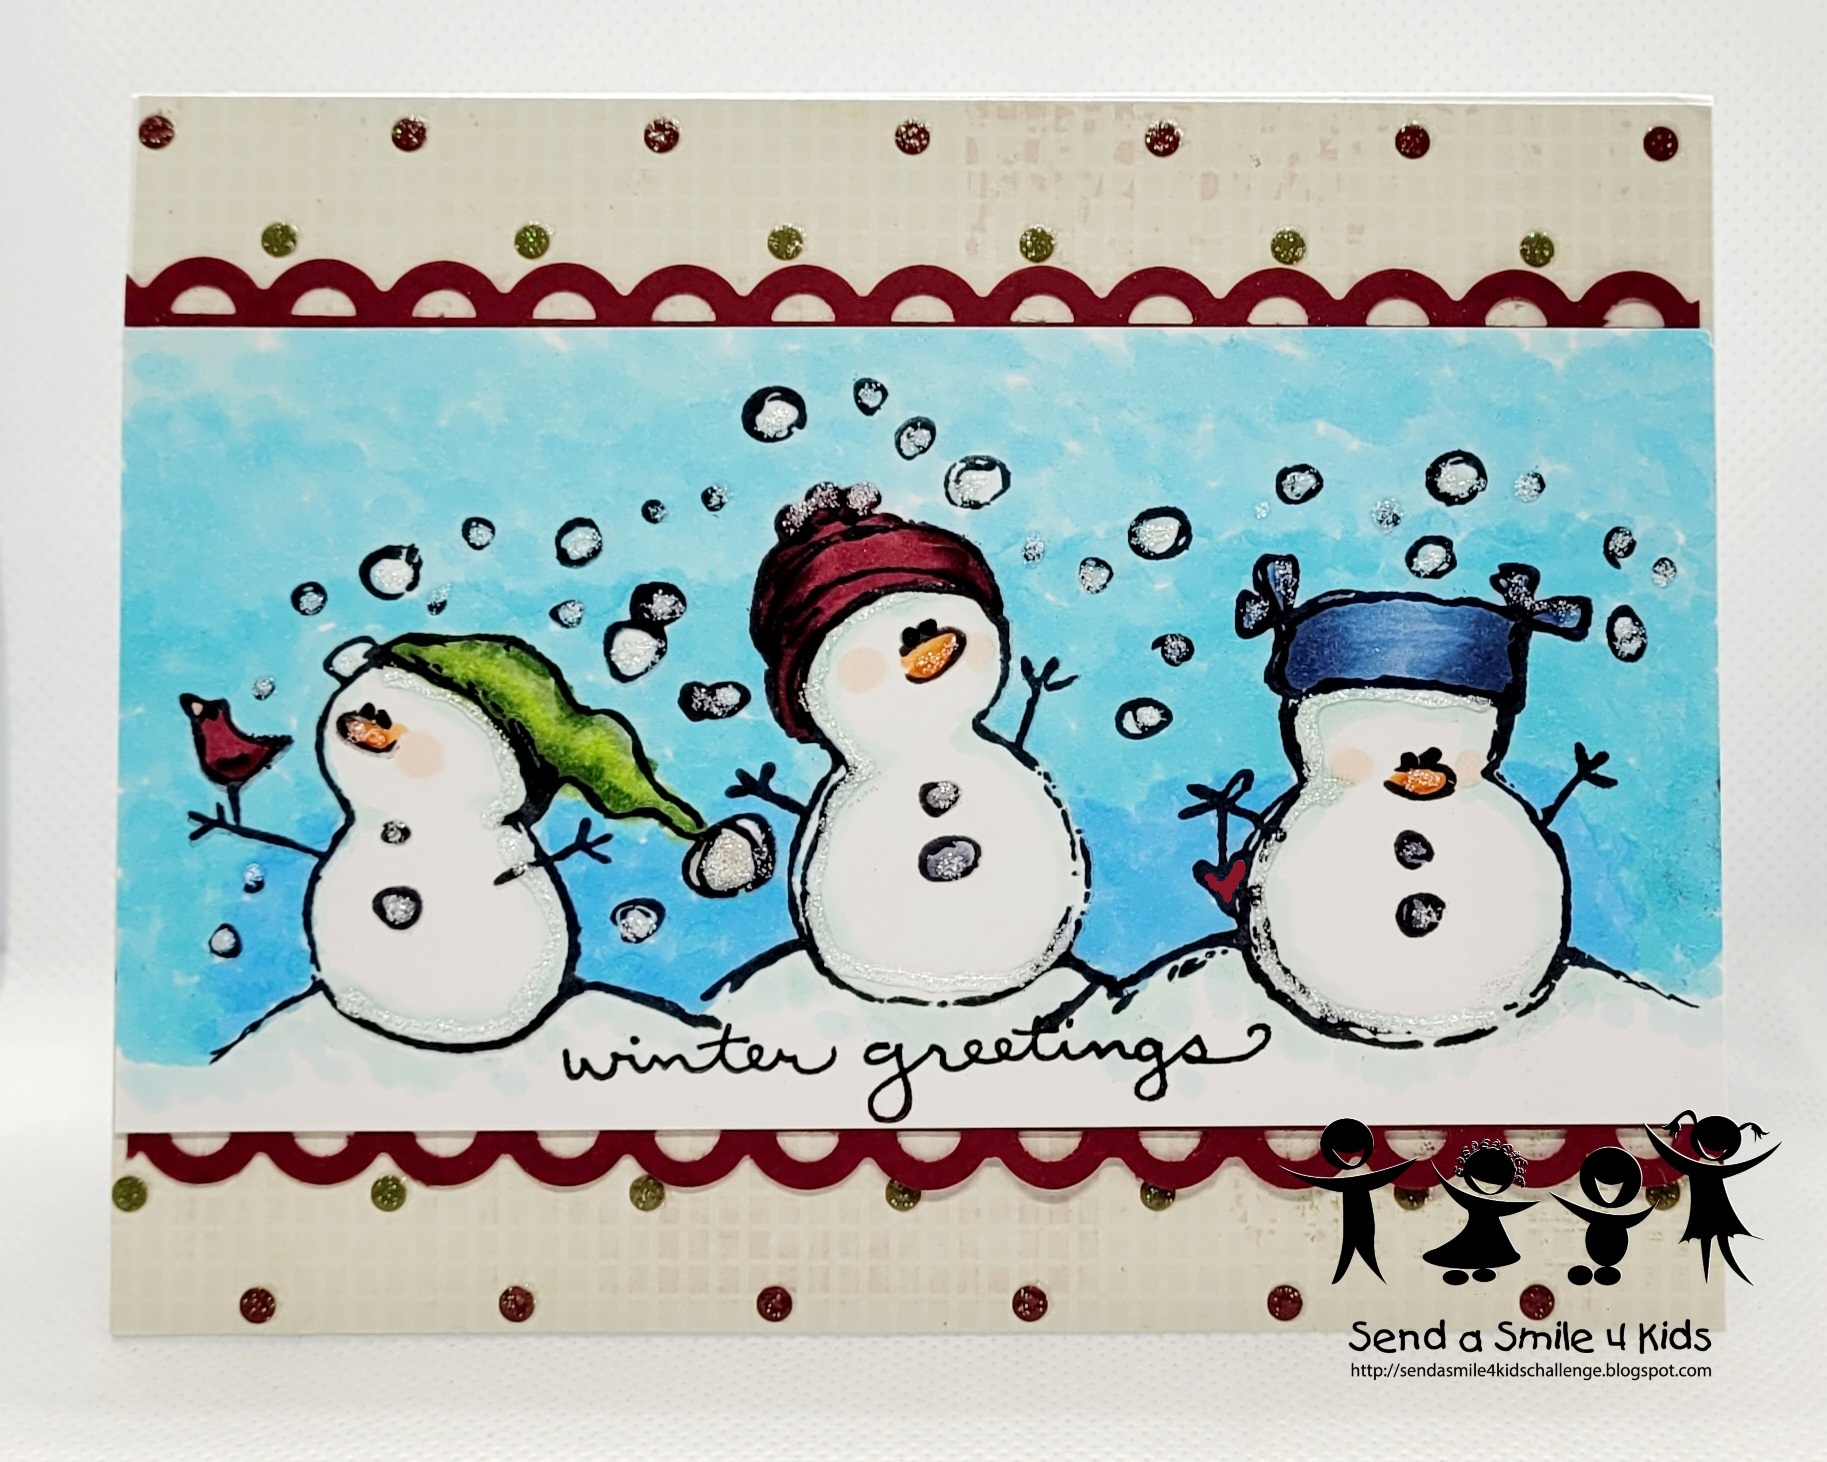
Winter Greetings-SAS4Kids November
Hello, and happy November! This month at Send A Smile 4 Kids we are creating cards for the holidays. I created this adorable little snowman card by stamping the snowmen from Close To My Heart's Snow Friends onto a strip of white Copic-friendly cardstock. I colored the images with my alcohol markers, including the sky. I then stamped the greeting from the Stampendous Snowy Short Stacks stamp set onto the snow drift. I cut the panel down and edged it with some cherry cobbler cardstock from Stampin' UP that I created a fun scallop with using a Fiskars punch. I layered all of that onto some fun glittery cardstock that I've had in my stash for so long I'm not even sure who makes it anymore. To finish the card off I added some Stickles in frosted lace to parts of the snowmen, their hats, and all of the snowballs to match the shimmer and shine in the cardstock. I love how adorably cute this card turned out. Now be sure to head on over to the Send A Smile 4 Kids blog and see what the other team members have created this month and join in on the fun!
Friday, November 3, 2023
Let's Celebrate!
Today's card was created for the latest Color Throwdown card challenge. I layered some rust-colored cardstock that I had my stash onto my A2 white card base. I then stamped, colored, and fussy cut the adorable gnome, butterfly, and mushroom from the Inkadinkado Garden Gnome stamp set onto white Copic-friendly cardstock. I created a focal panel using white cardstock, pink ink from Gina K Designs, and the mini cloud stencil from My Favorite Things. I attached a piece of green cardstock from my stash with snail adhesive, and die cut the panel using a stitched stacking rectangle die from Paper Rose. I stamped the sentiment from the Momenta Birthday wooden block stamp set at the bottom of the panel. I popped the panel up off of the card for a little dimension. I finished the card off by adding some white gel pen details the images. Thank you for visiting my blog today!
Sunday, October 29, 2023
It's The Most Wonderful Time Of The Year-Coffee And Cards With Celeste And Deb
With Halloween right around the corner, Deb and I decided to use this fun Halloween photo as our inspiration for our Coffee and Card collaboration this month. I started with an A2 card base and layered on some mats of orange and black cardstock from my stash. I layered some fun polka patterned paper from the American Crafts Haunted 6x6 paper pad on top. I then die cut a rectangle panel using the Gina Marie Designs wonky stitched stacking rectangle dies. I stamped the sentiment from Essentials by Ellen Boos Inside stamp set using versafine onyx black ink at the top right side of the focal panel. I then stamped the stars from Pebbles/American Crafts Midnight Haunting stamp set onto the panel around the sentiment and at the bottom right. I stamped all of the fun Halloween mugs from the same Ellen Hutson stamp set onto white Copic-friendly cardstock, and colored the images using my alcohol markers. I then fussy cut the images, darkened the eyes and mouths of the images using my Sakura black glaze pen. I popped the images up using Stampin' UP foam dimensionals, and adhered them around the focal panel. I finished the card by adding some Nuvo glitter drops in white blizzard to the stars. I love how adorable this card is!
I had the opportunity to visit London this month, and had a wonderful Turkish meal complete with Turkish coffee. I absolutely adored the texture and richness of the coffee! Now, be sure to pop over to Deb's blog and see what fun she created using our inspiration photo!
Thursday, October 19, 2023
Happy Halloween
Friday, October 6, 2023
Autumn Greetings-Send A Smile 4 Kids
Hello! Welcome to the October Send A Smile 4 Kids card challenge. This month we are creating holiday/celebration cards for kids. I recently picked up Say It With Stamps I Love Fall stamp set from Photoplay, and just had to use it right away. I pretty much used the inspiration photo on the stamp package to create my card. I started by layering some cocoa brown cardstock from Hobby Lobby onto my white A2 card base. I then stamped the text pattern onto some light beige cardstock from Hobby Lobby using Gina K Designs cocoa brown ink and Unity Stamp Company's Small Details background stamp. I die cut the panel by doing selective die cutting using a circle die from My Favorite Things and a stitched rectangle die from Paper Rose. I trimmed down a small strip of the darker brown paper and stamped the sentiment from the stamp set and cut the strip down using the same rectangle die. I adhered it to the bottom of the focal panel to help ground my adorable images, which I stamped from the same stamp set and colored using my alcohol markers. I popped the images up using foam dimensionals from Stampin' UP. I popped the focal panel up off of the card using 3M foam tape. I finished the card off by adding white gel pen detail to the images, and some brown 6mm sequins from The Ton around the sentiment. Thank you so much for stopping by my blog today. Be sure to head over to the Send A Smile 4 Kids blog to see what everyone created this month.
Friday, September 29, 2023
Nutty For You
Hello, and happy end of September! Today's card was created for the latest Color Throwdown card challenge. I thought the inspiration photo was so perfect being that we are on the cusp of Autumn and all things fall! I started by stamping the acorns from Paper Smooches Falling For You stamp set onto plain kraft cardstock and inking them up with Tim Holtz walnut stain distress ink. I stamped the leaves separately onto white cardstock and inked them with Tim Holtz mowed lawn distress ink. I fussy cut the images out and adhered the leaves with both liquid glue and foam dimensionals to give them a bit of interest. I created a card base out of linen textured kraft creamy brown cardstock and adhered a panel of gorgeous fall plaid patterned paper from Design Group that I picked up last year at Target in the dollar bin and mounted that onto some early espresso cardstock that I had border cut using a pretty border die from My Favorite Things. I adhered my focal panel onto my card base, attached the acorns using foam dimensionals, added some cream colored twine to the tops of them, and finished the card off with some white gel pen highlights and gorgeous coppery sequins from The Ton. Thank you so much for stopping by my blog today!
Sunday, September 17, 2023
But First Coffee-Coffee And Cards With Celeste And Deb
Hello, and welcome to the September collaboration of Coffee and Cards with Celeste and Deb. We decided to use this fabulous fall photo as inspiration for our cards this month. After the blistering temperatures we had this summer, I know we are all anticipating cooler Autumn weather! To create my card, I started by layering some beautiful fall patterned paper by Design Group that I picked up in the dollar bin at Target last year. I added a small strip of espresso brown cardstock from Stampin' UP in between the patterned papers to add some interest and break up the busy patterns. I die cut a circle panel using kraft cardstock from Recollections and a circle nesting die from Gina Marie Designs. Using the coffee bean stamp from the Stampabilities Coffee mini stamp set and Versamark ink, I stamped the entire background for a nice tone on tone pattern. It's subtle, but it's there. I then stamped the large mug from Stamplorations Coffee Cup Large stamp set onto white cardstock and then paper pieced the rest of the cup using more patterned paper from the same Design Group paper pad and some simple kraft for the sleeve. I then stamped the sentiment from the Stampabilities Coffee stamp set directly onto the coffee cup's sleeve. I then popped the circle panel and the coffee cup up off the card using 3M foam tape. To finish off this beautiful fall-themed coffee card I added some espresso sequins from the Ton around the focal panel.
My lovely boyfriend Nathan just flew back from Great Dunmow, England and brought me back this gorgeous mug and some lovely Twinings tea. I had to feature that as my beverage this month, despite this being a coffee card. I love a nice cup of hot tea in the afternoon. Now, be sure to head over the Deb's bog to see what fun she created this month!
Sunday, September 3, 2023
Merry Christmas-Caffeinated Christmas
Hello, happy Labor Day weekend! I don't know about the rest of you, but I always get a little excited around this weekend because it marks the beginning of Autumn for me. Today's card was created for the latest Caffeinated Christmas Card challenge. This month's challenge is to create a coffee, cocoa, or tea card with cookies on it. To create my card, I started by layering a piece of patterned paper from the American Crafts Very Merry 6x6 paper pad onto my A2 card base. Then using a stitched scalloped edge rectangle die from Gina Marie Designs, I die cut a forest green panel. I stamped the sentiment from Amy R Stamps at the top using Versamark ink and embossed it using Ranger's detail white embossing powder. Using the Momenta Christmas Mug & Cookie die set (which I picked at Hobby Lobby on clearance a few months ago for a steal) I created the mug, cookies, and all of the elements using more patterned paper from the same Very Merry paper pad and cardstock from my stash. I adhered them together with liquid glue, and then popped them up off of the card using Stampin' UP foam dimensions. For some additional bling, I added Nuvo crystal drops to some of the elements for a nice touch of glitter. I love how adorably cute this card is. Thank you so much for stopping by my blog and, if you left a comment, I greatly appreciate it!
Saturday, September 2, 2023
You're Boo-Tastic-Send A Smile 4 Kids
This month at Send A Smile 4 Kids we are celebrating all things Fall/Halloween. I thought it would be fun to create an adorable Halloween card since I have two granddaughters I usually send cards to for that holiday. I created this card by stamping the adorable witch from the Mama Elephant Bootastic stamp set onto white Copic-friendly cardstock. I colored the image using my alcohol markers and fussy cut the image out. I then inked a background using Stampin' UP's perfect plum ink and added water to it for a nice distressed look. I cut down a white focal panel using white cardstock and my Fiskars wire trimmer and created a window in the panel. I stamped the sentiment under the window opening, adhered the witch to the opening, and popped the whole panel up using 3M foam tape. I finished the card off by added some black gems from Paper Rose. Love how adorably this card turned out. Now, be sure to head over the Send A Smile 4 Kids blog and see how everyone else was inspired by this month's challenge.
Subscribe to:
Posts (Atom)


.jpg)